
FoxAlien XYZ Probe - Online User ManualUpdated 2 months ago
📦 Product Overview
The FoxAlien XYZ probe is a high‑precision accessory that triggers a signal when the tool touches its conductive surface. Working with popular control software (OpenBuilds, gSender, UGS), it automatically sets the workpiece origin (X, Y, Z) with a repeatability of ≤ 0.01 mm.
⚠️ Safety Warnings – Must Read
| Hazard | Consequence & Mandatory Action |
|---|---|
| Crash Risk | The tool must be positioned exactly over the marked area before probing. Any offset will cause the tool to strike the block, resulting in broken tools or permanent damage to the block. |
| Parameter Disaster | When using the reverse side (thickness ≈ 10 mm), NEVER enter 15 mm as the Z value in software – this will cause a 5 mm over‑cut, ruining the workpiece and possibly breaking the tool. |
| Feed Speed | The probing feed rate must be ≤ 80 mm/min. Excessive speed may cause impact and vibration. |
| Conductive Interference | When machining thin conductive materials (copper, aluminium, etc.), always place an insulating paper (e.g., plain paper) under the block to prevent signal short‑circuiting. |
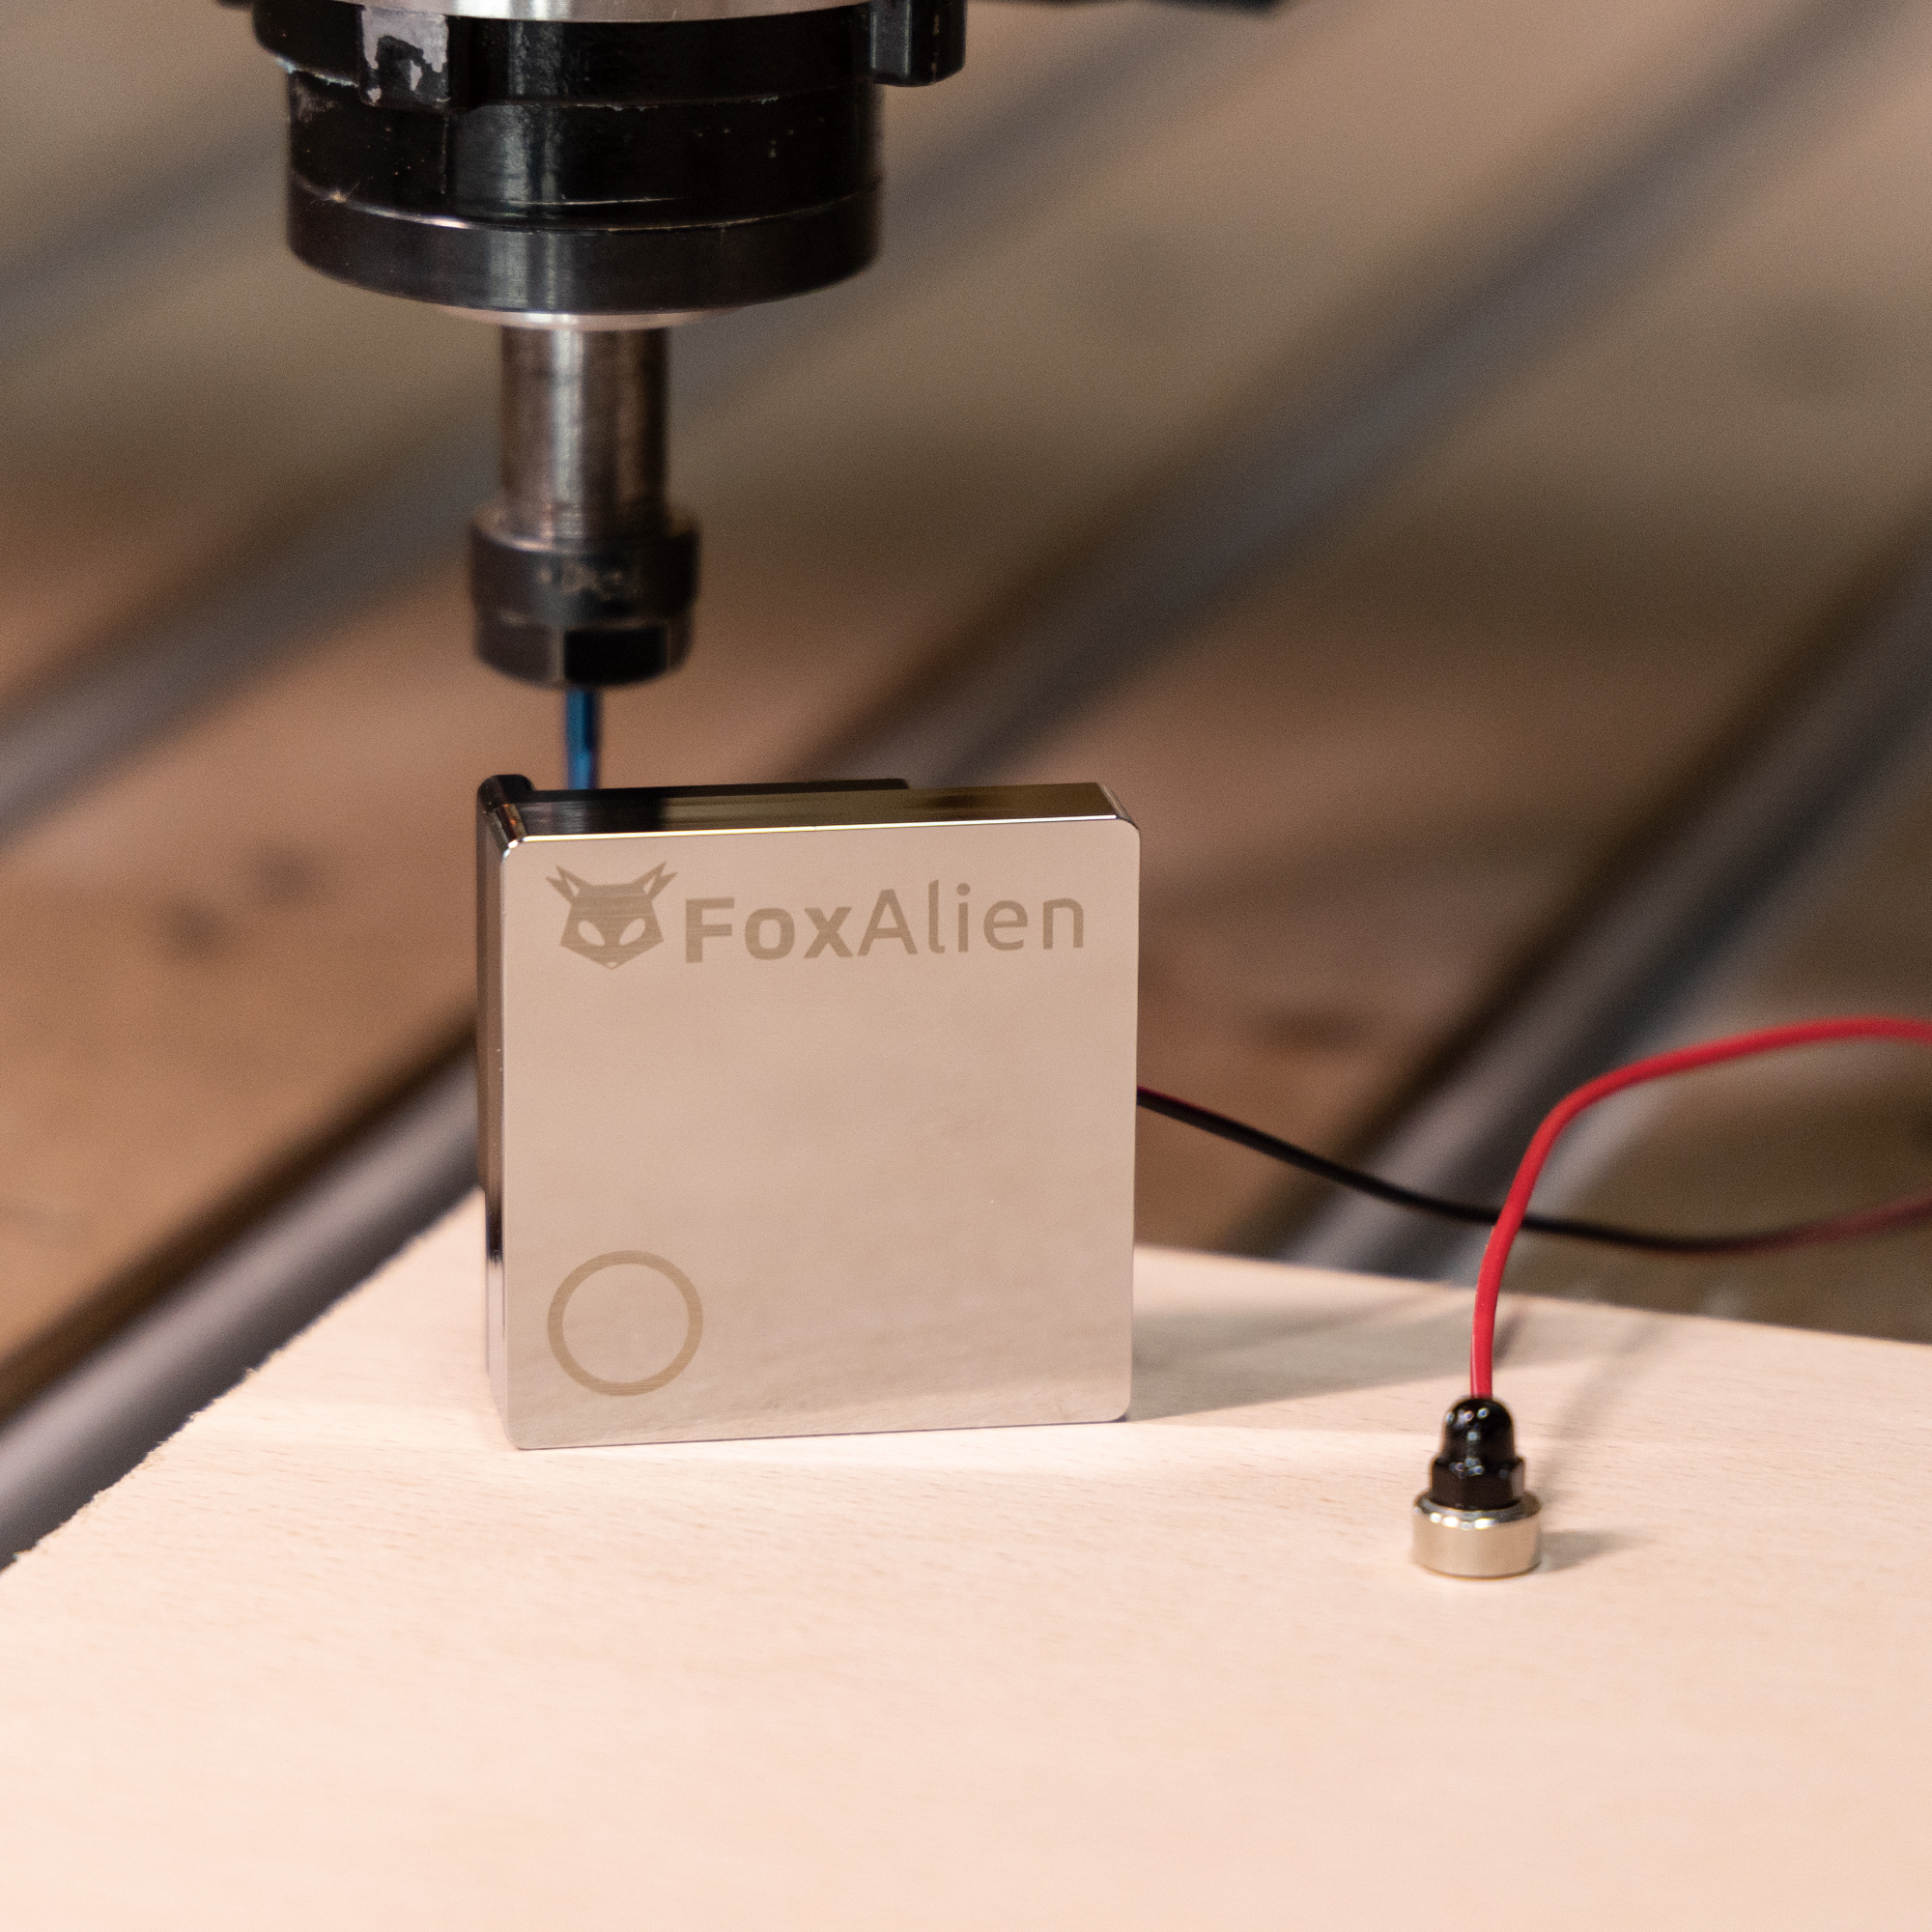
🔍 What’s in the Box
XYZ probe body (front side with marked dot, reverse side with bare aluminium surface)
Magnetic connector with cable (attaches to the ER collet nut)
Aviation connector & XH2.54 white terminal (for connection to the controller)
📐 Before You Start – Critical Measurements
Measure Actual Thickness & Offset
Each block has manufacturing tolerances. Use a calliper to measure the following and note them down (on paper or your phone) – you will enter them into the software later.
| Measurement | Where to Measure | Typical Reference | Purpose |
|---|---|---|---|
| Z front thickness | Front dot → bottom surface | ≈ 15 mm | Used for normal front‑side probing |
| Z reverse thickness | Bare aluminium face → bottom | ≈ 10 mm | Used for thin‑workpiece reverse probing (do not use 15) |
| XY offset | Deviation between contact point and workpiece origin | Depends on placement | Entered as XY offset in software |
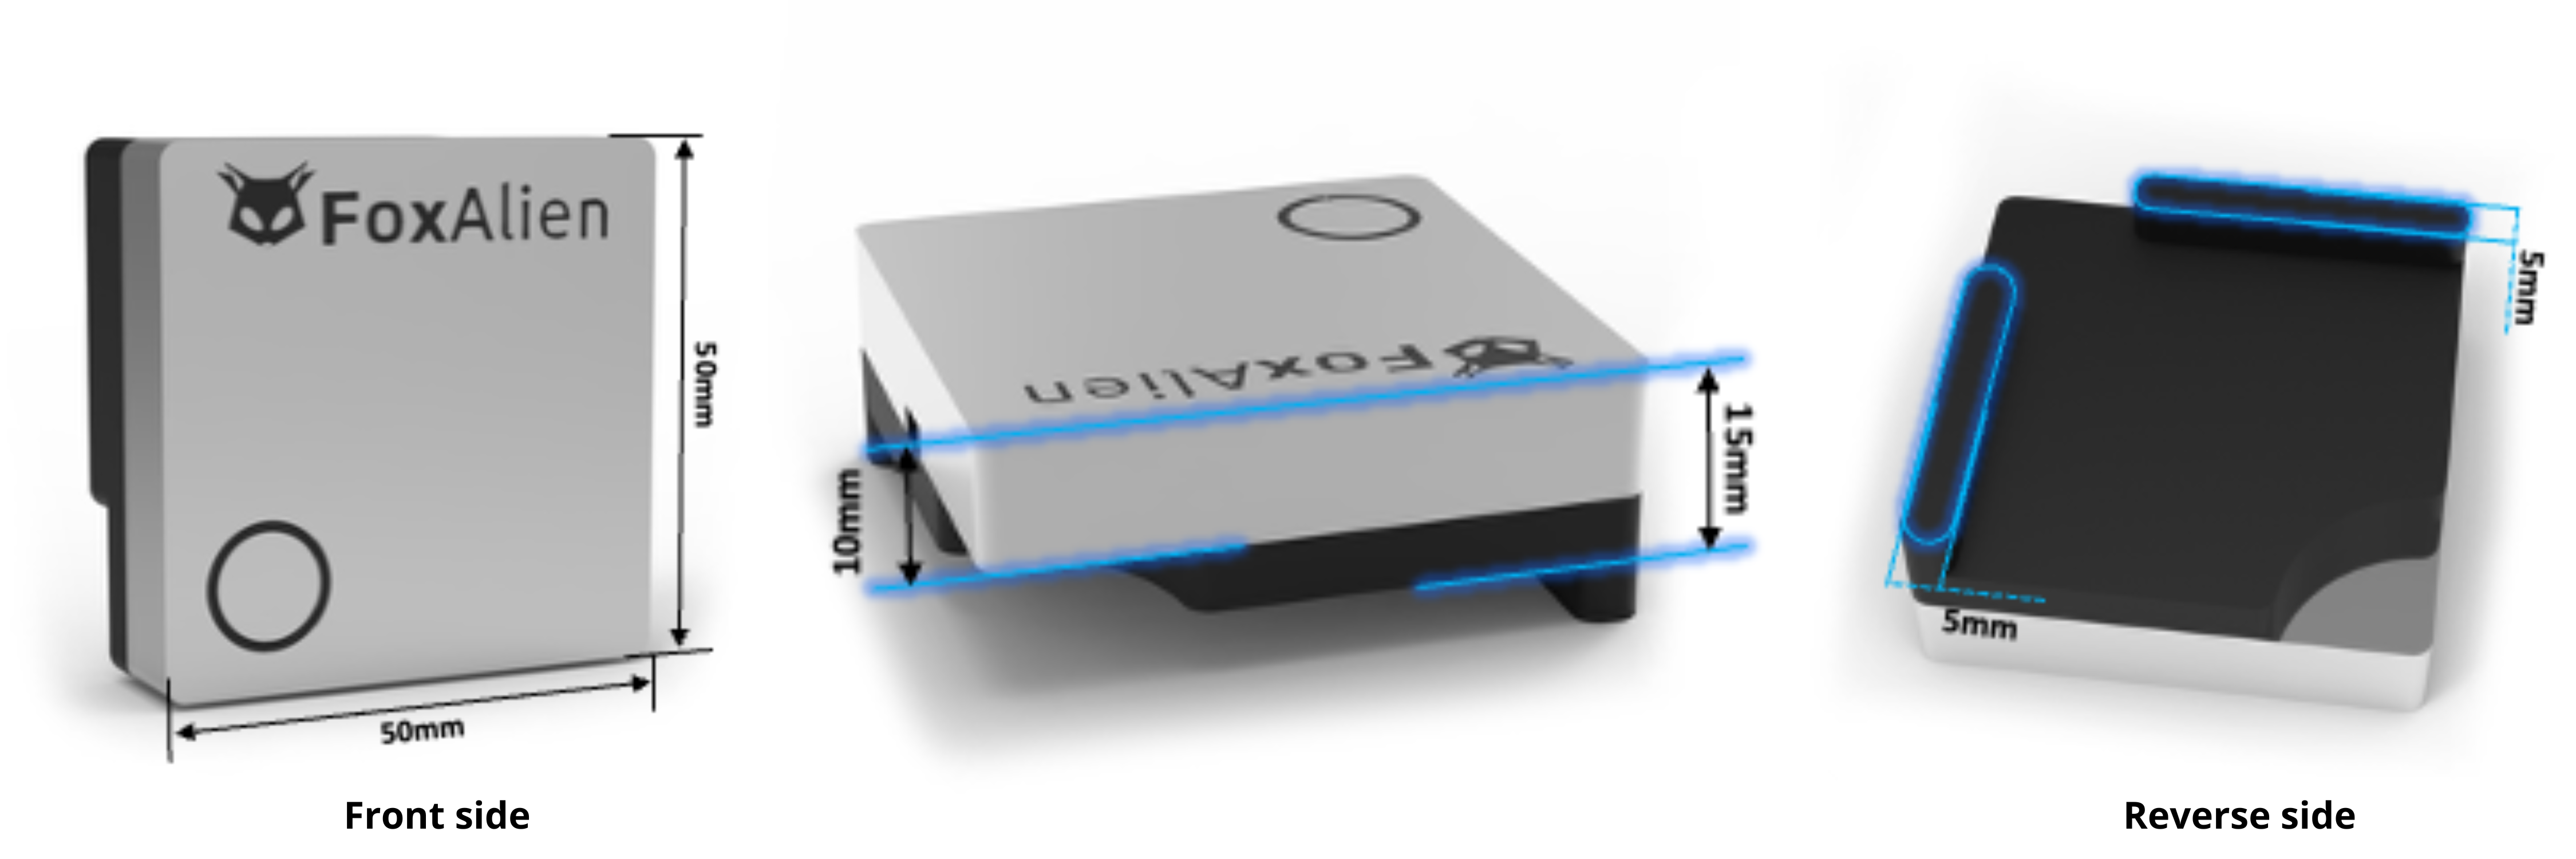
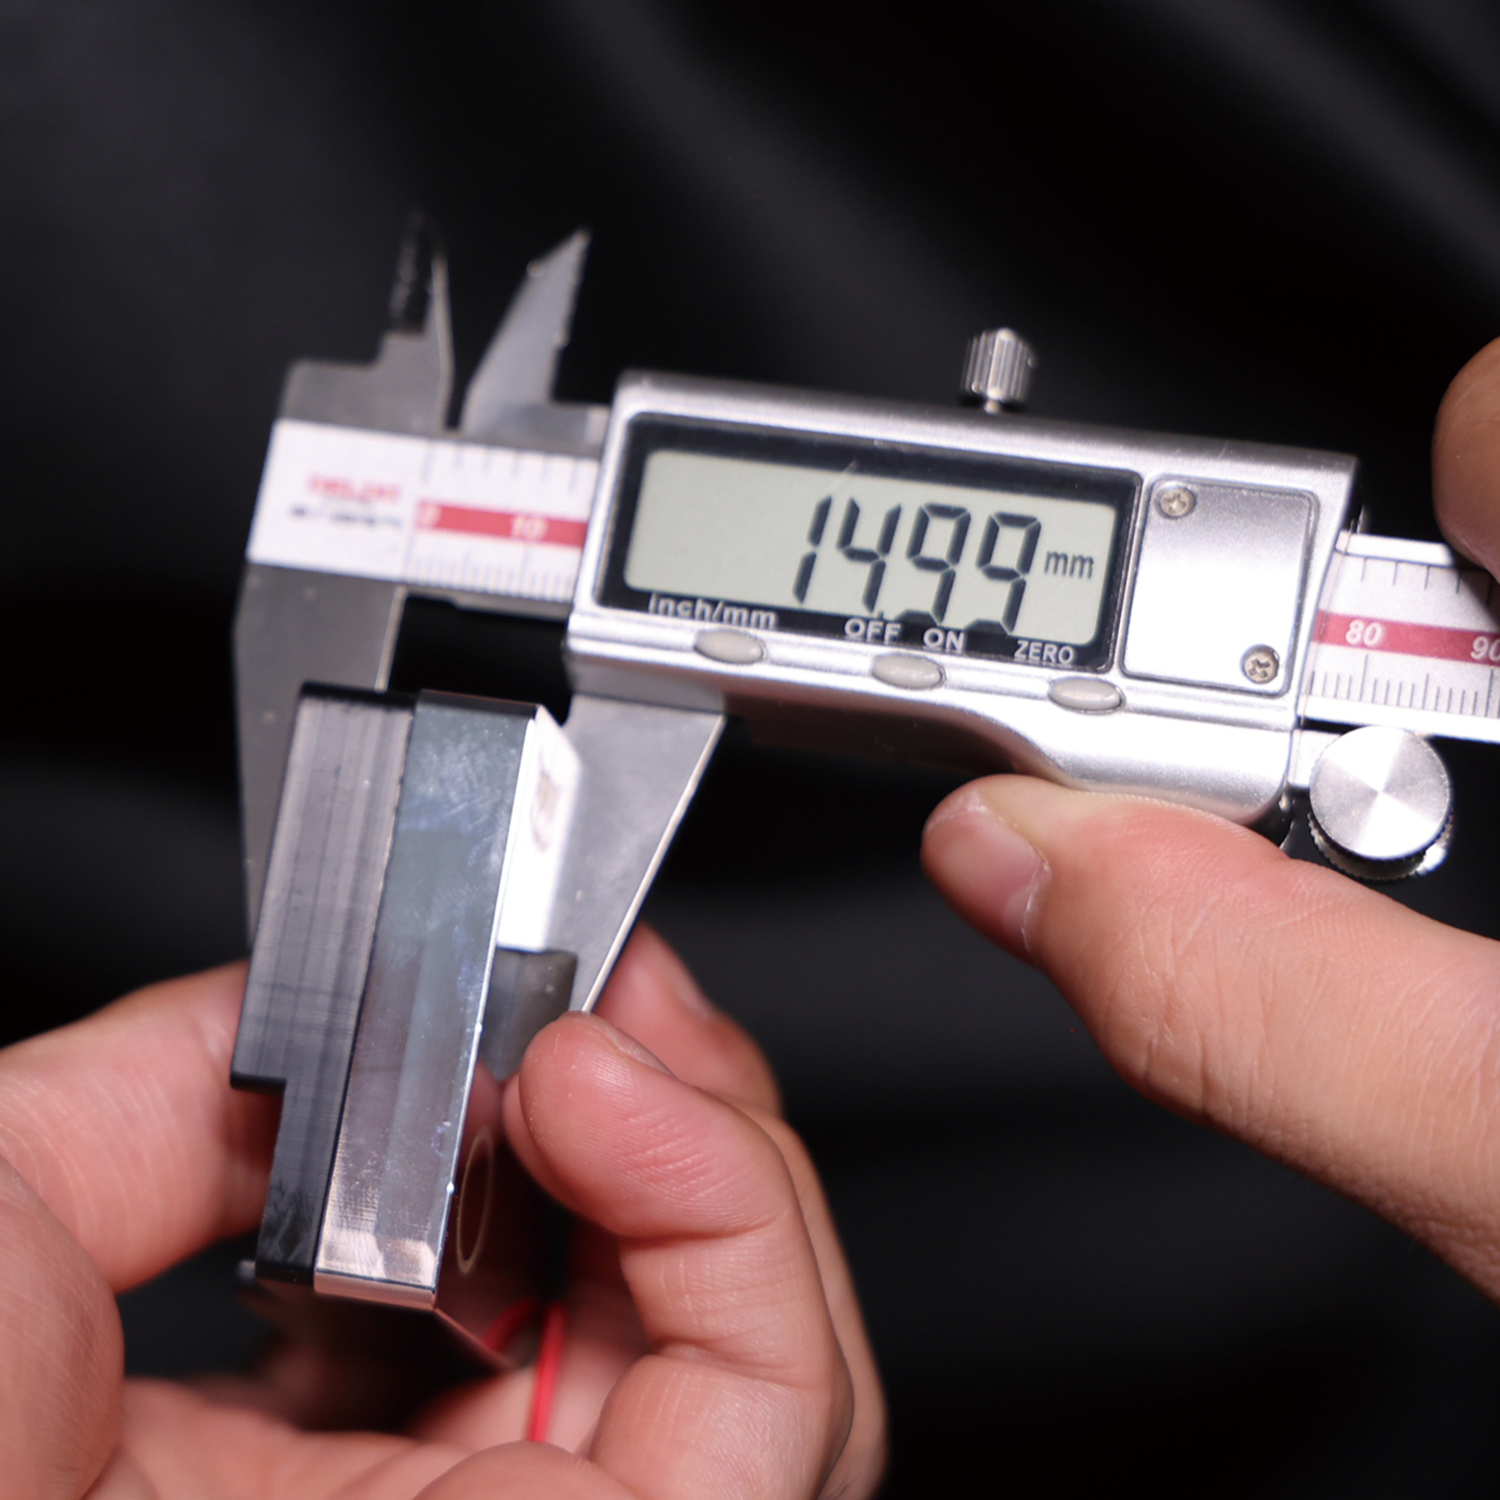 Z front thickness
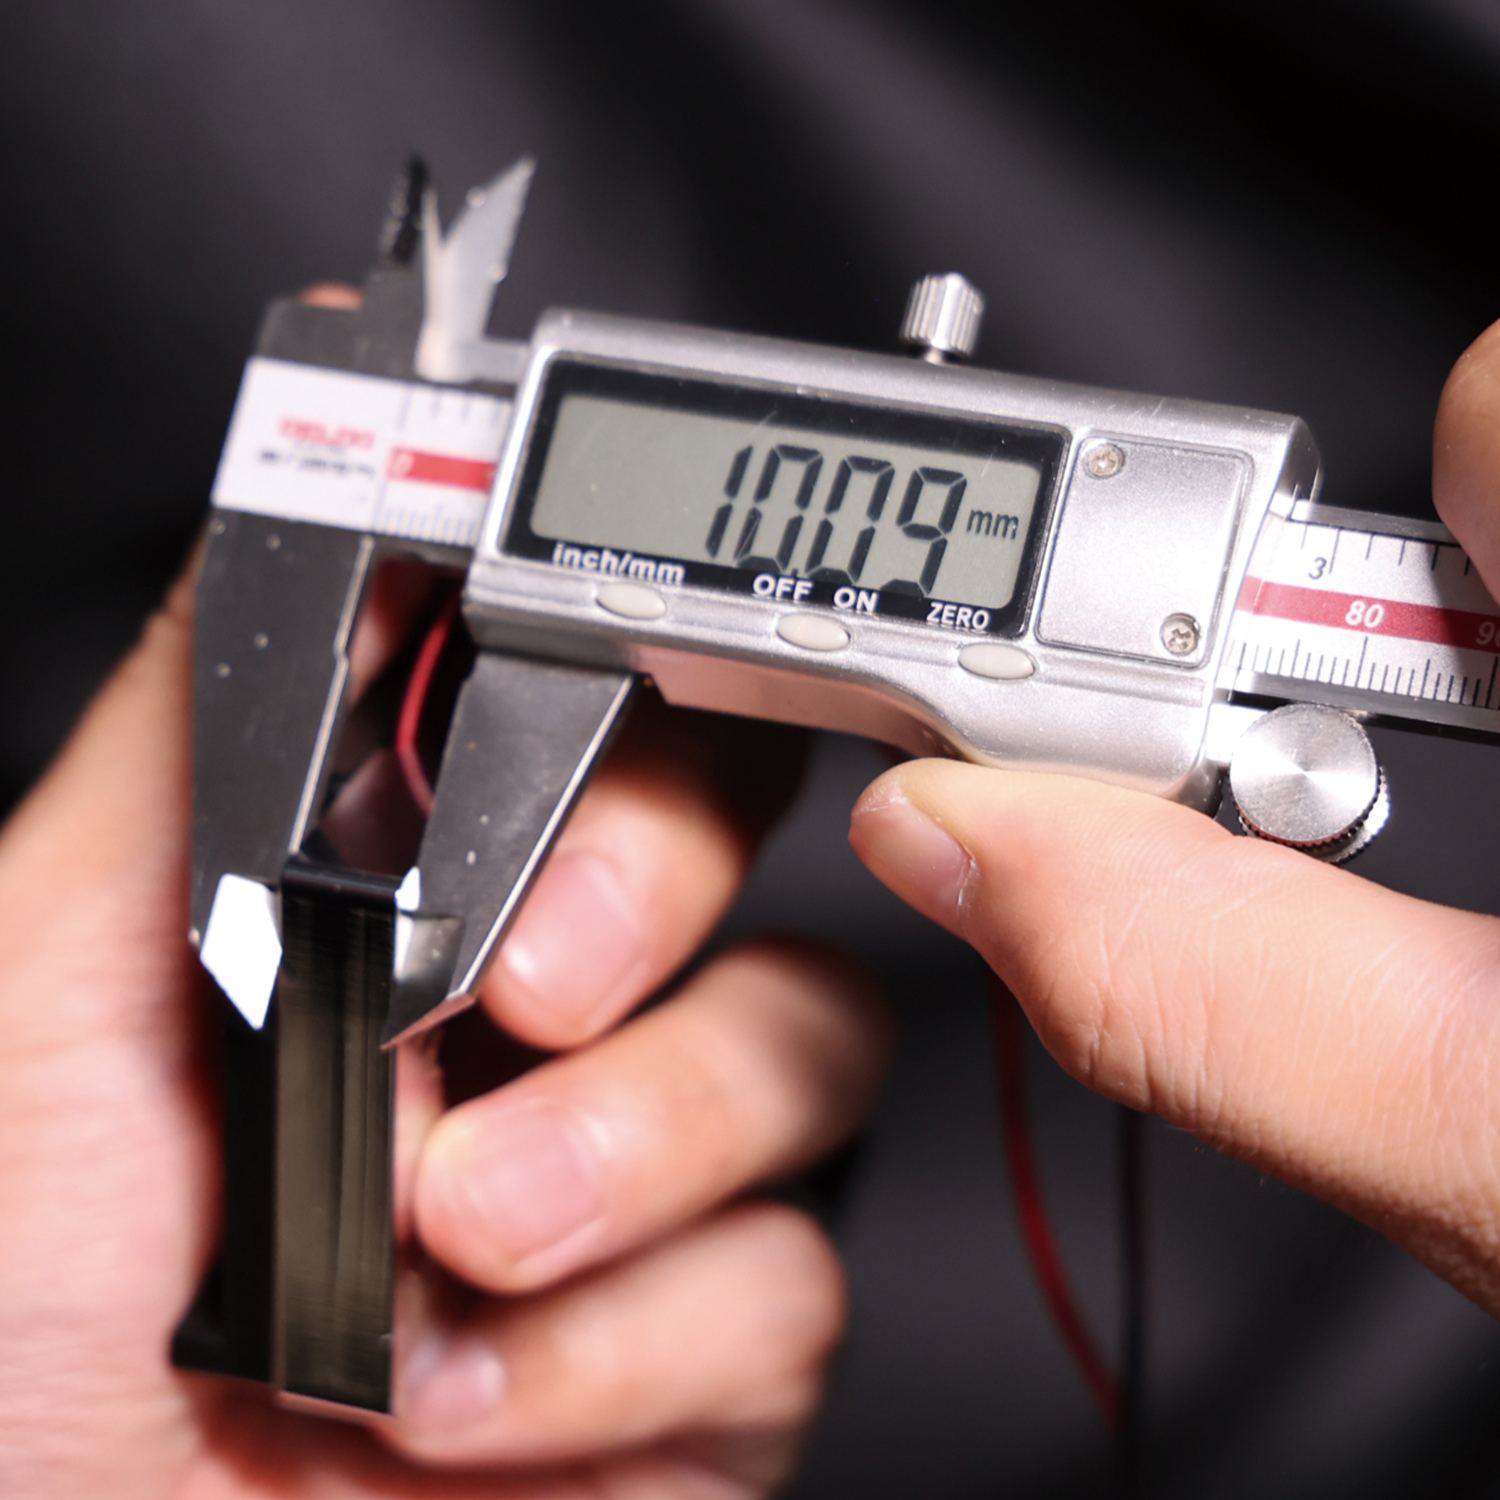 Z reverse thickness
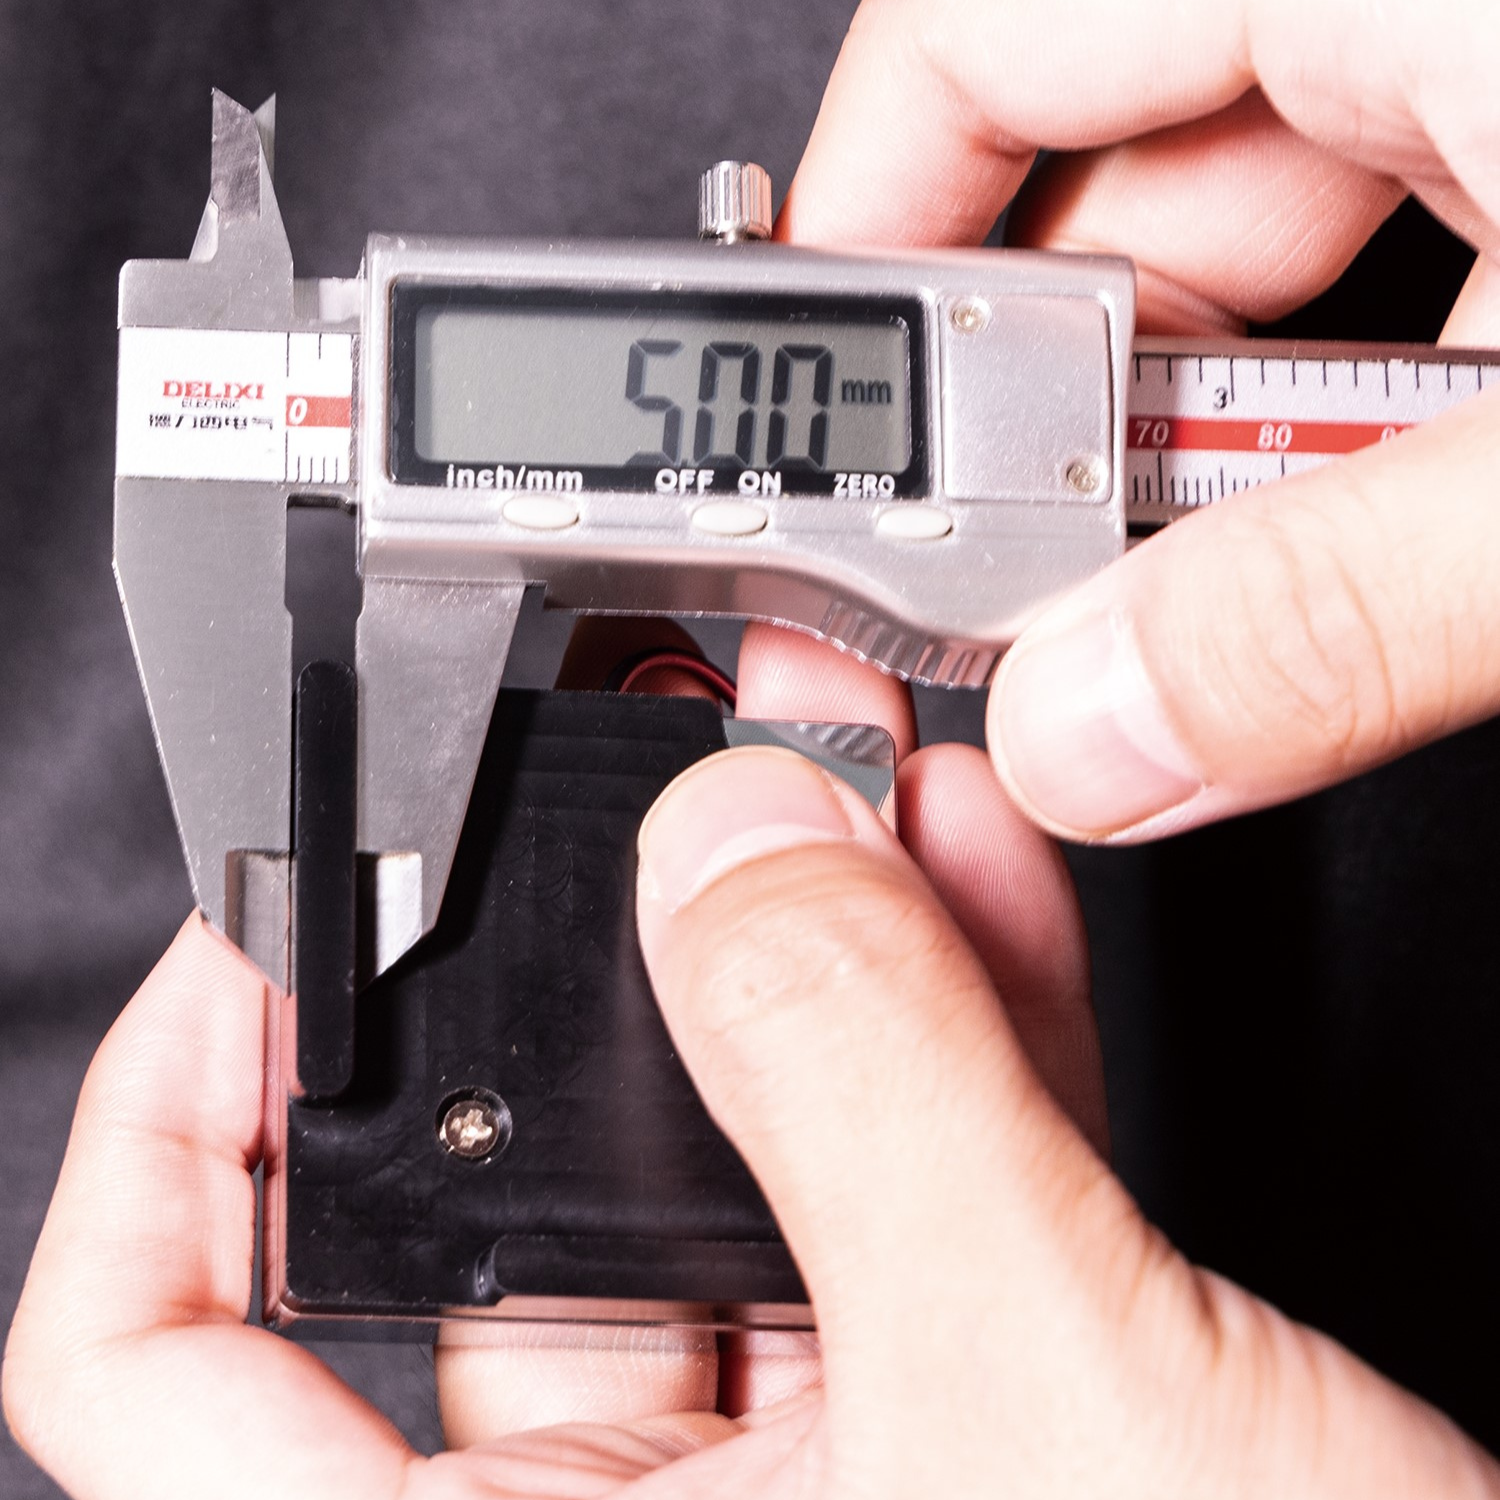 XY offset
🔌 Hardware Setup – Three Simple Steps
Place the probe
Place it flat on the workpiece surface at the lower‑left reference corner (or near your workpiece origin). Ensure full contact with no tilt.Move the spindle to the initial position
For front‑side probing: align the tool tip with the marked dot on the front.
For reverse‑side probing: align with the centre of the bare aluminium area on the back.
⚠️ This position must be precise – deviation is the leading cause of crashes.
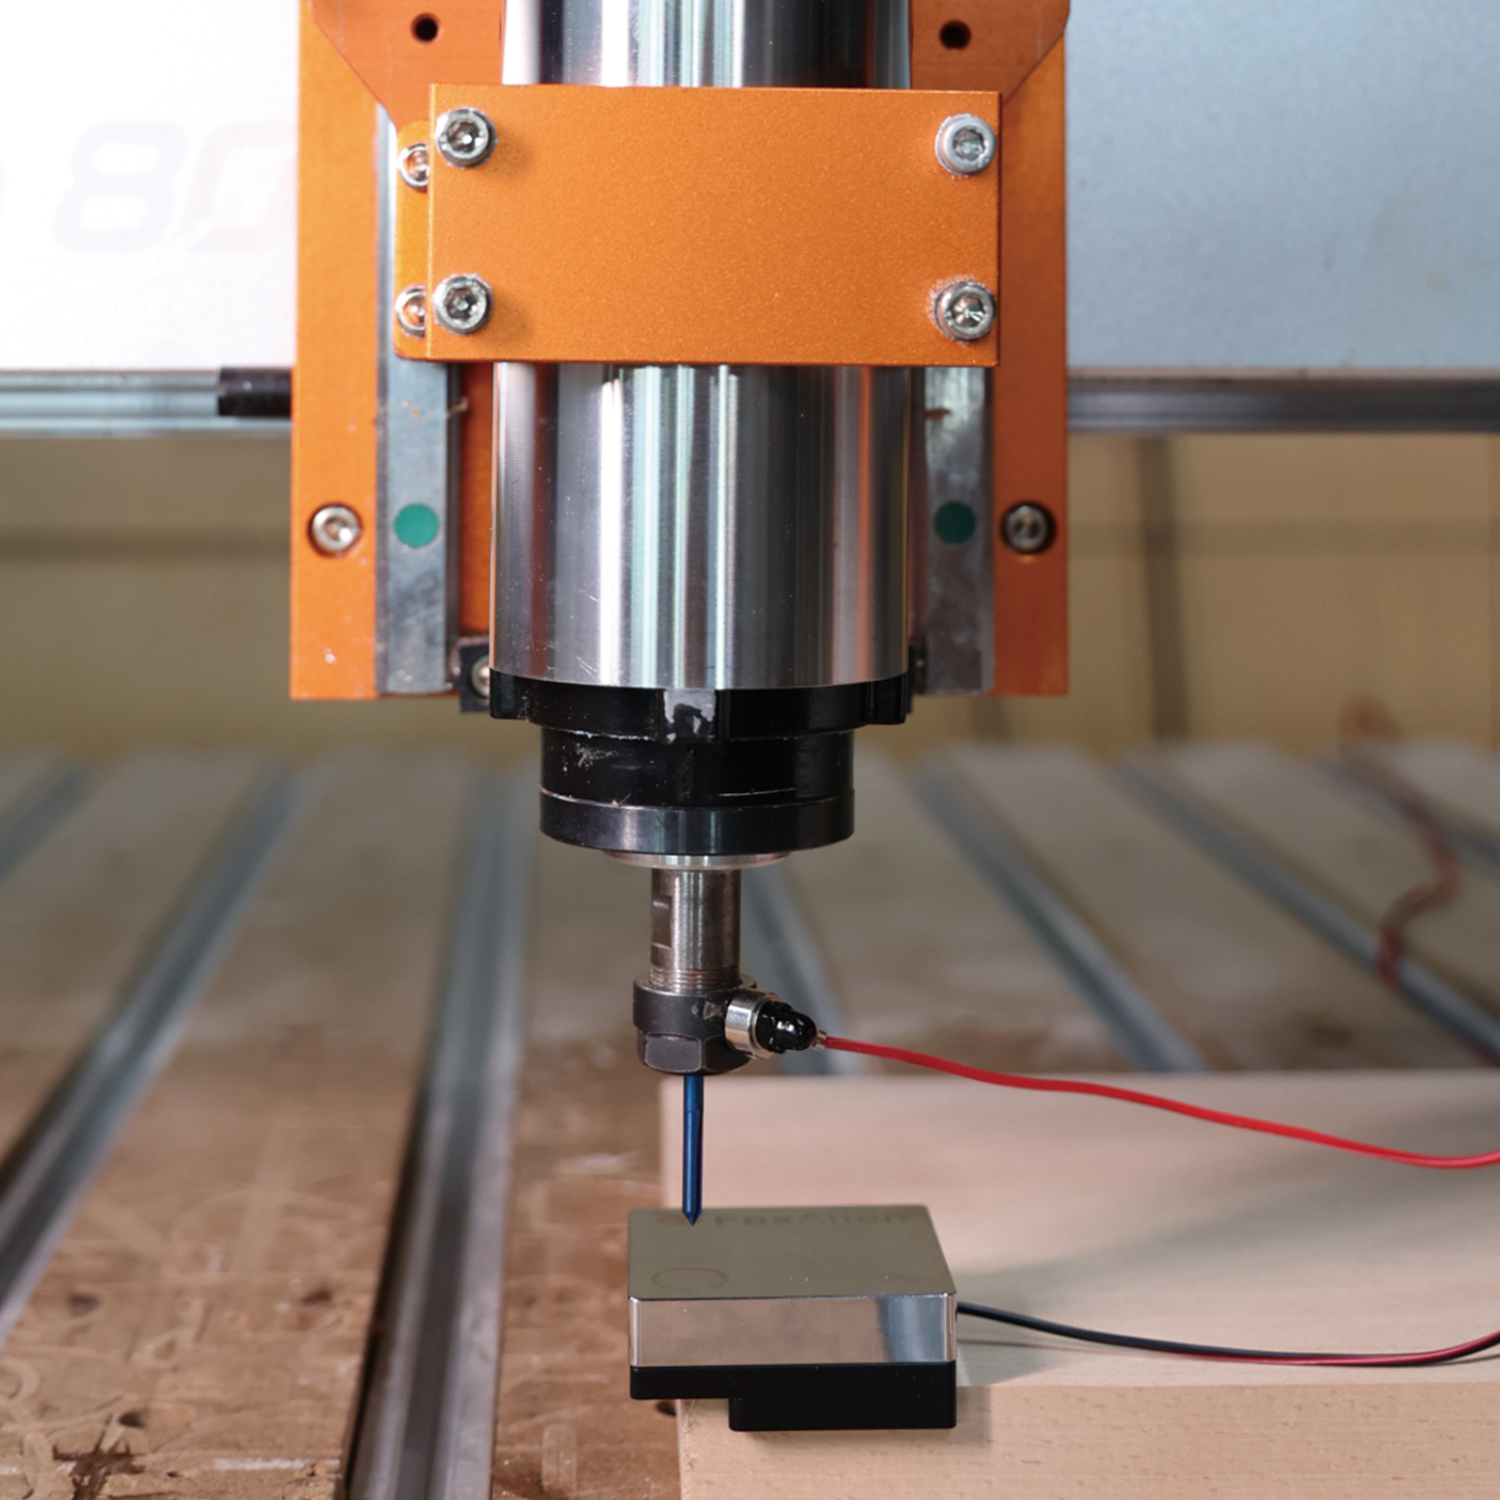 Front-side probing
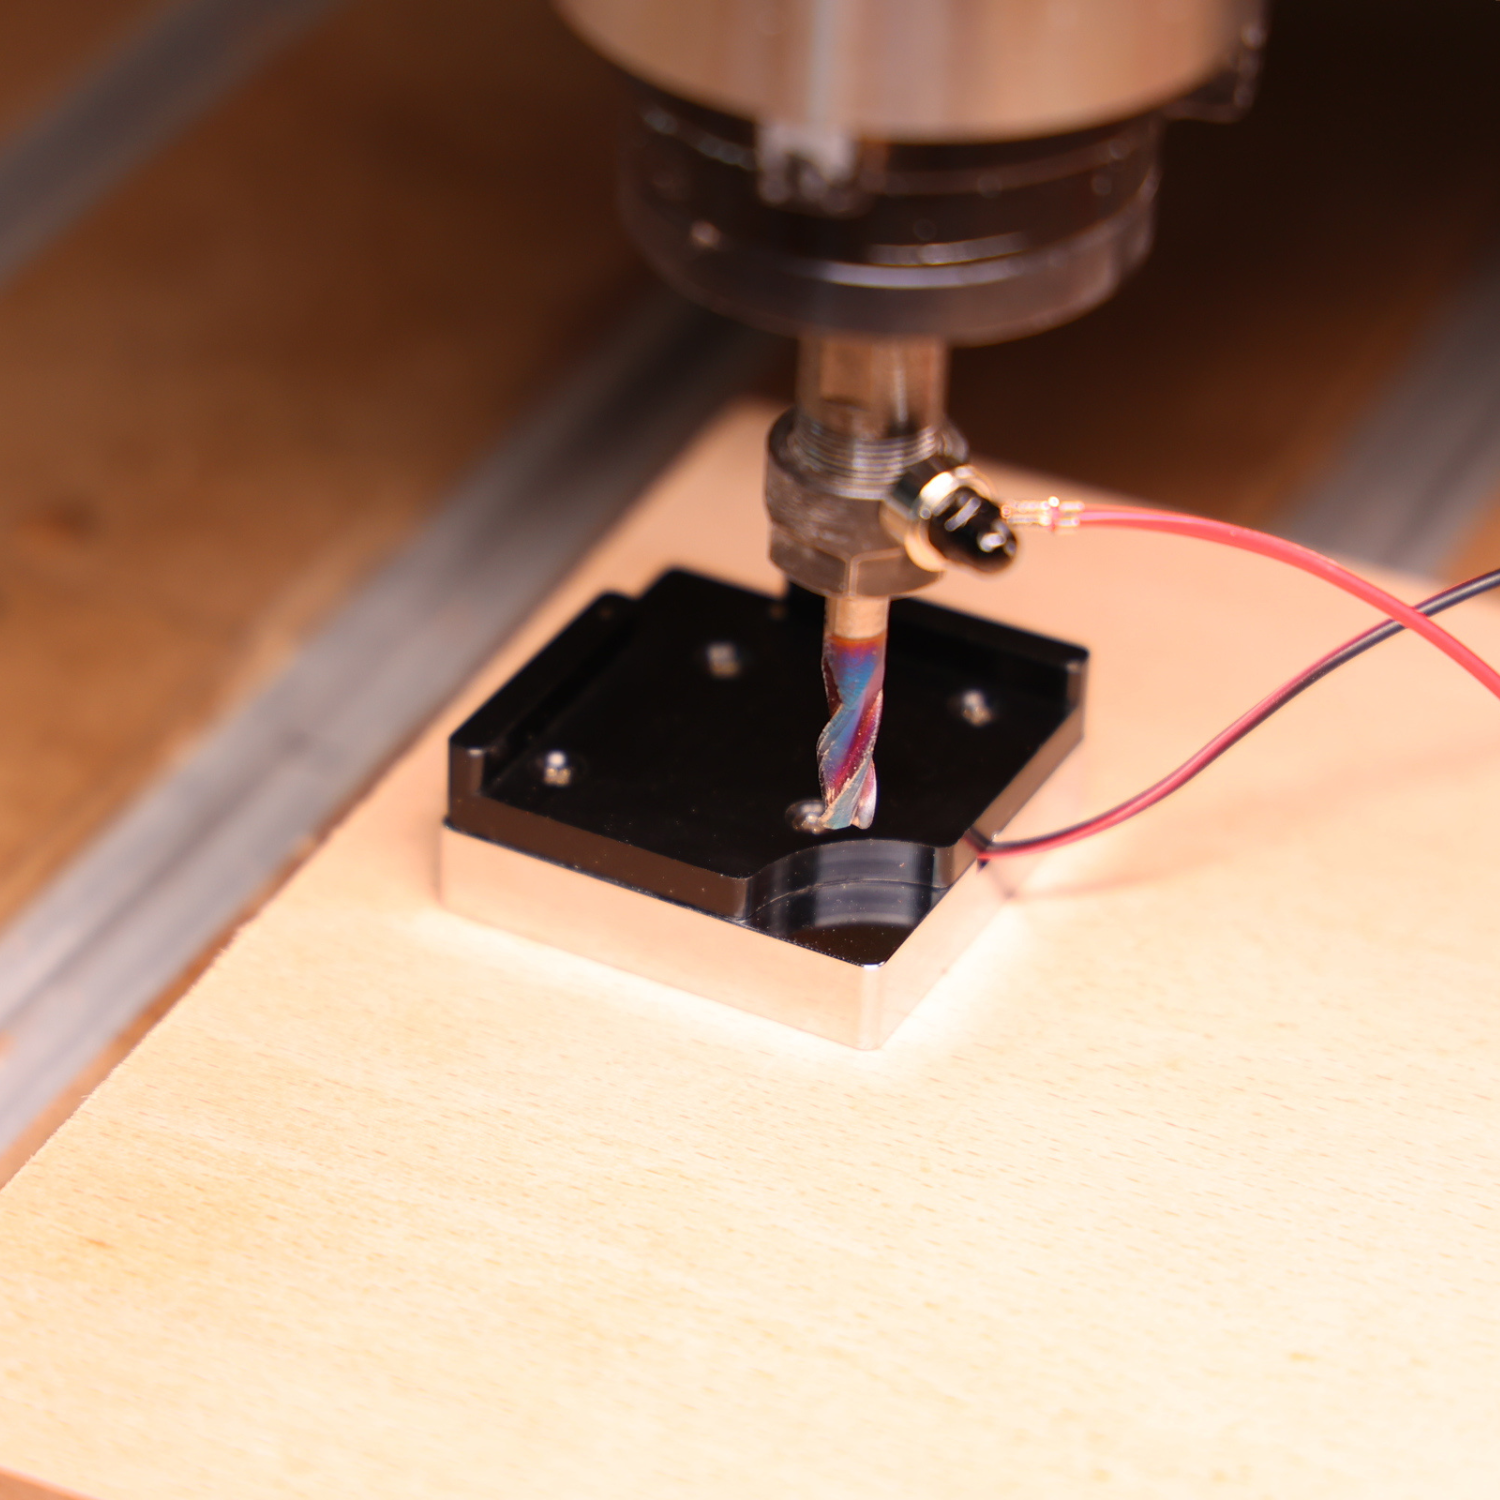 Reverse-side probing
Connect the signal cable
Attach the magnetic connector to the ER collet nut (make sure it makes good contact).
Plug the signal cable (aviation or XH2.54) into the Probe port of your controller.
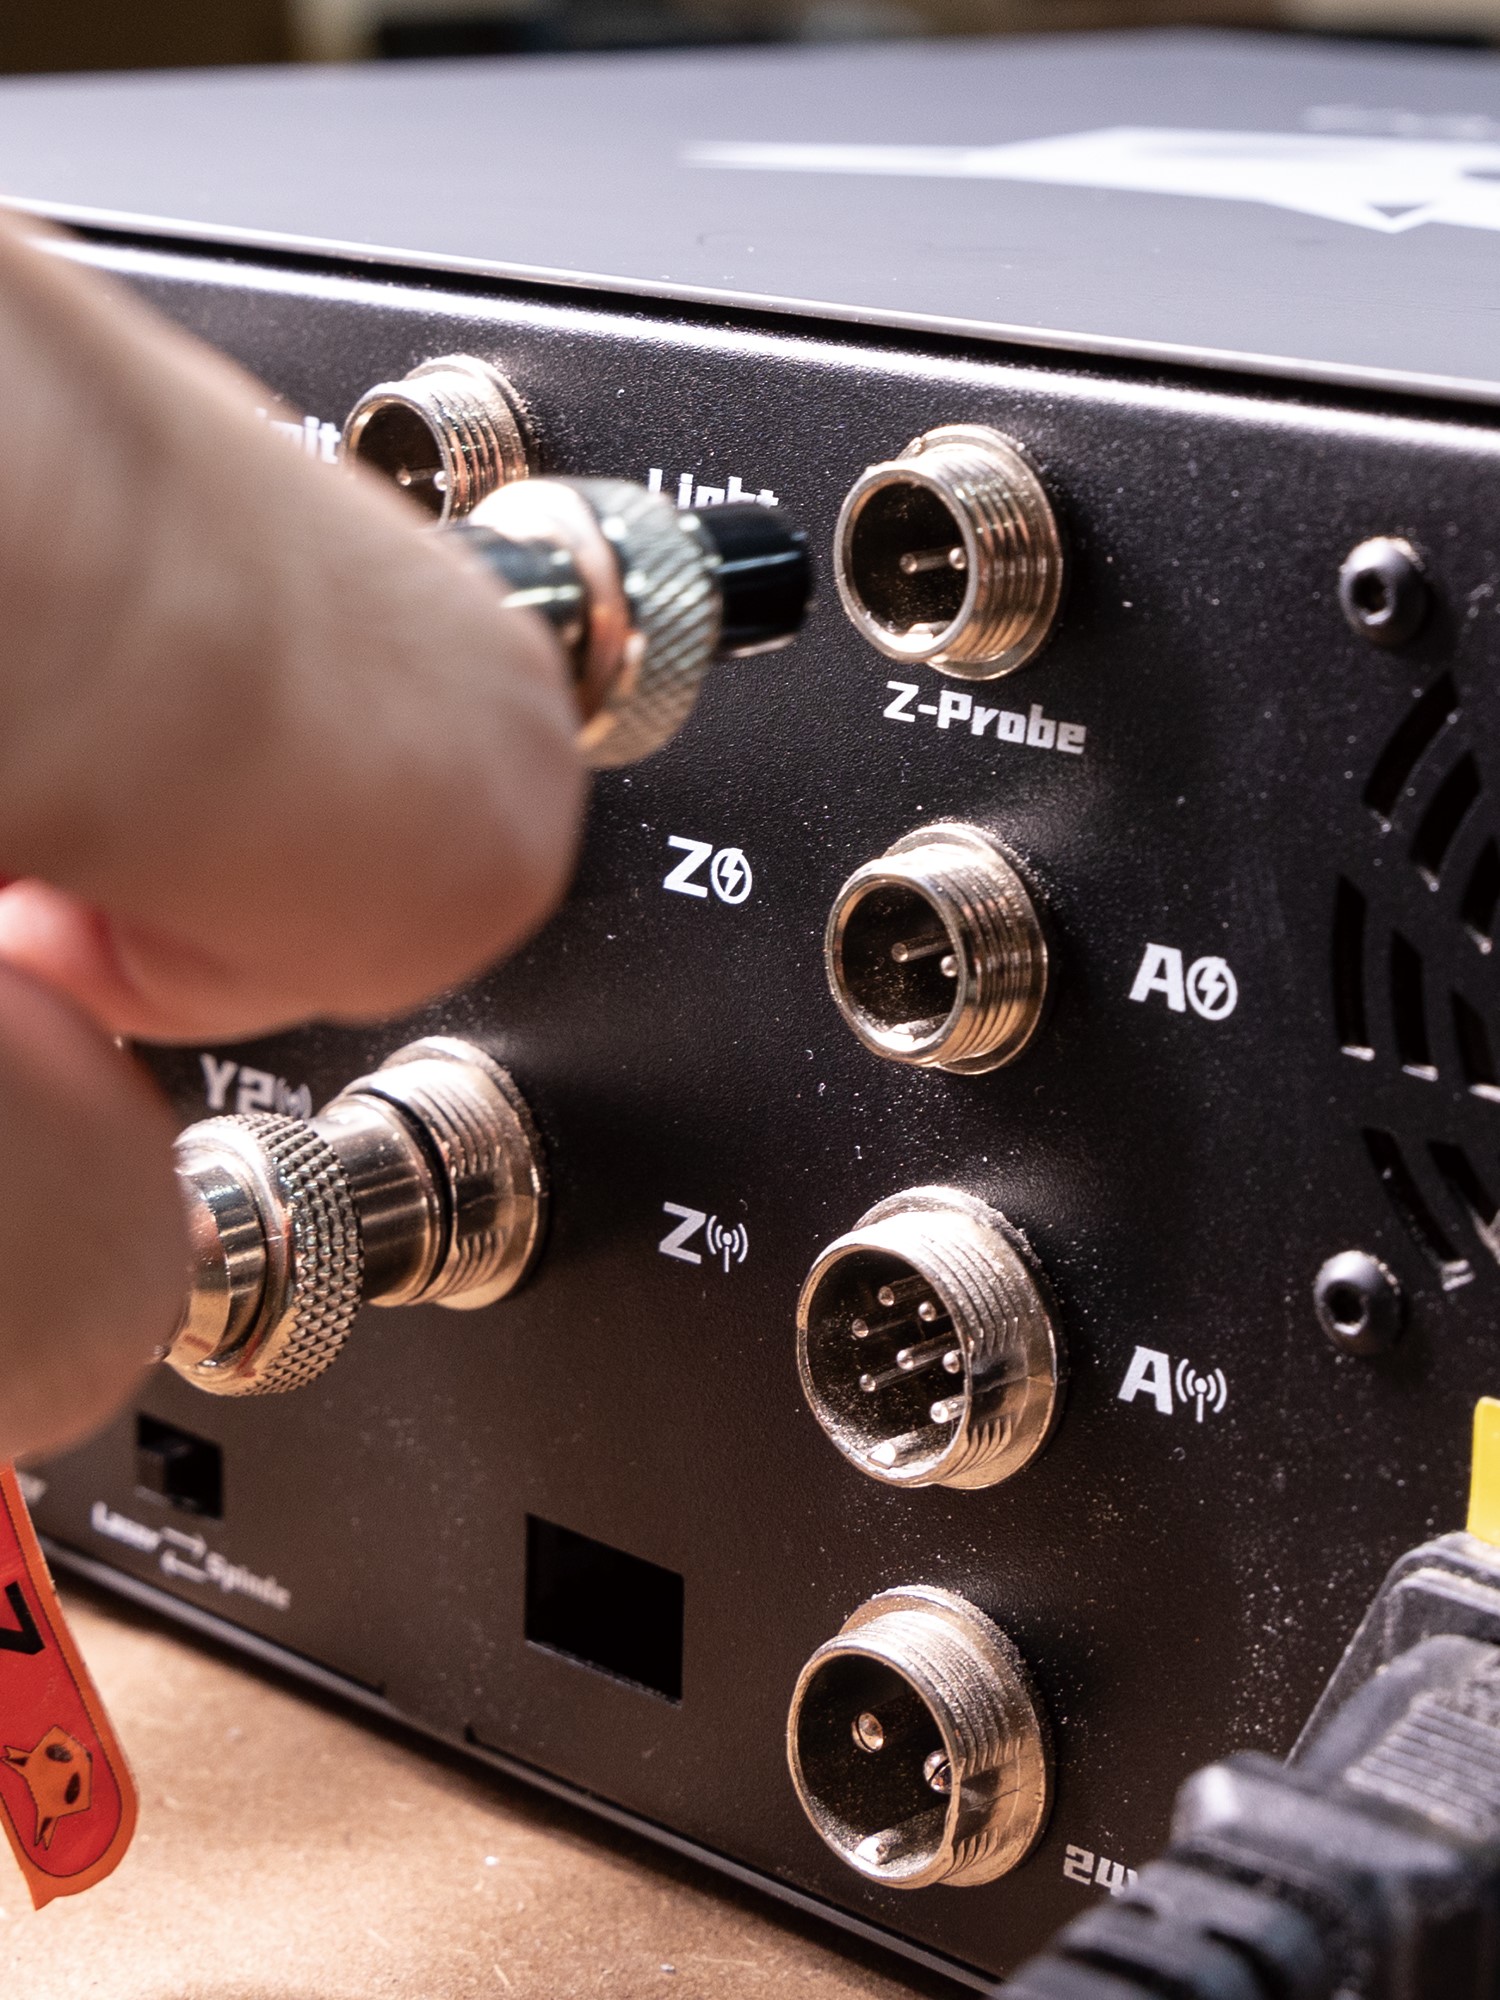 For Masuter 3S/XE-PRO/XE-Ultra series/Vasto series/CL-4x4
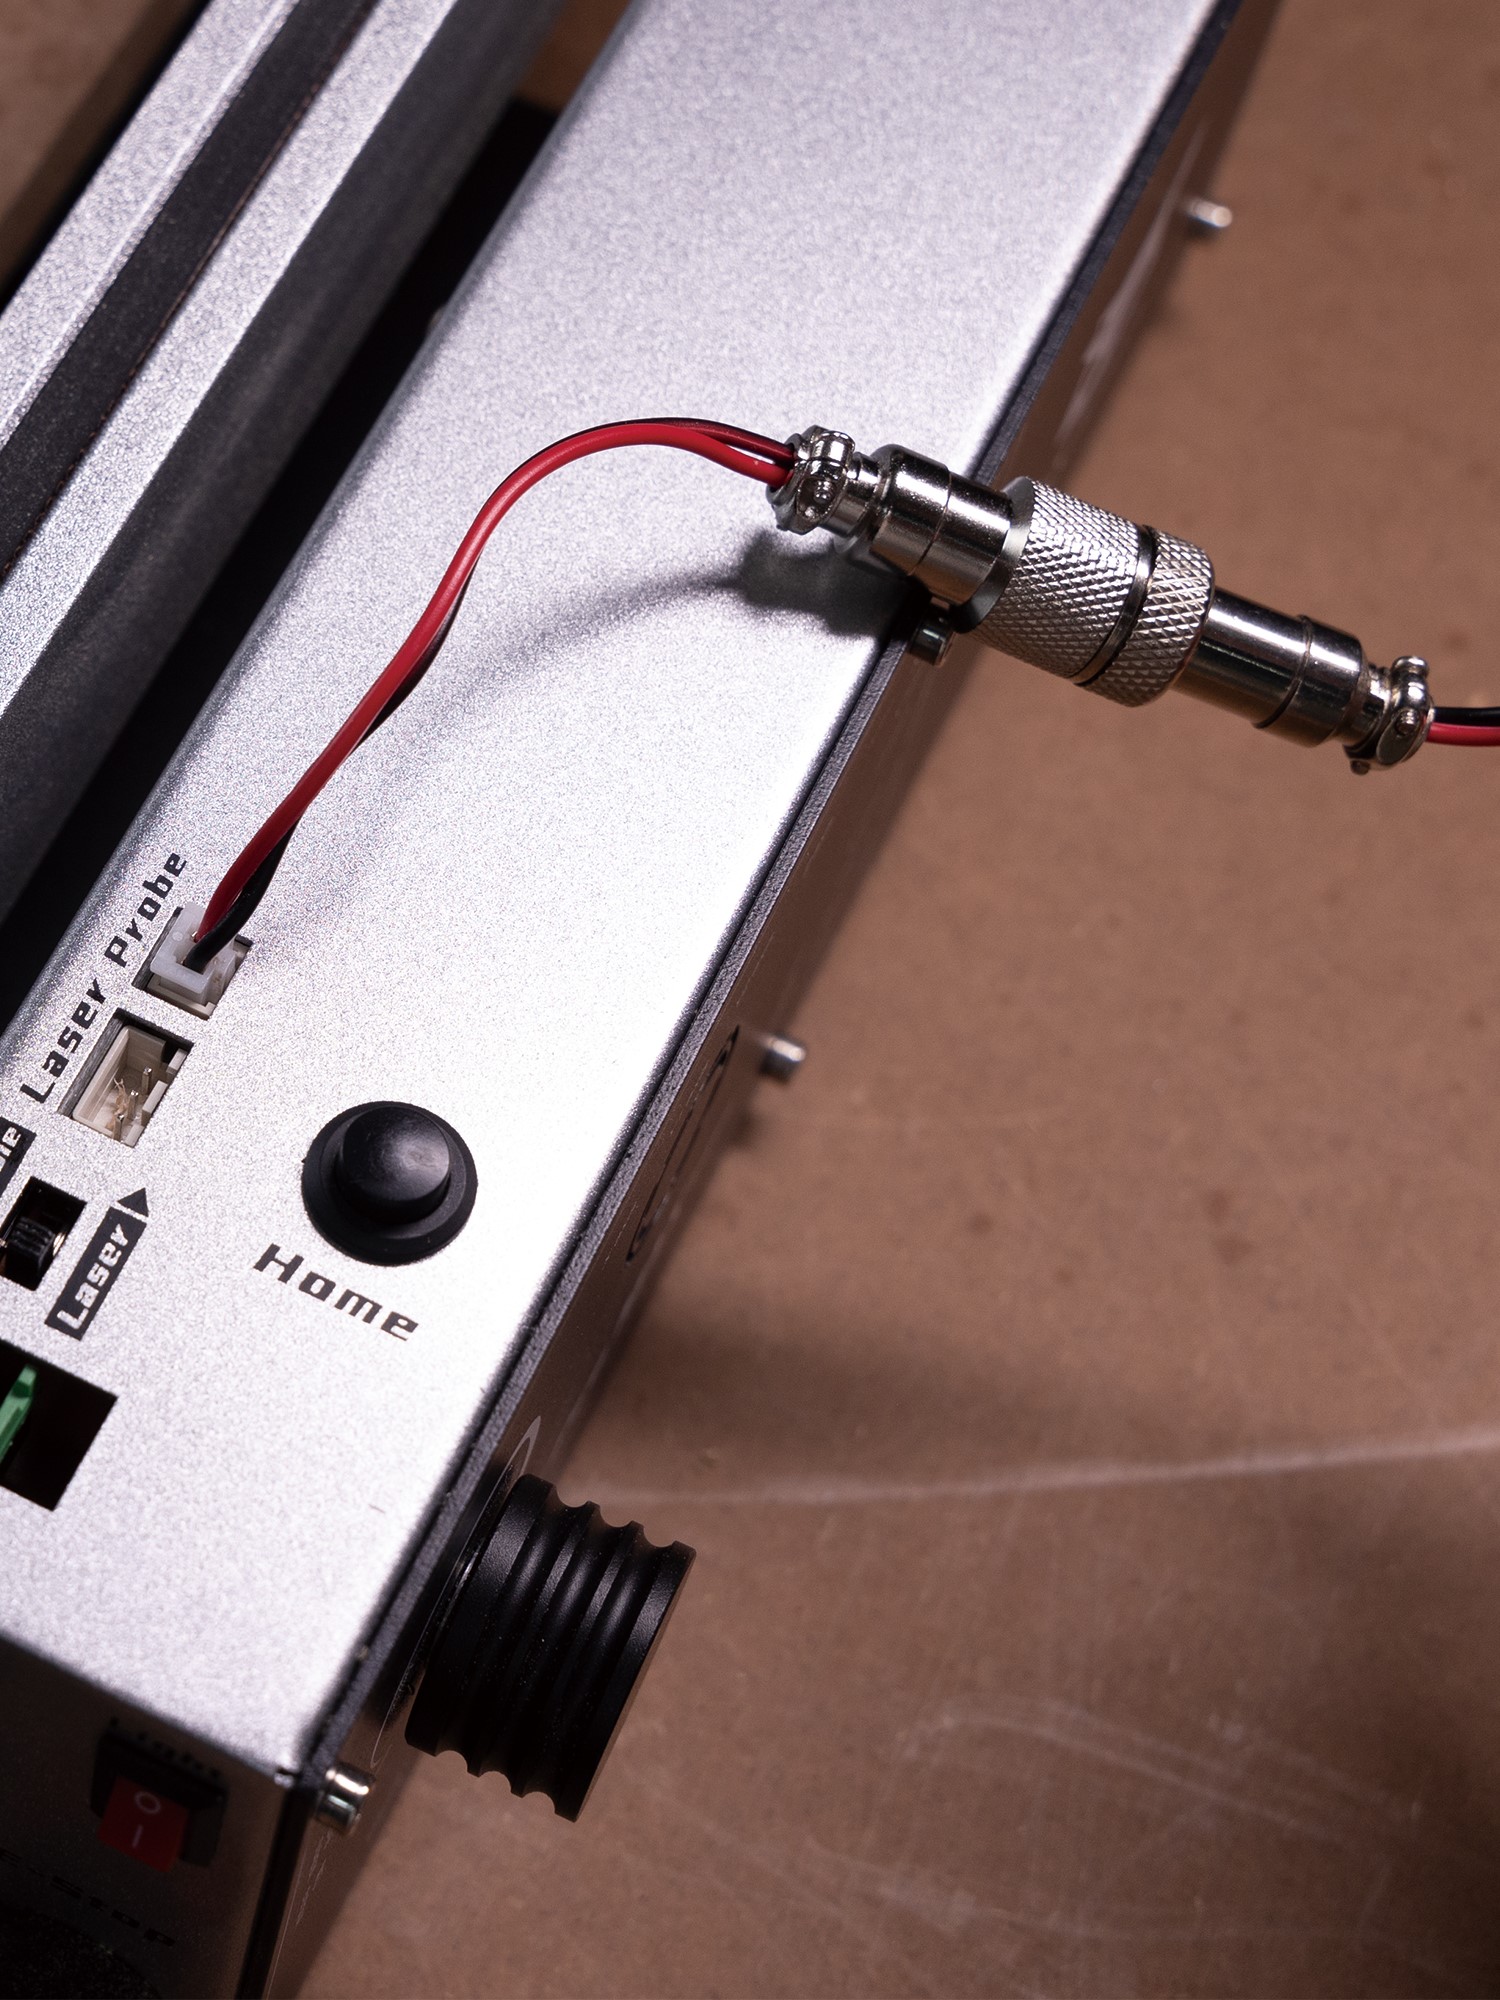 For Masuter Pro/Masuter 3/Masuter Pro Max
🖥️ Software Configuration & Probing Procedure
▍OpenBuilds CONTROL
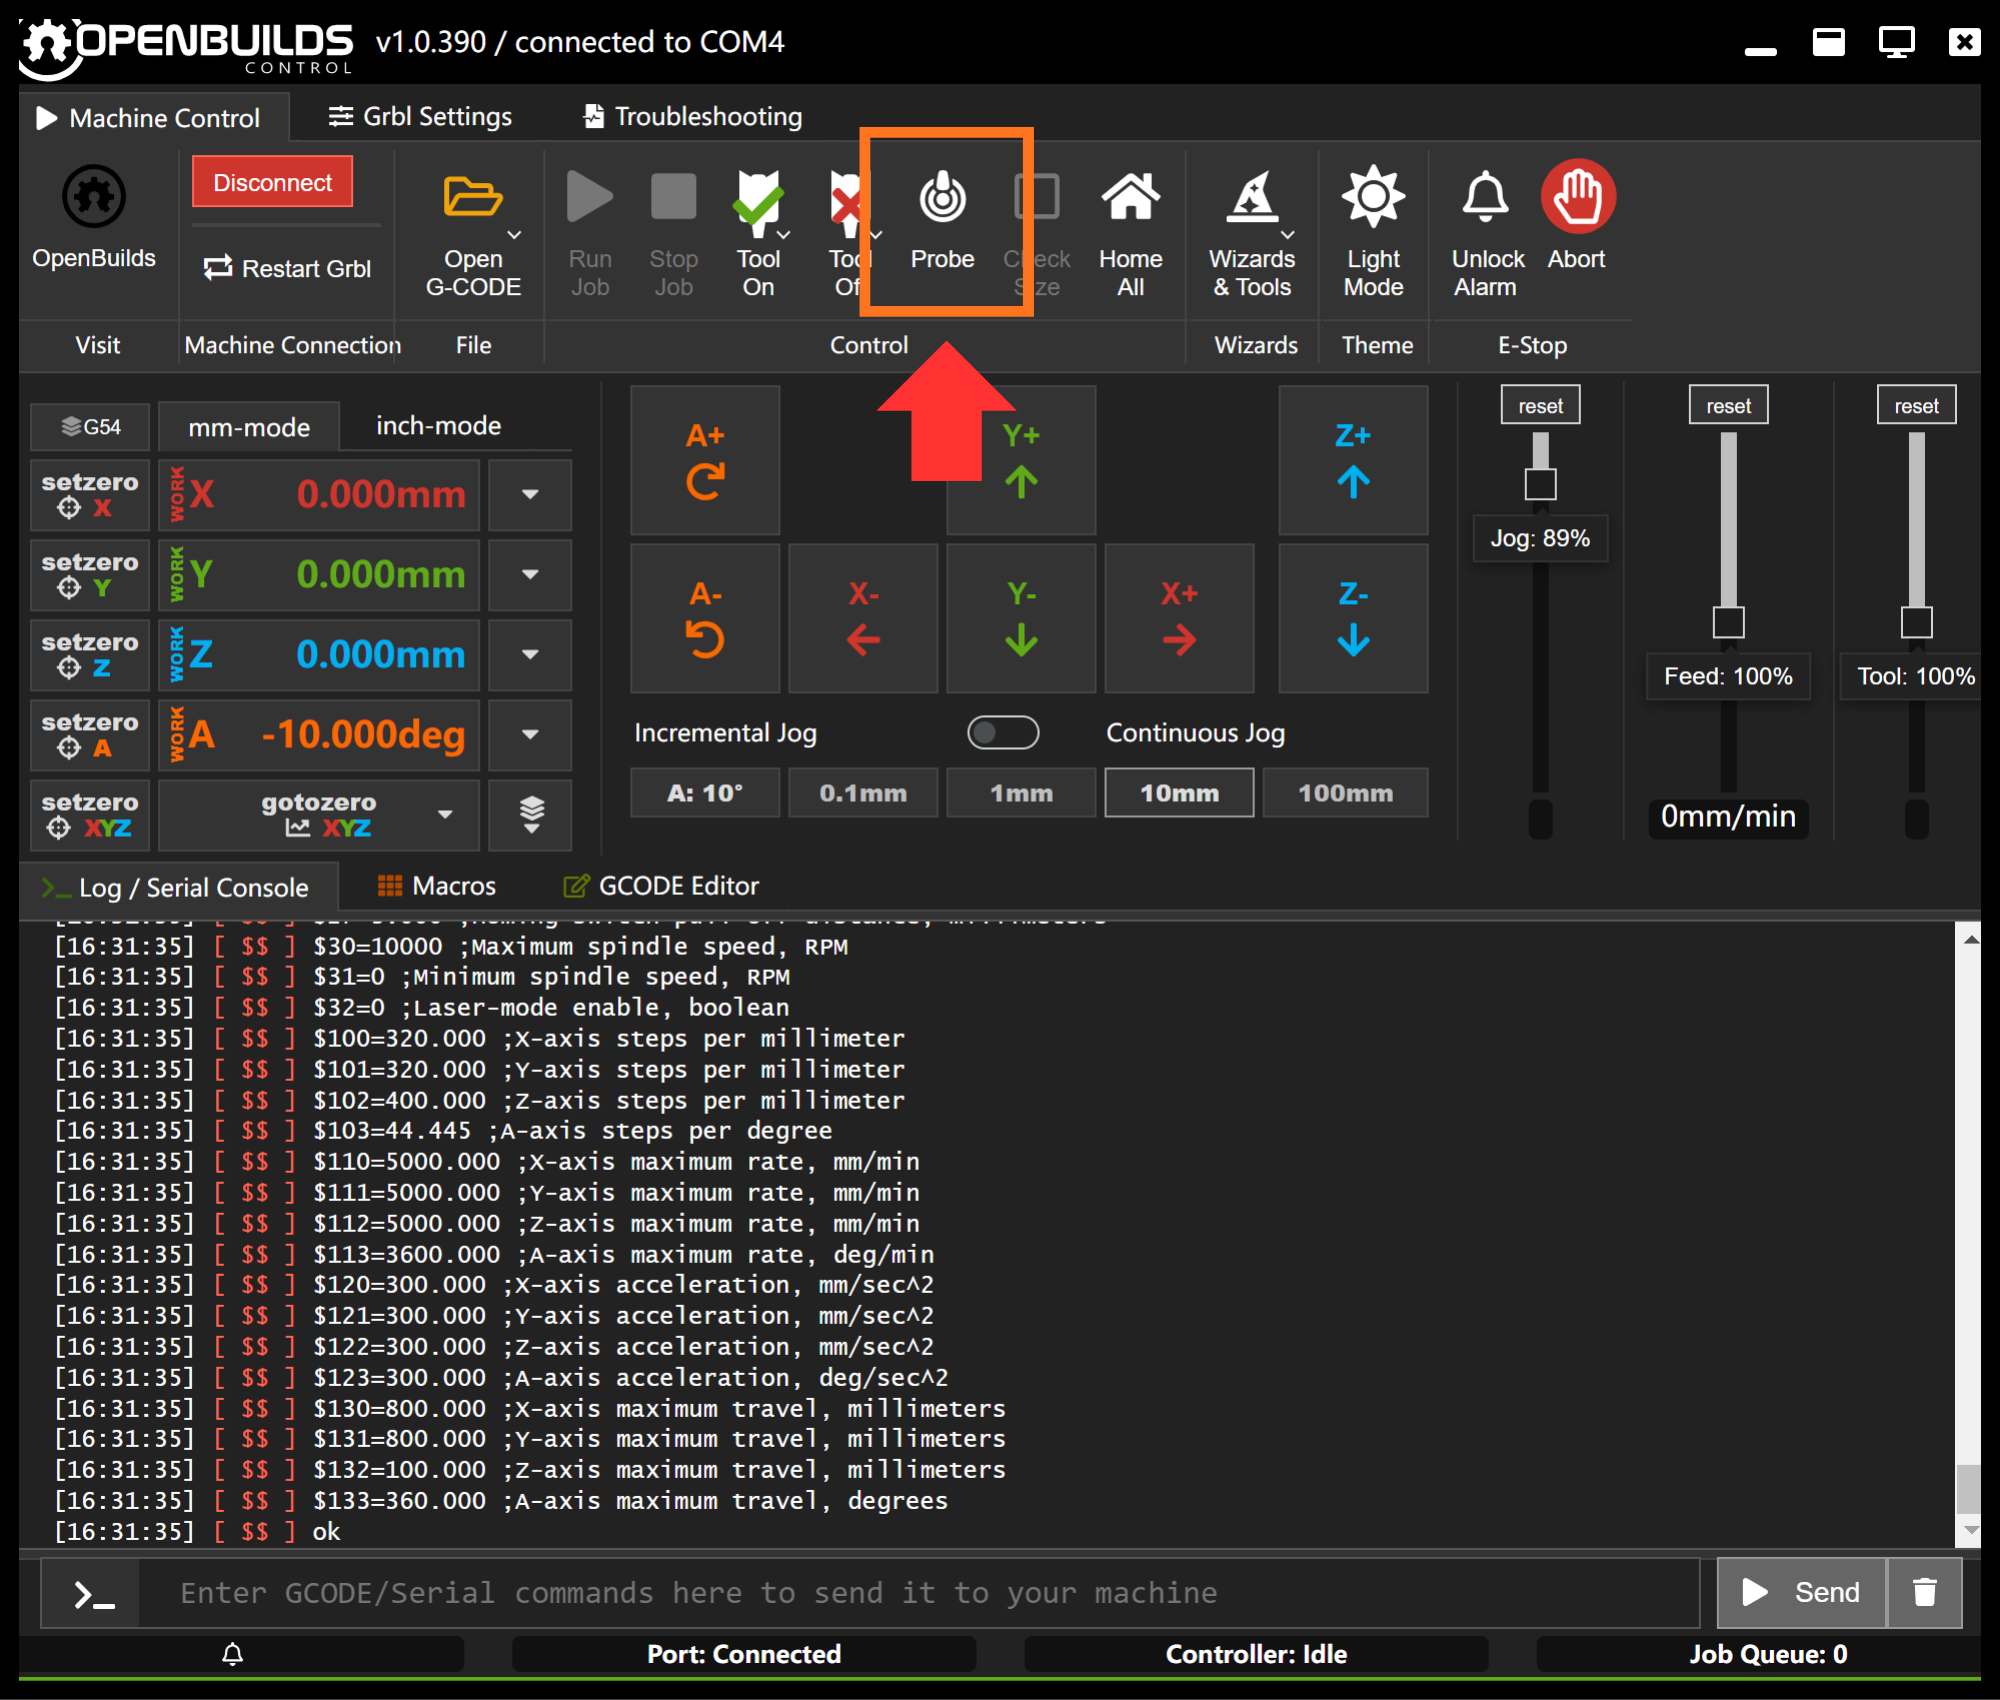
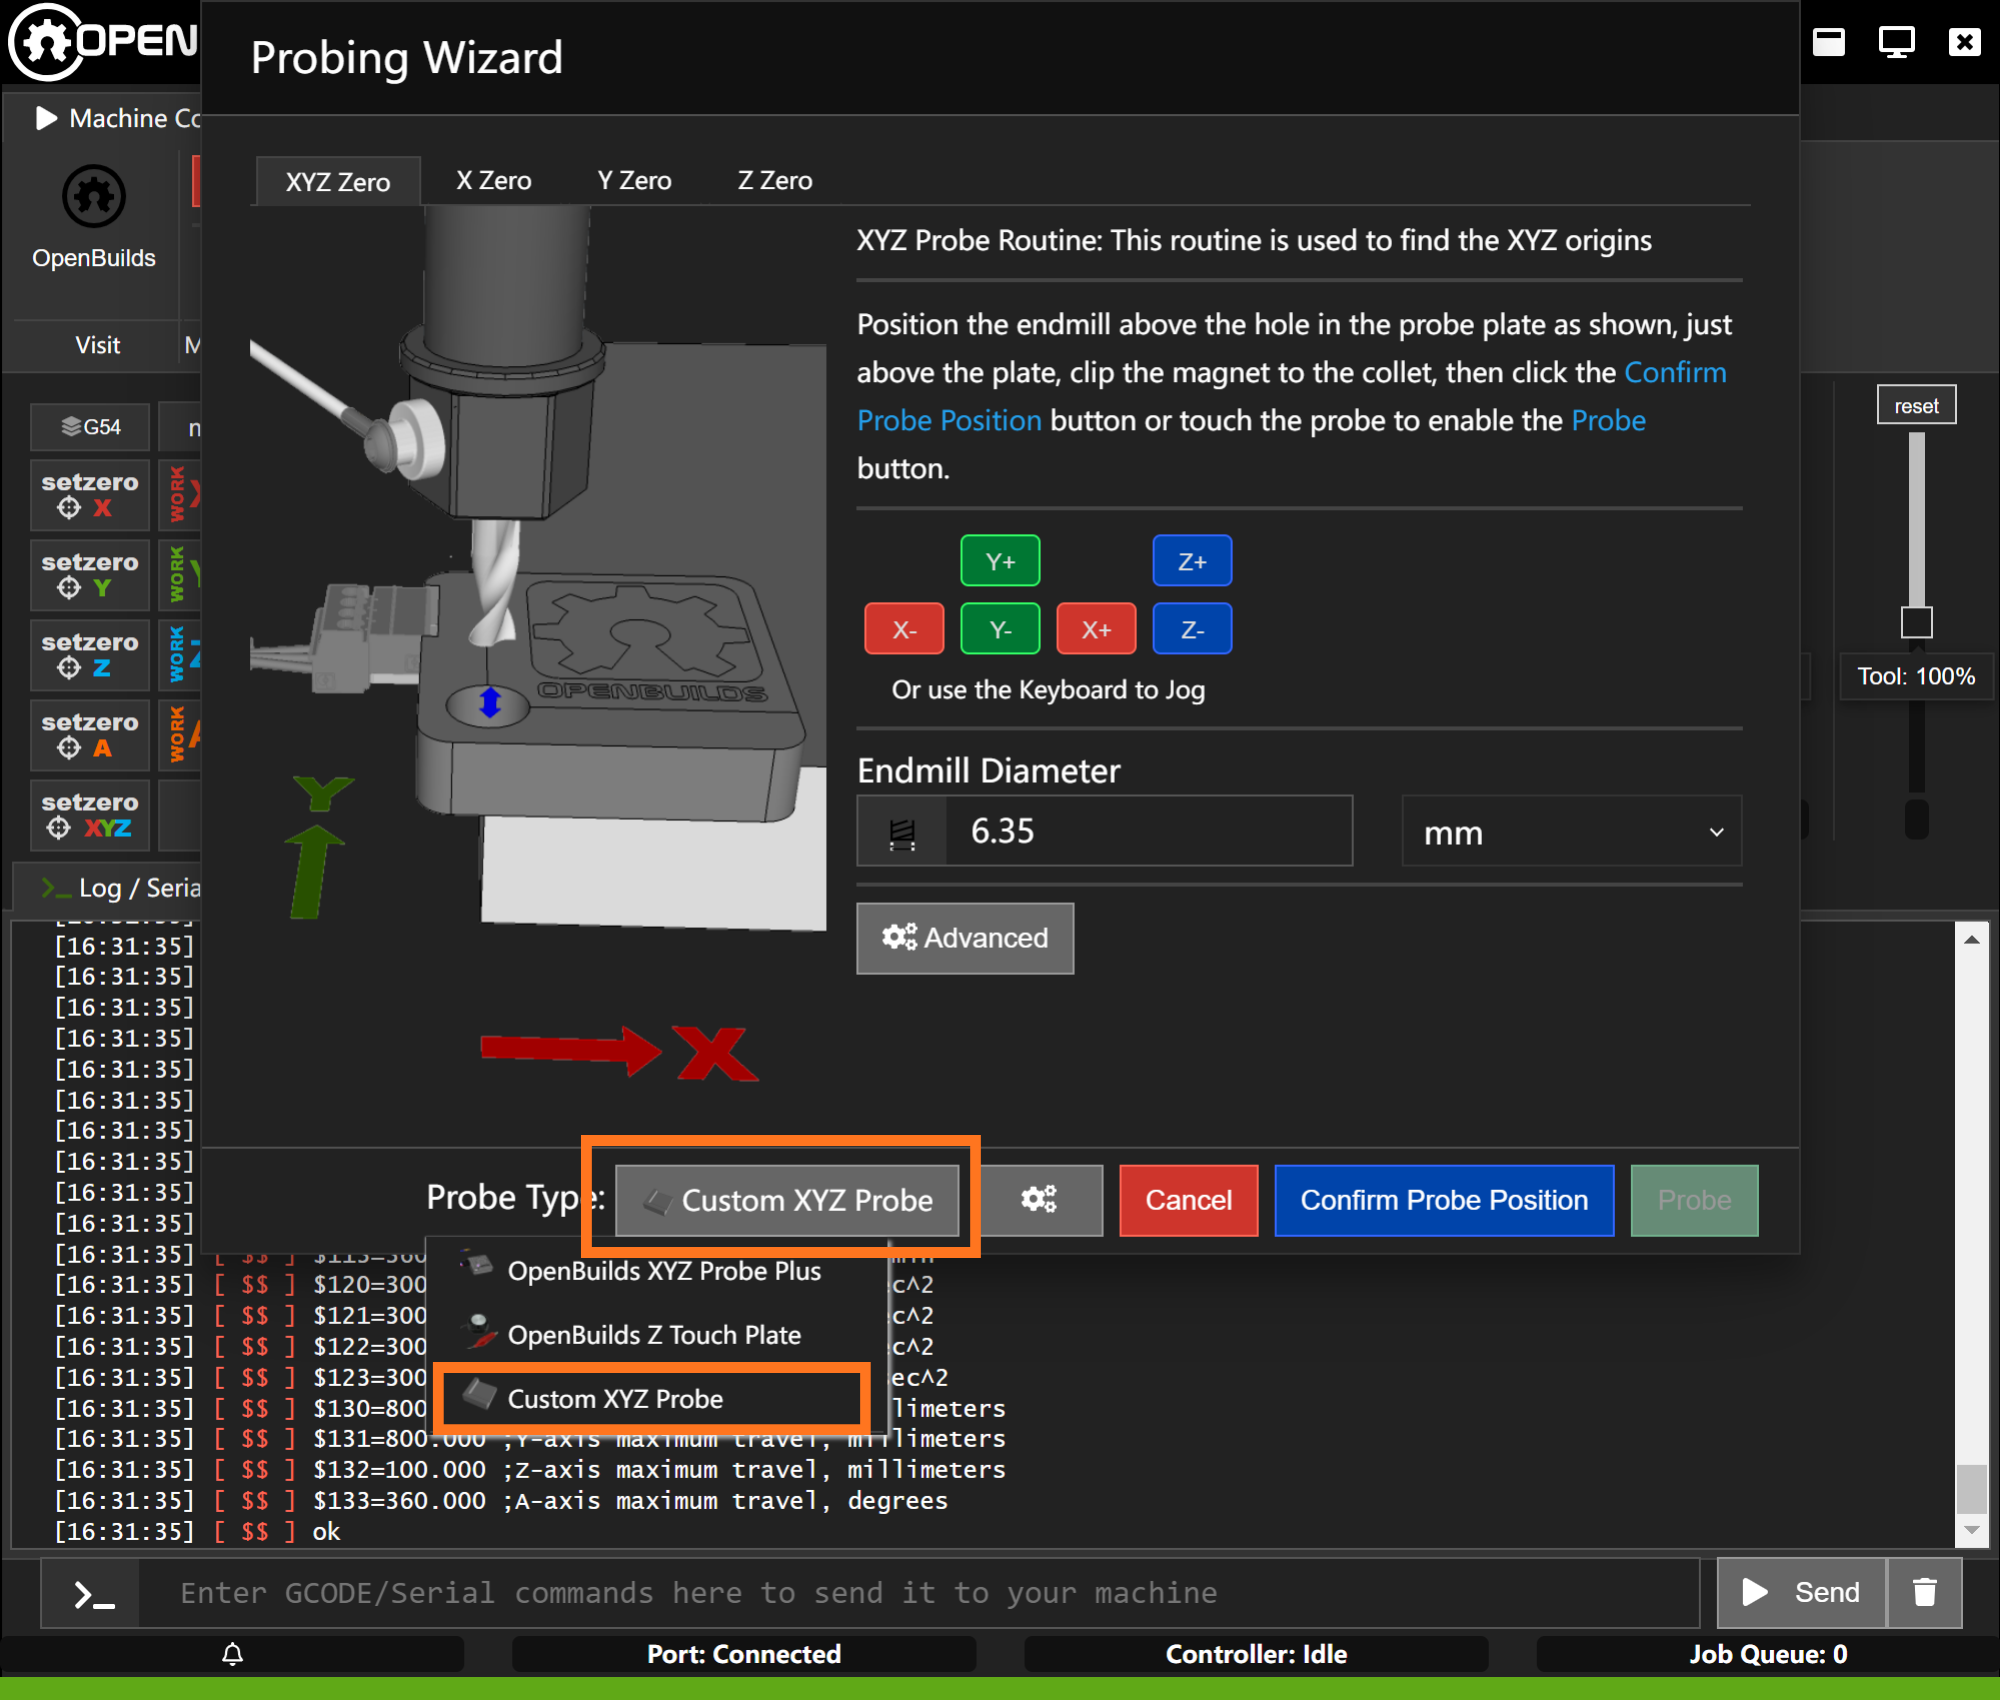
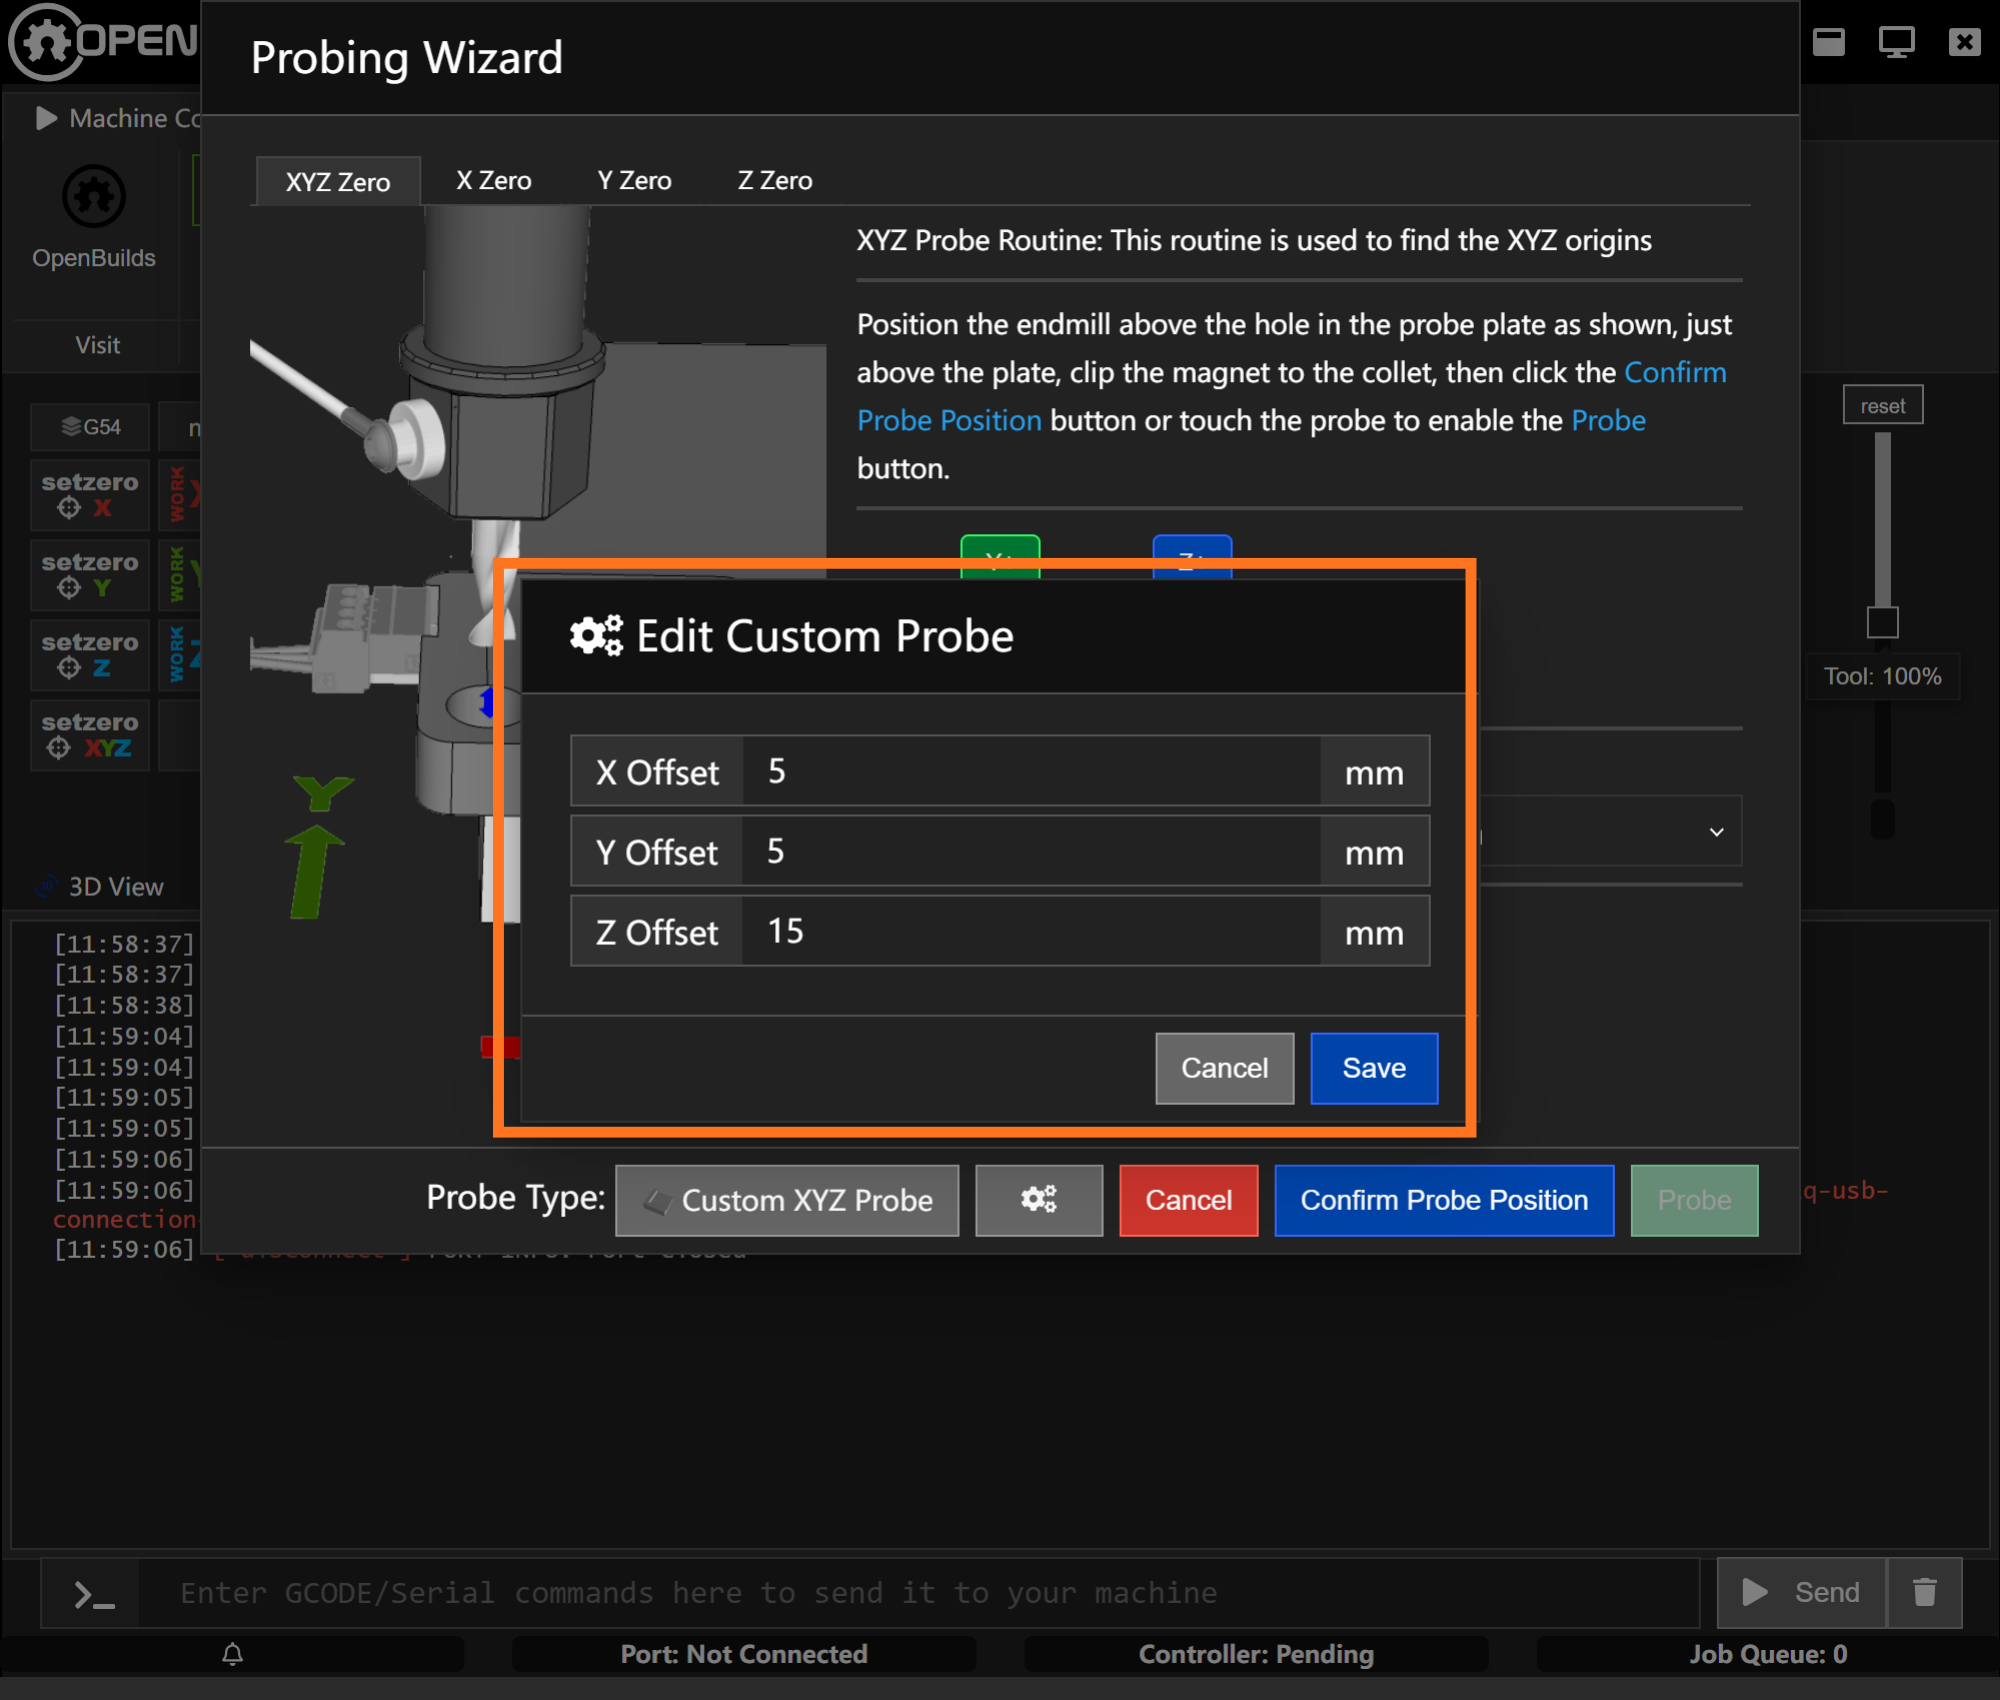
Click Probe → select Custom XYZ Probe as the probe type.
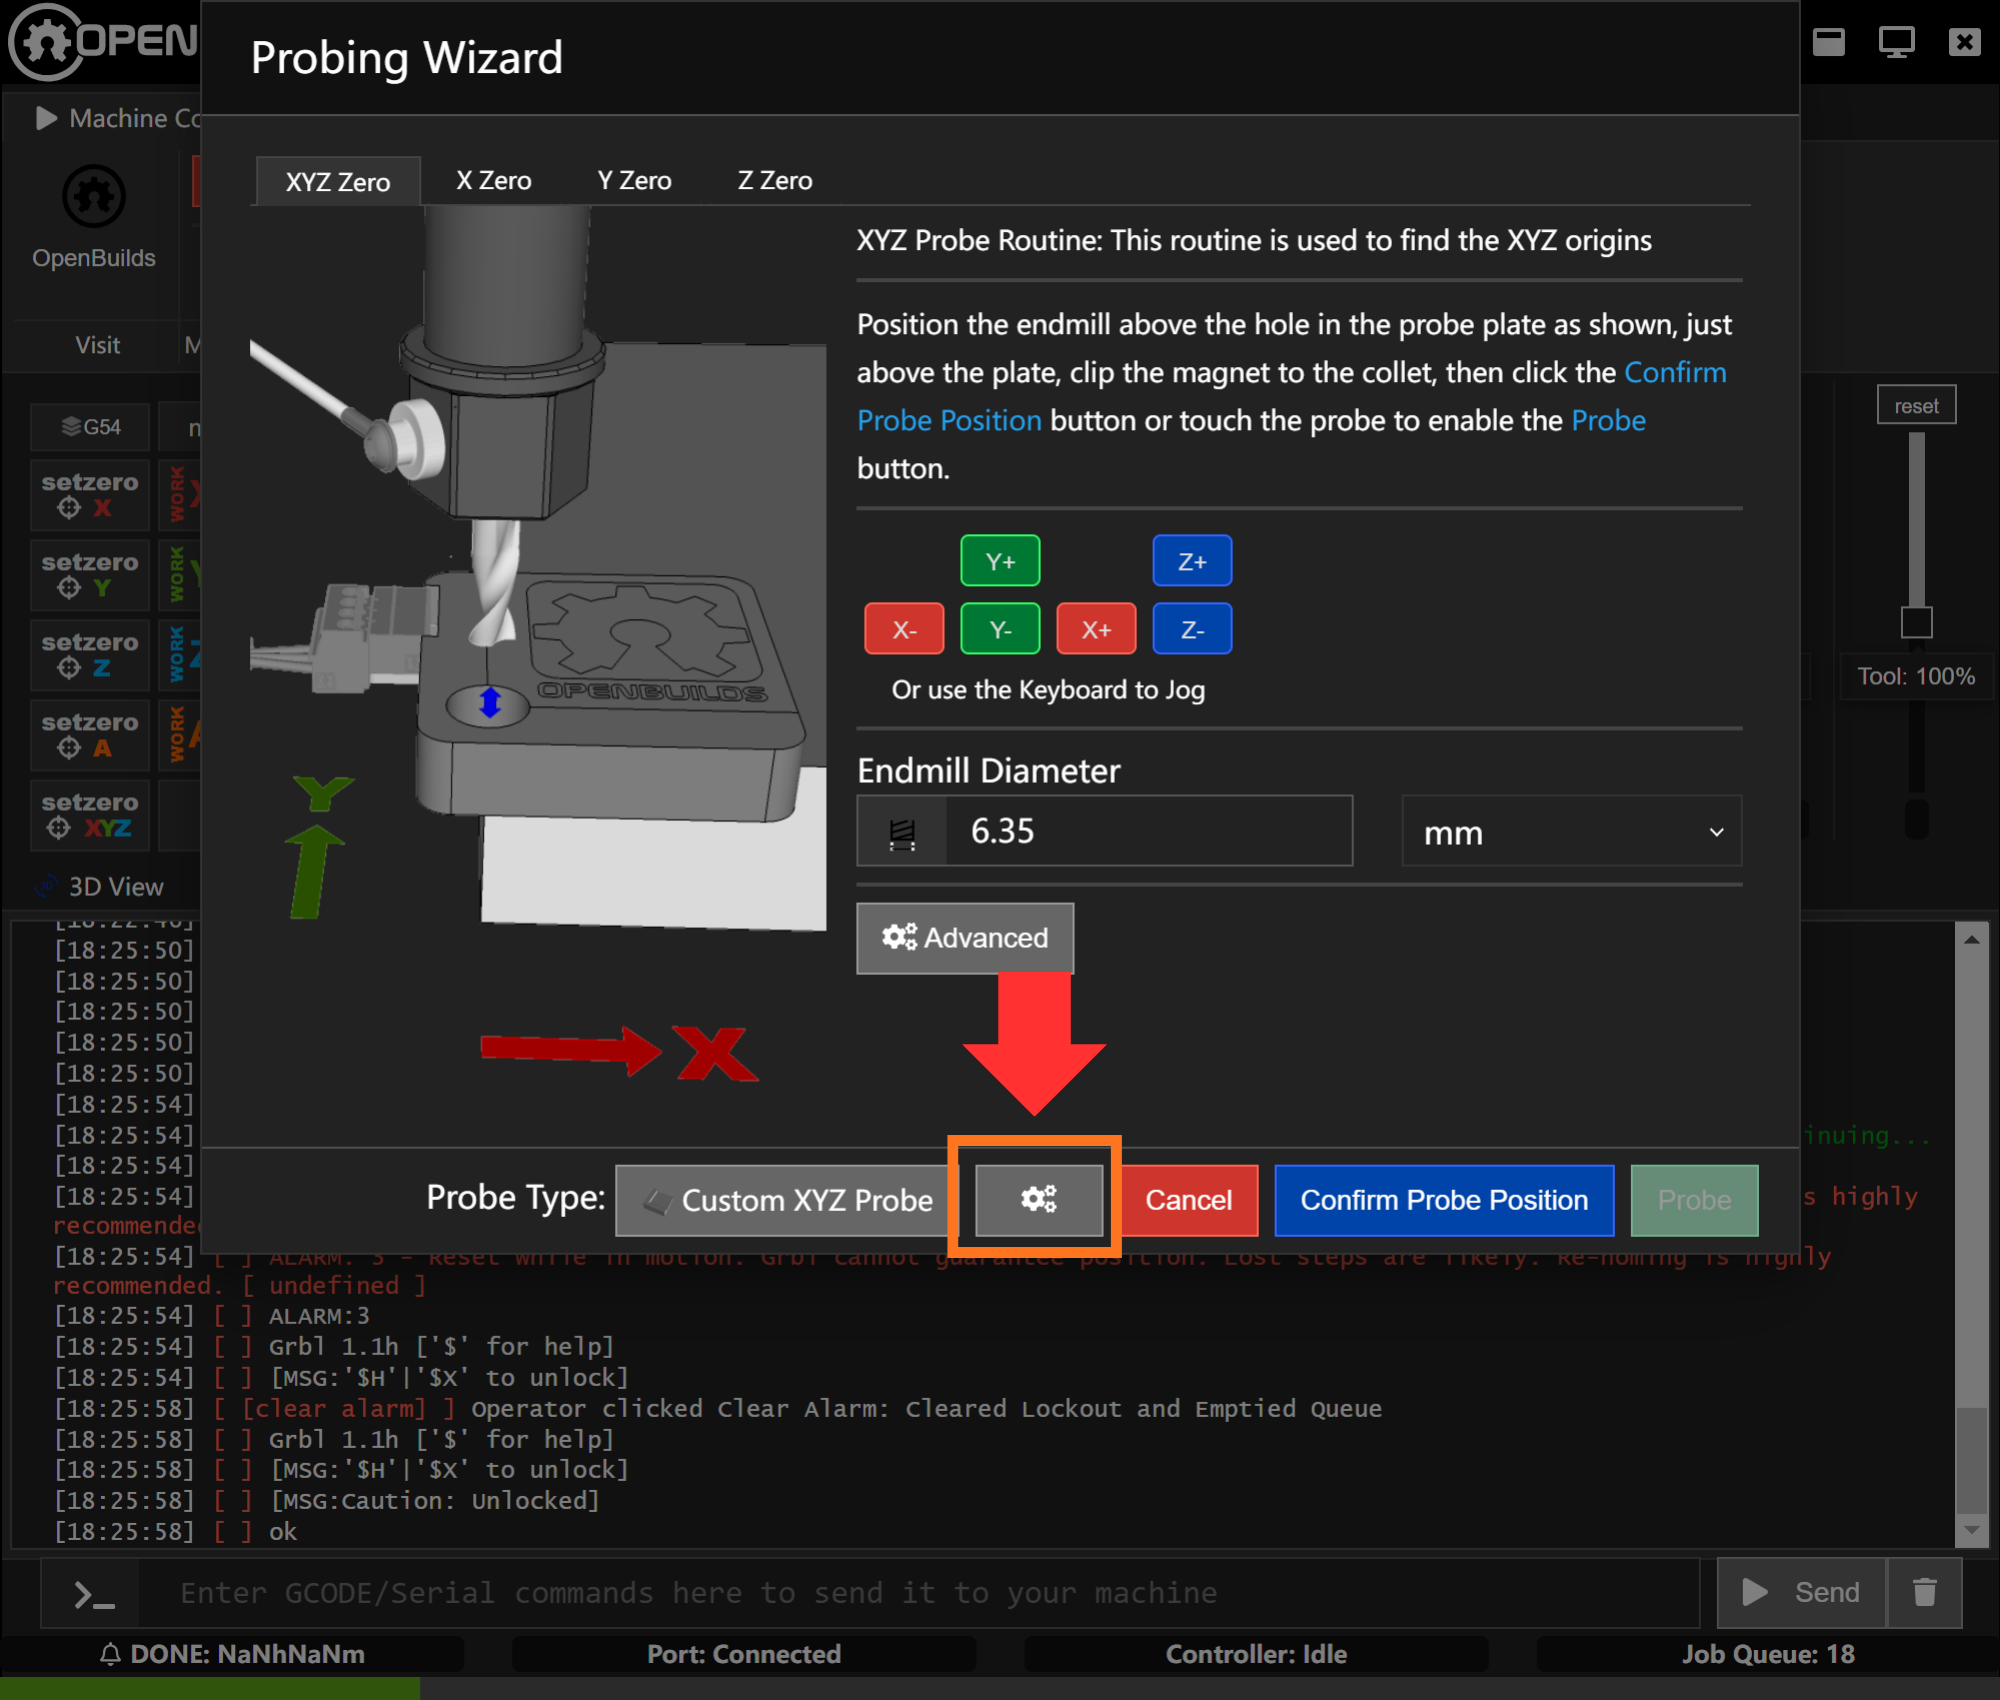
Click Settings, enter your measured Z thickness and XY offset, then click Save.
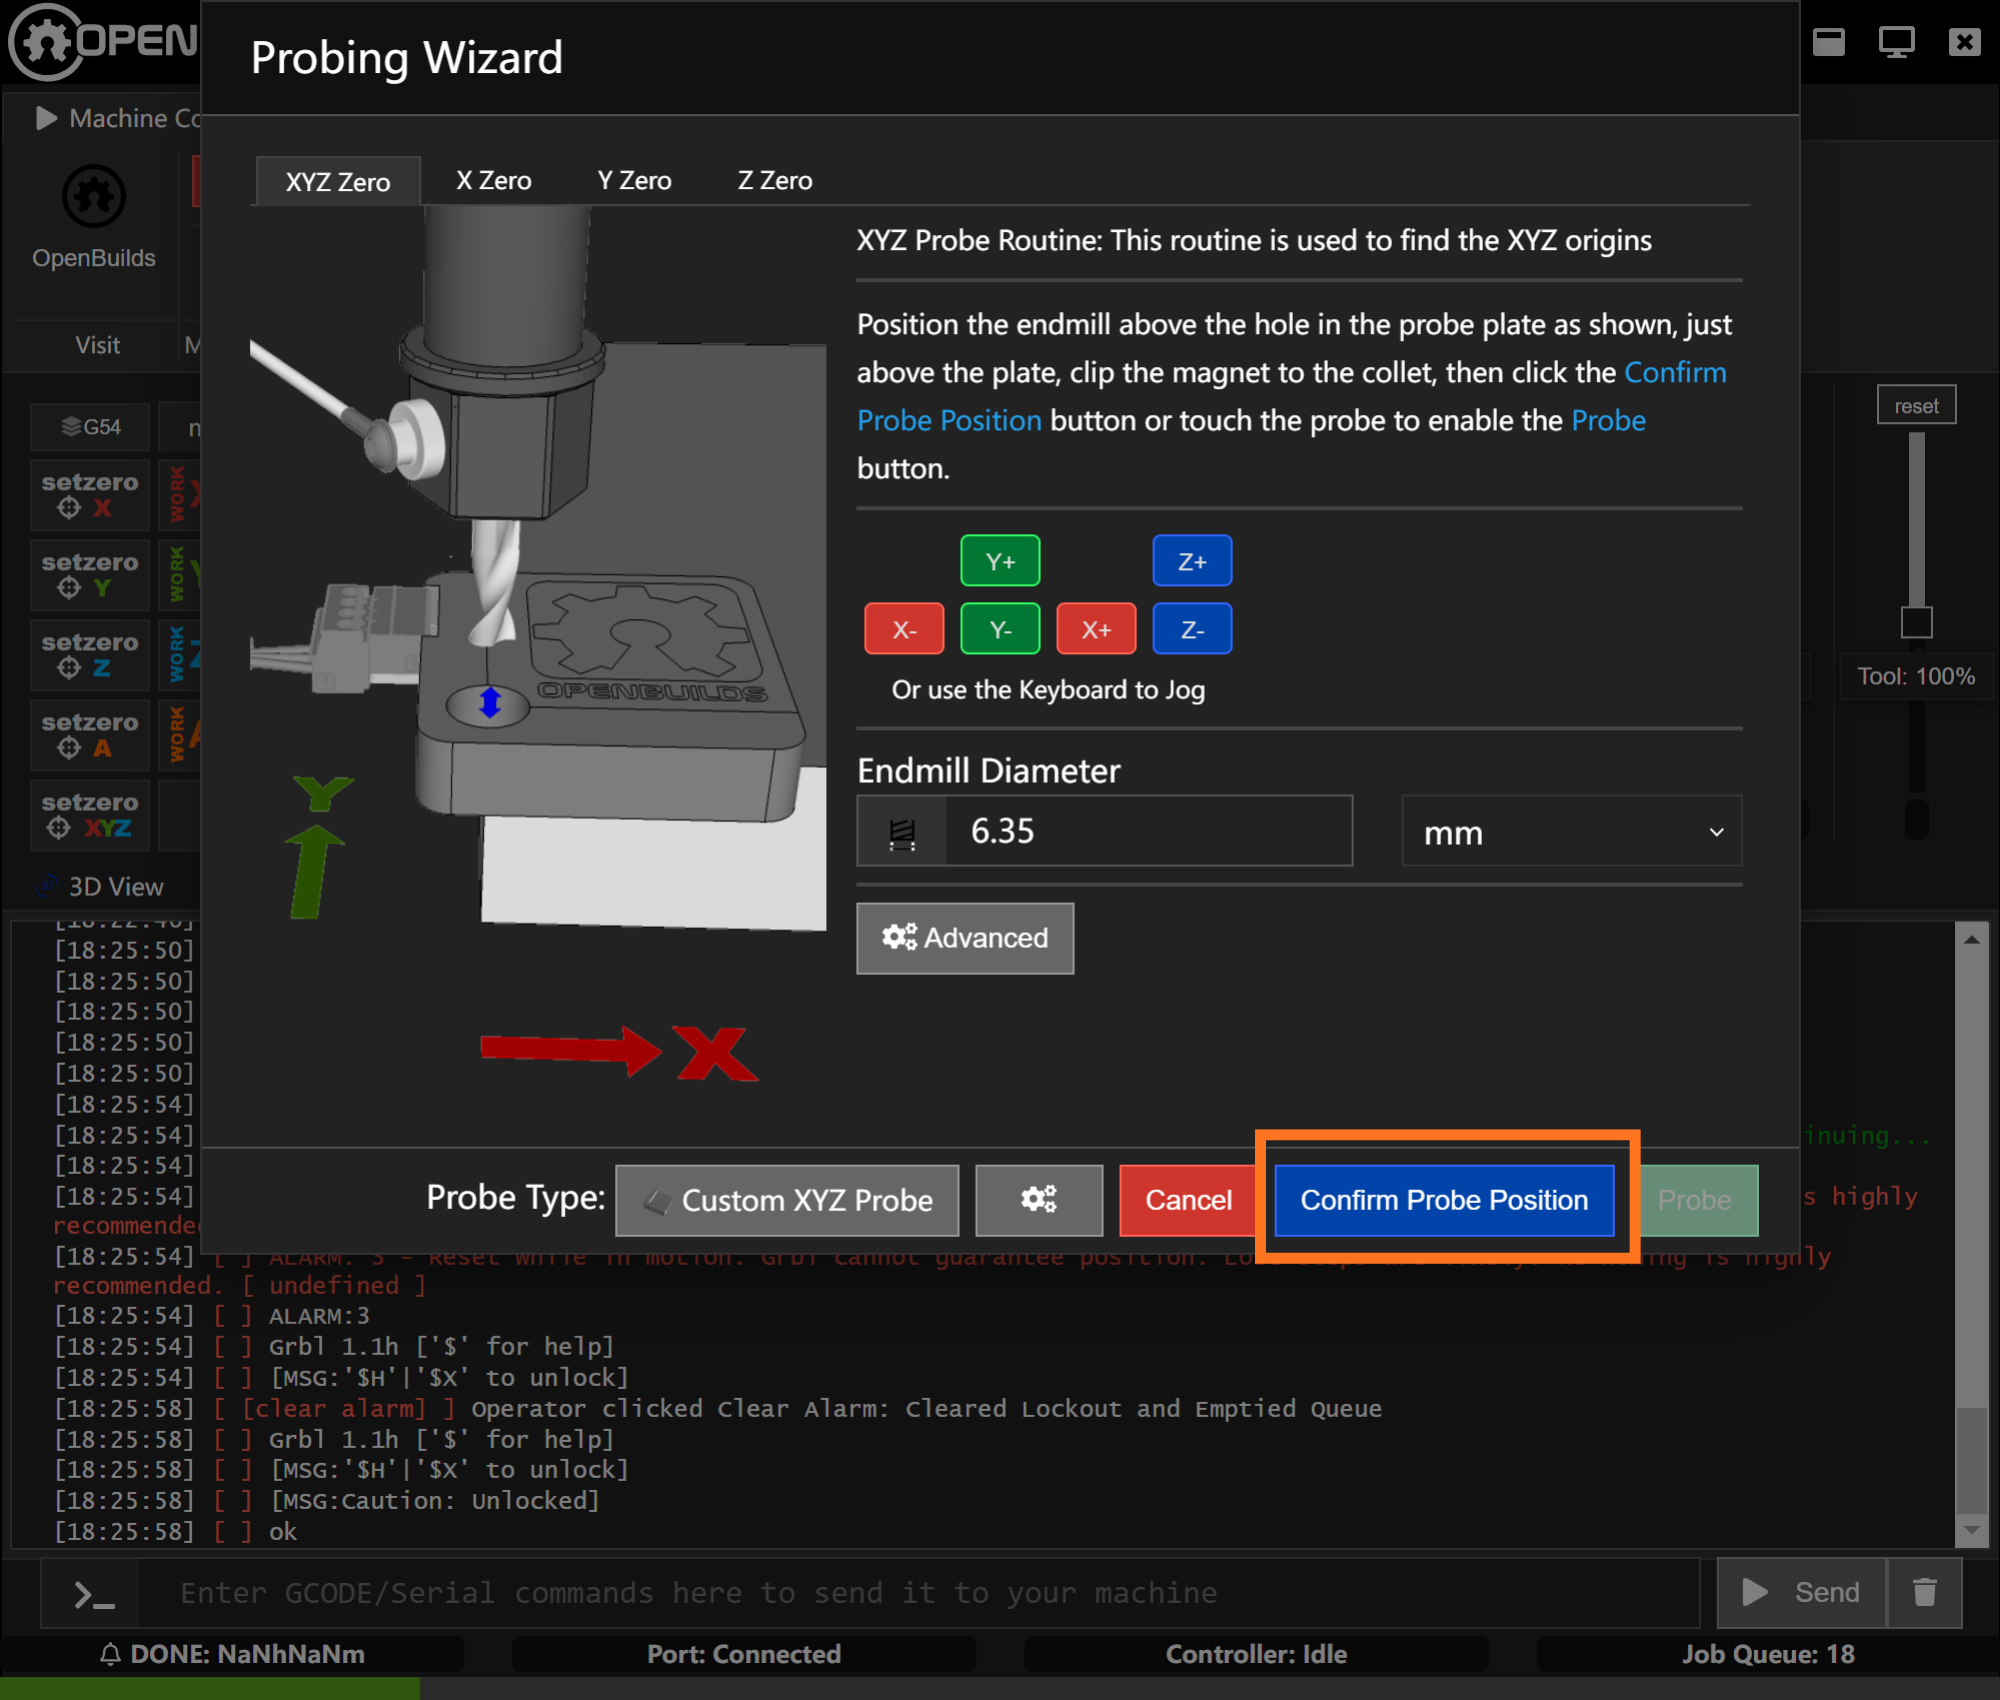
Click Confirm Probe Position to verify the tool is over the probing area.
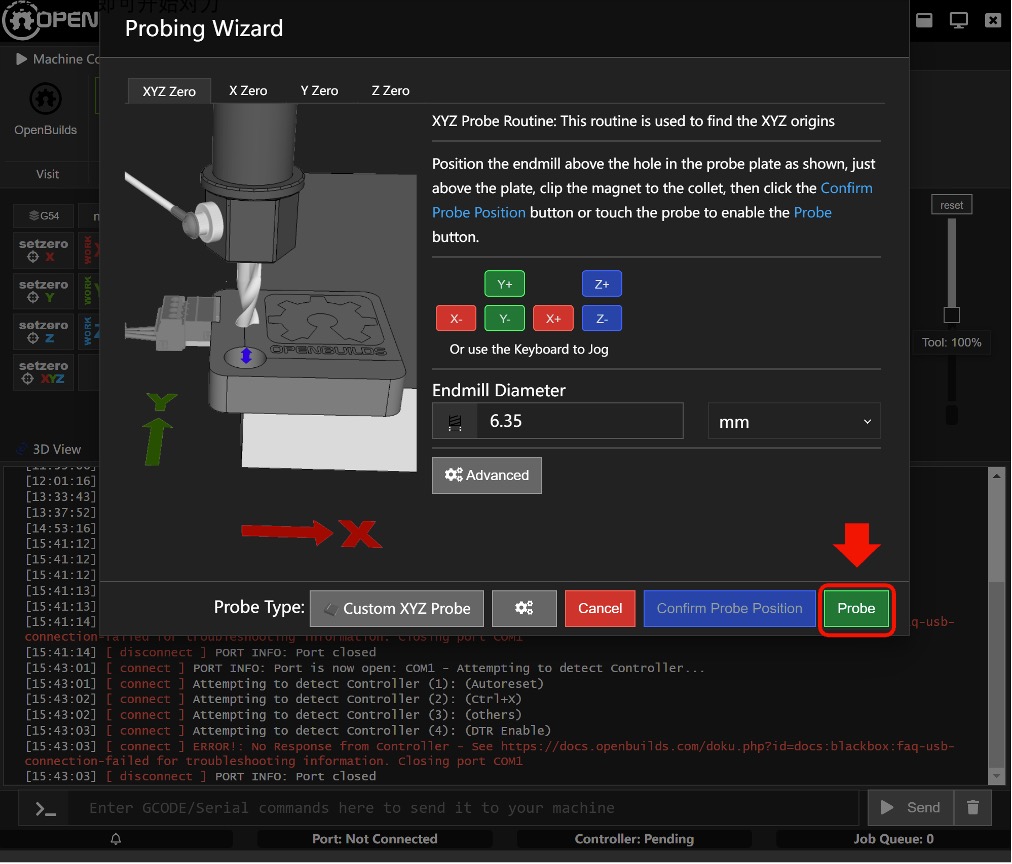
Wait for the Probe button to become active, then click to start.
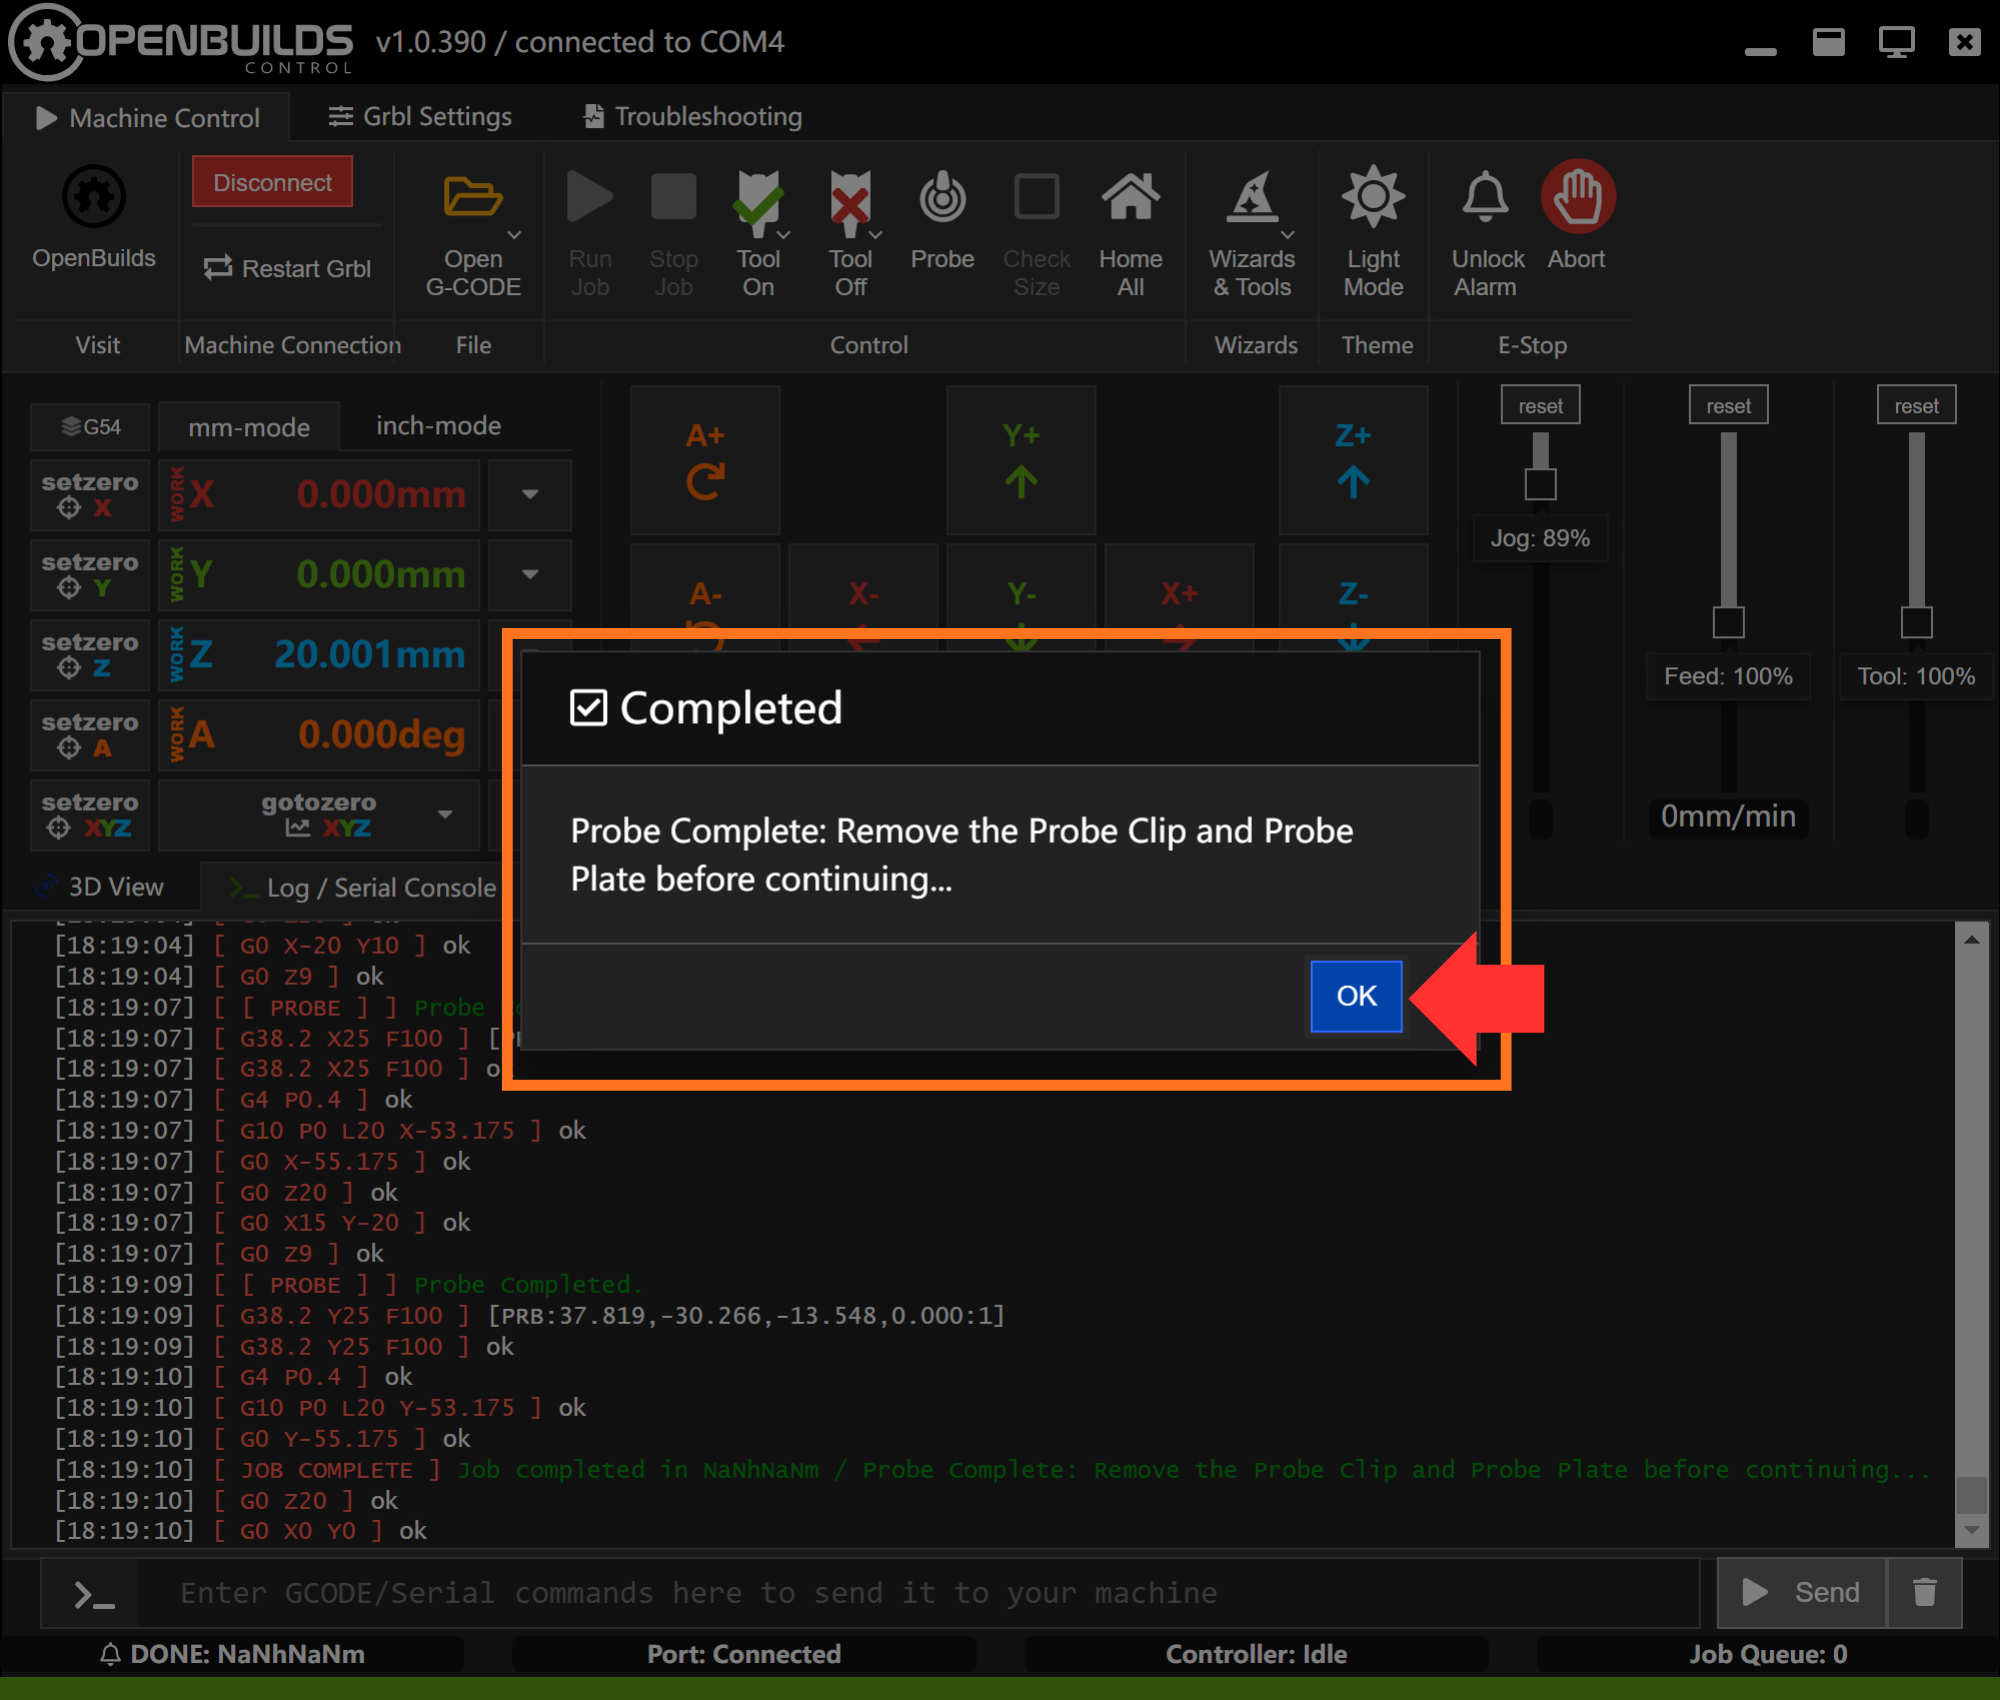
A pop‑up will indicate successful completion.
▍gSender
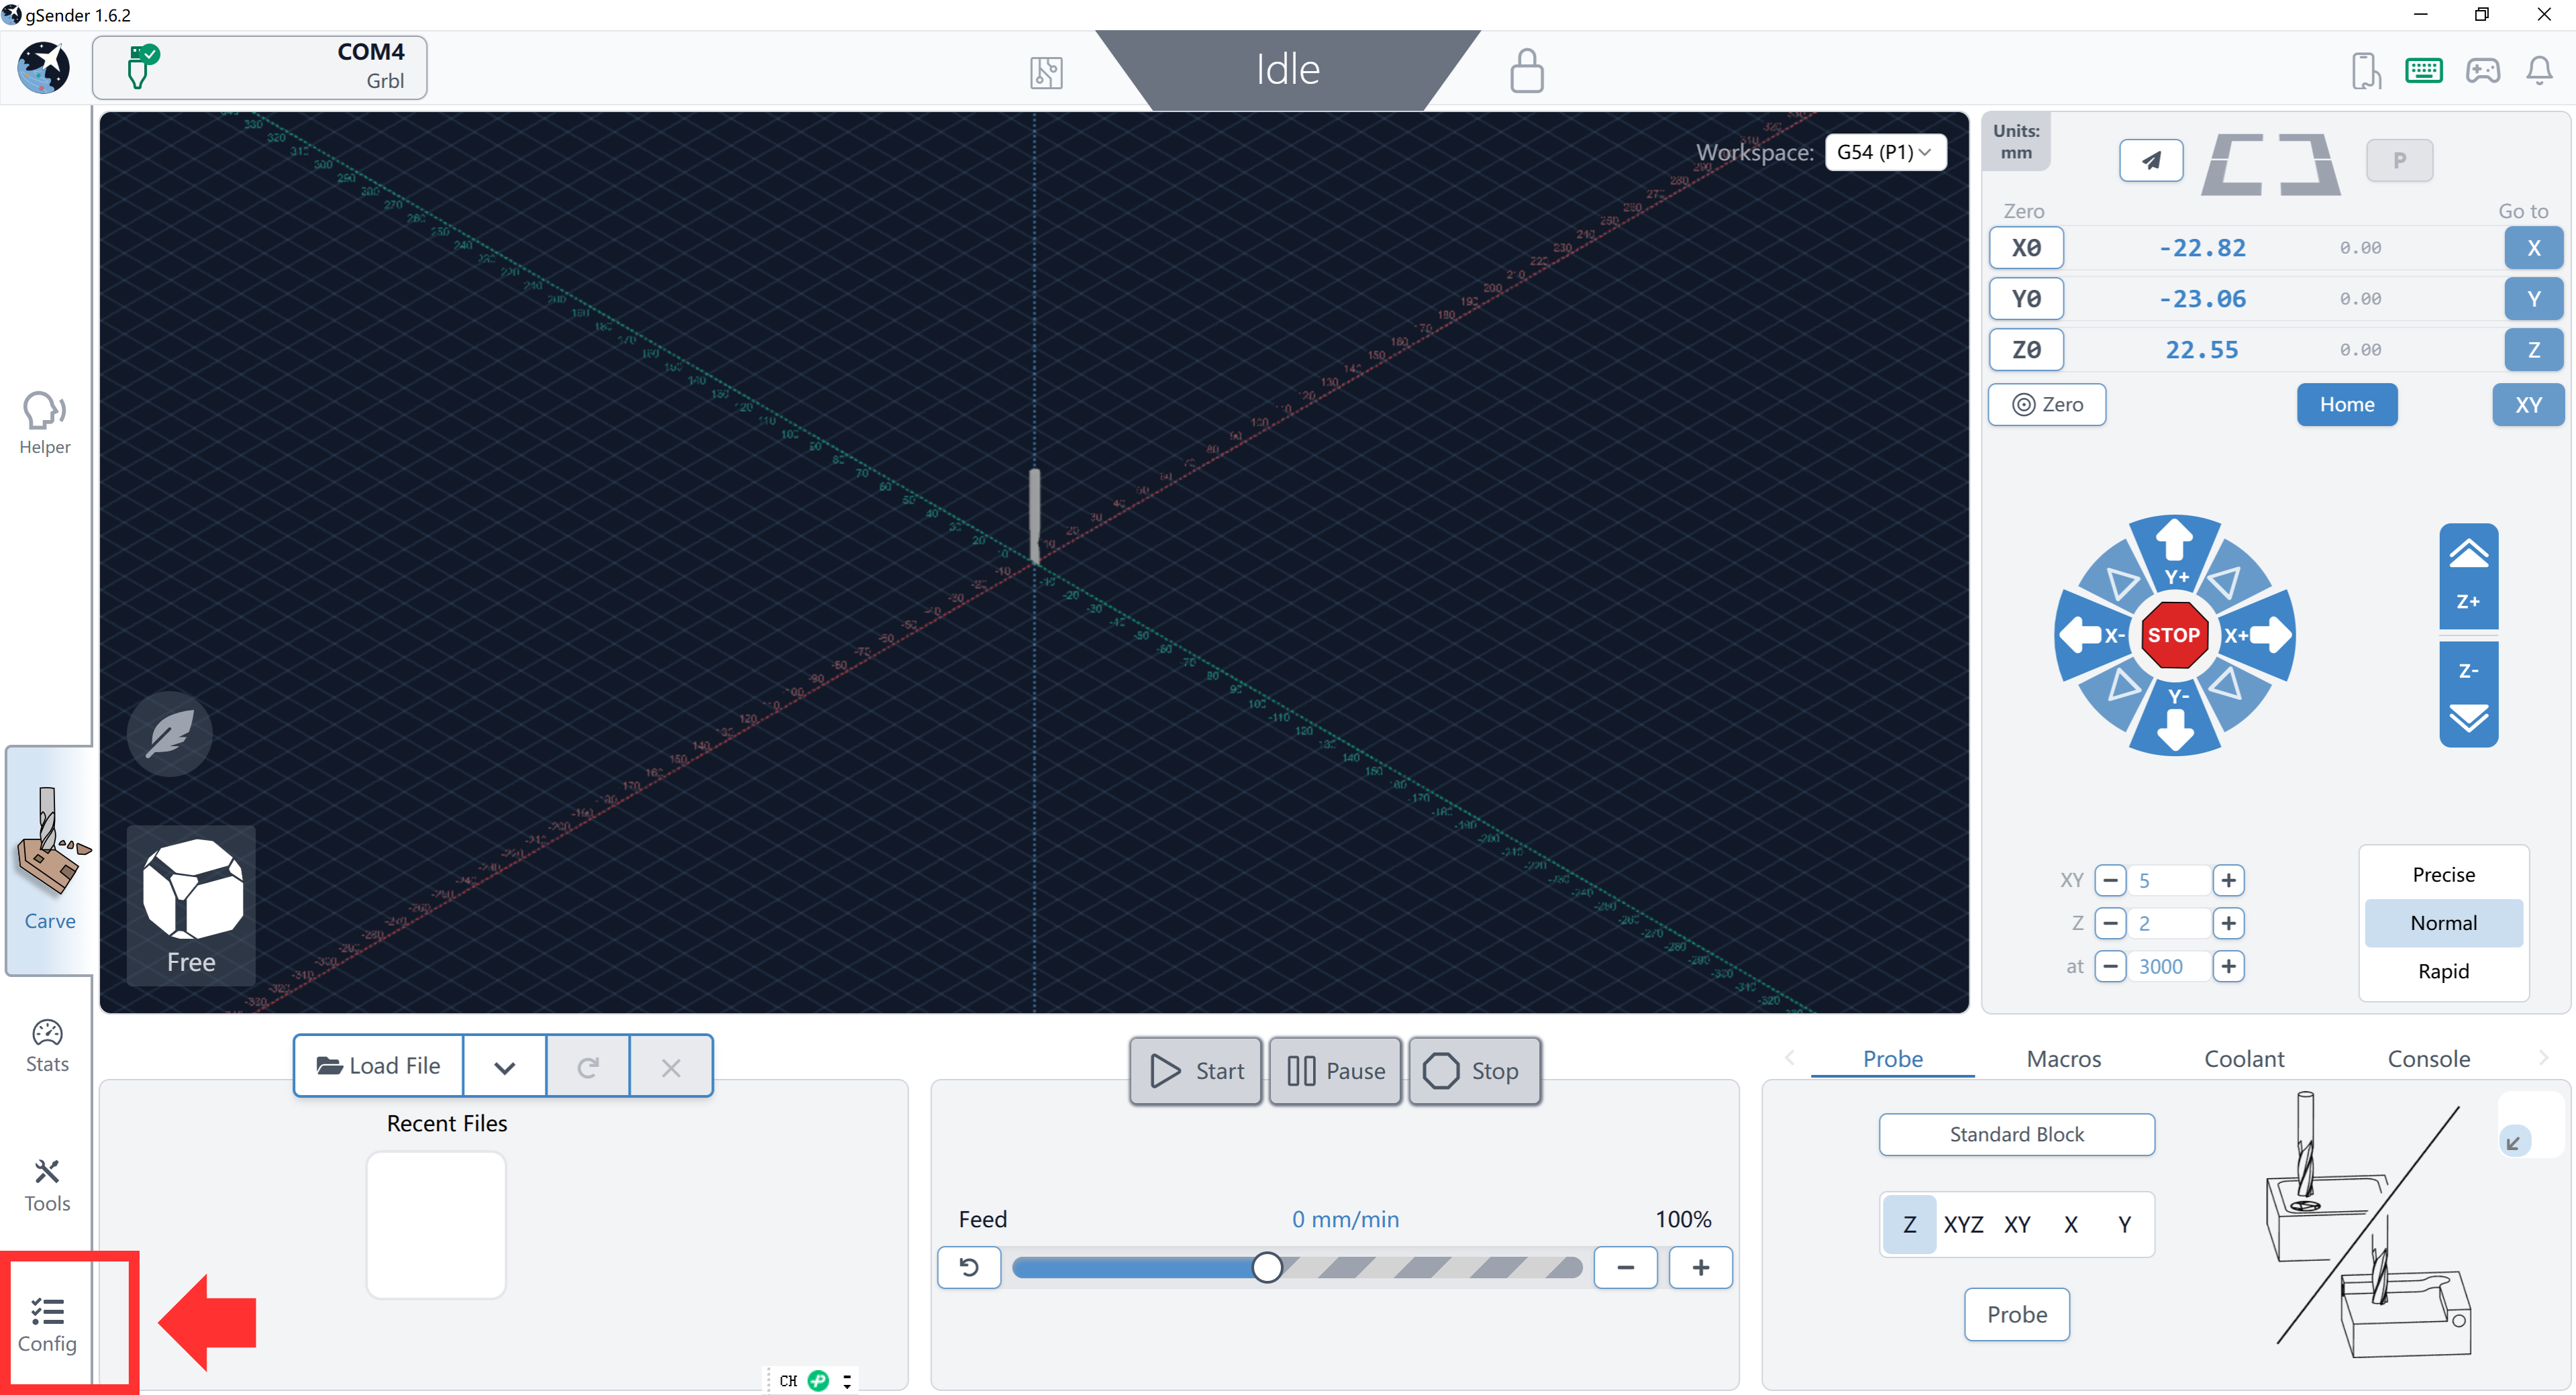
Click the Config button at the lower‑left → go to the Probe settings page.
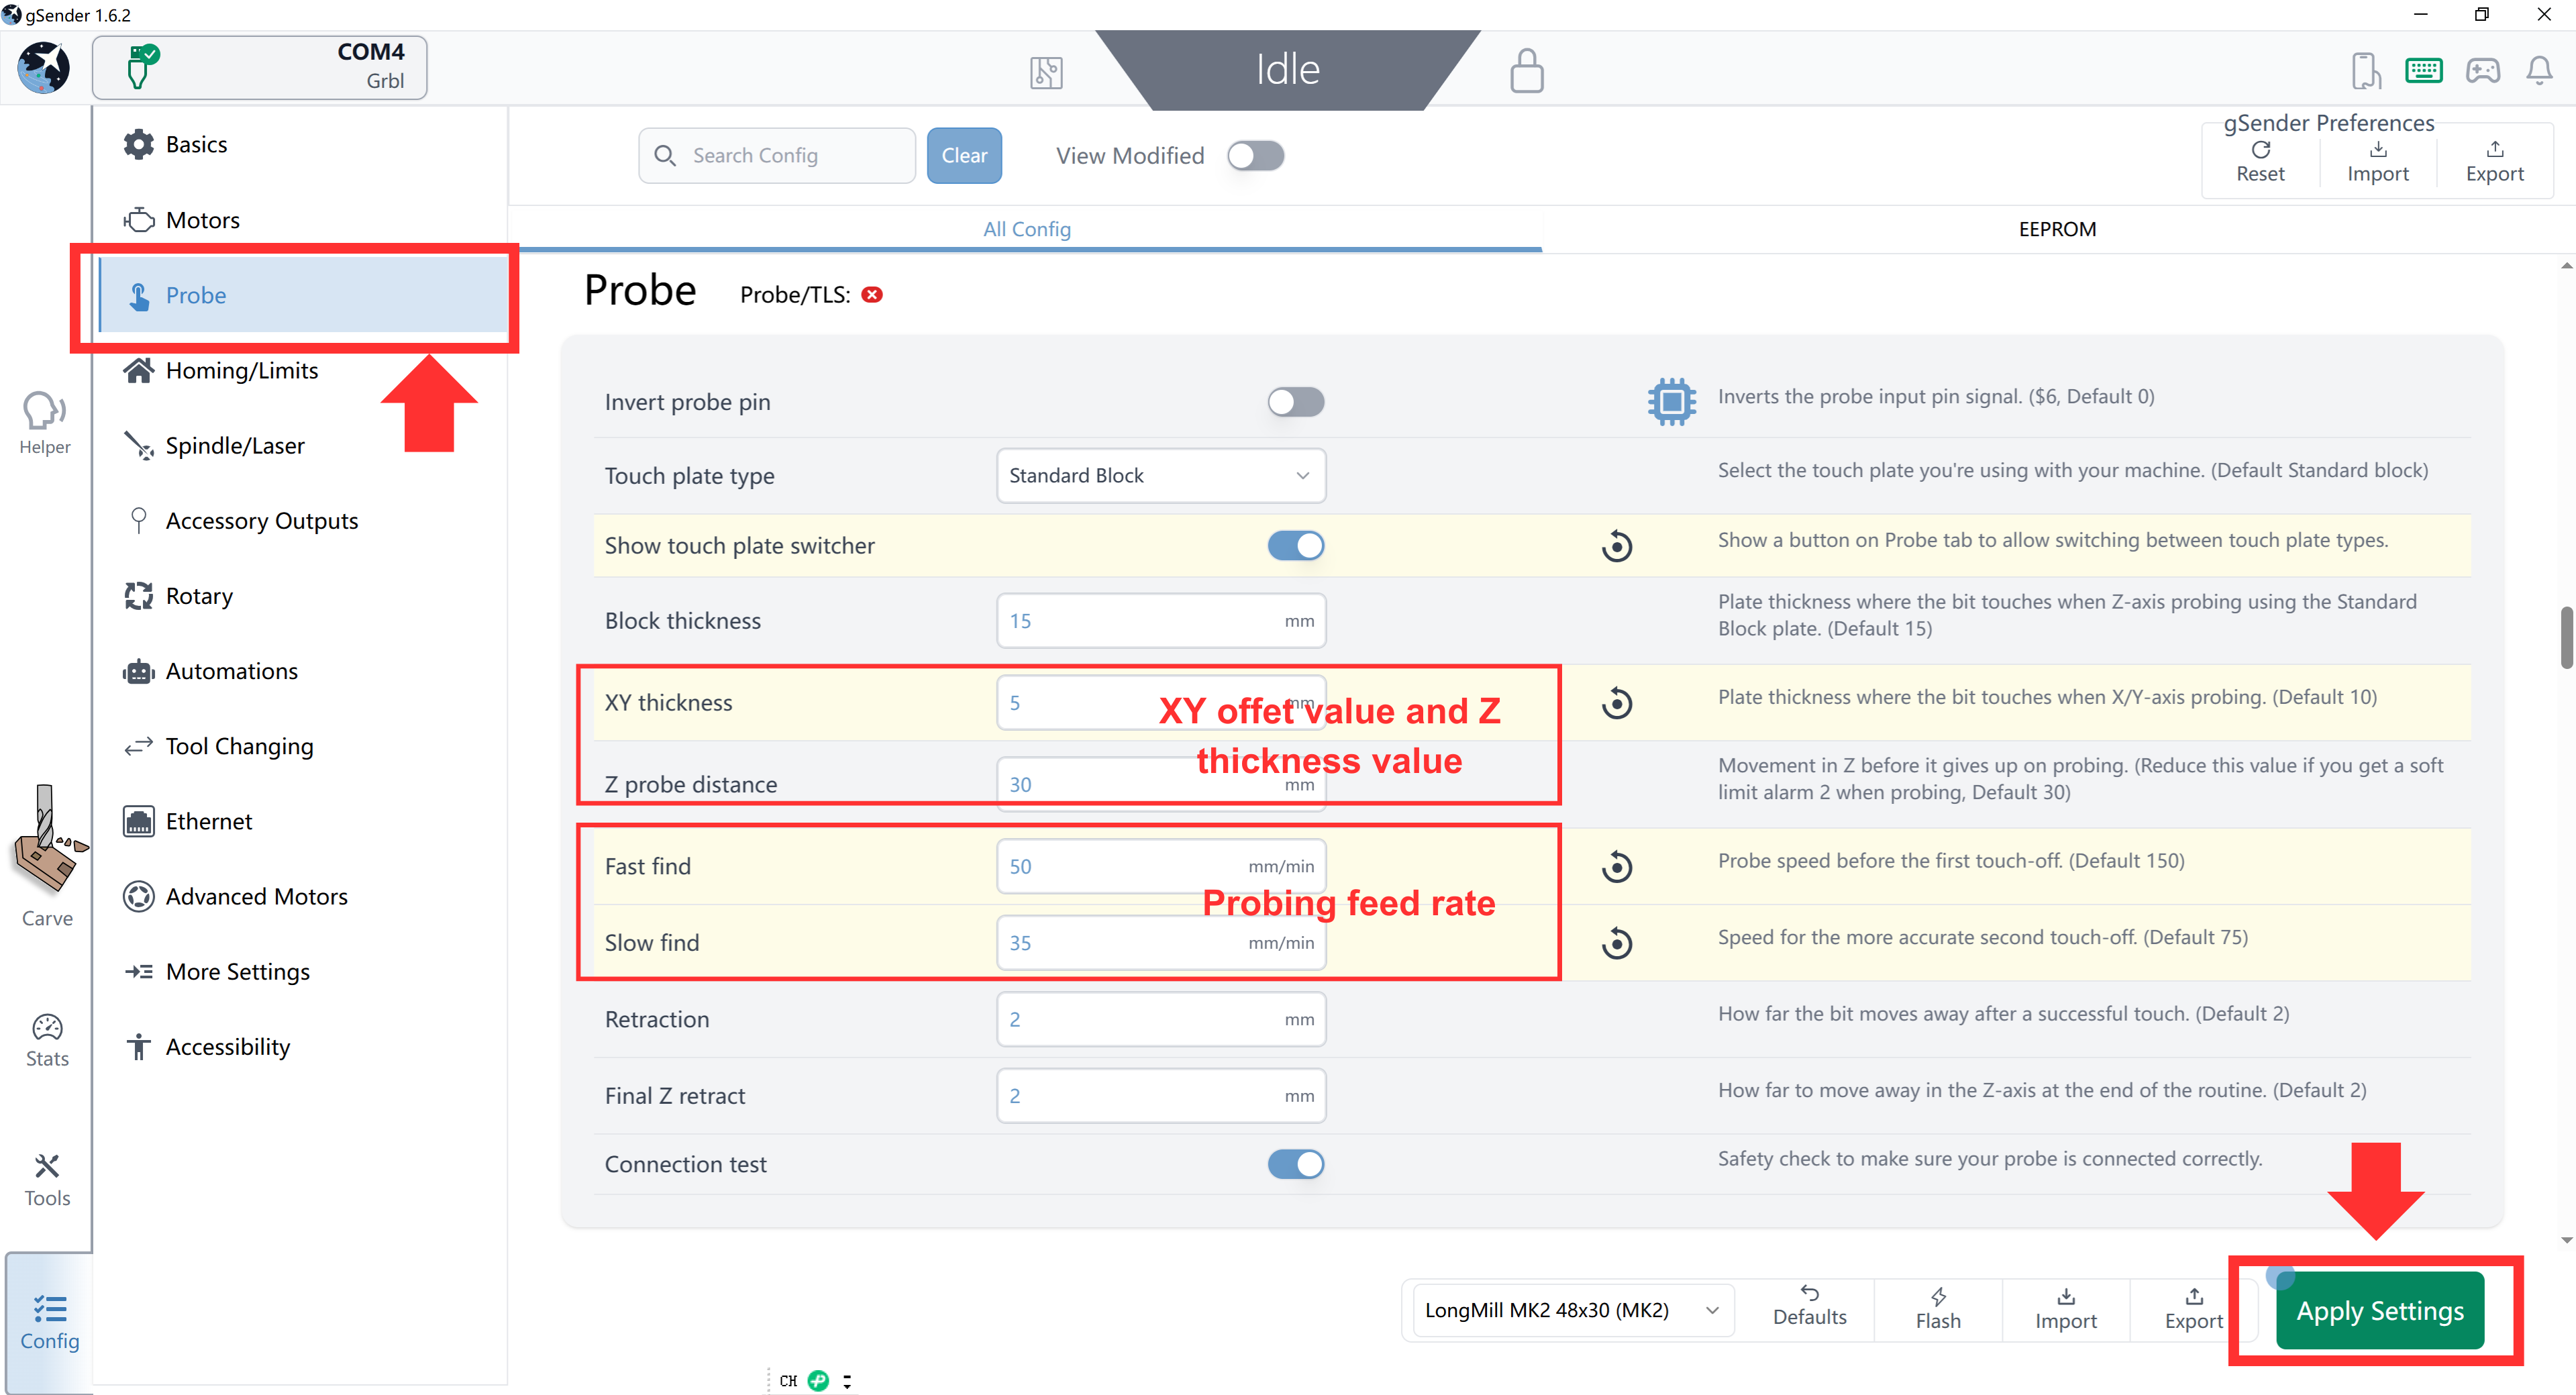
Enter the measured Z thickness and XY offset, and reduce the probe feed rate to 35-50 mm/min.
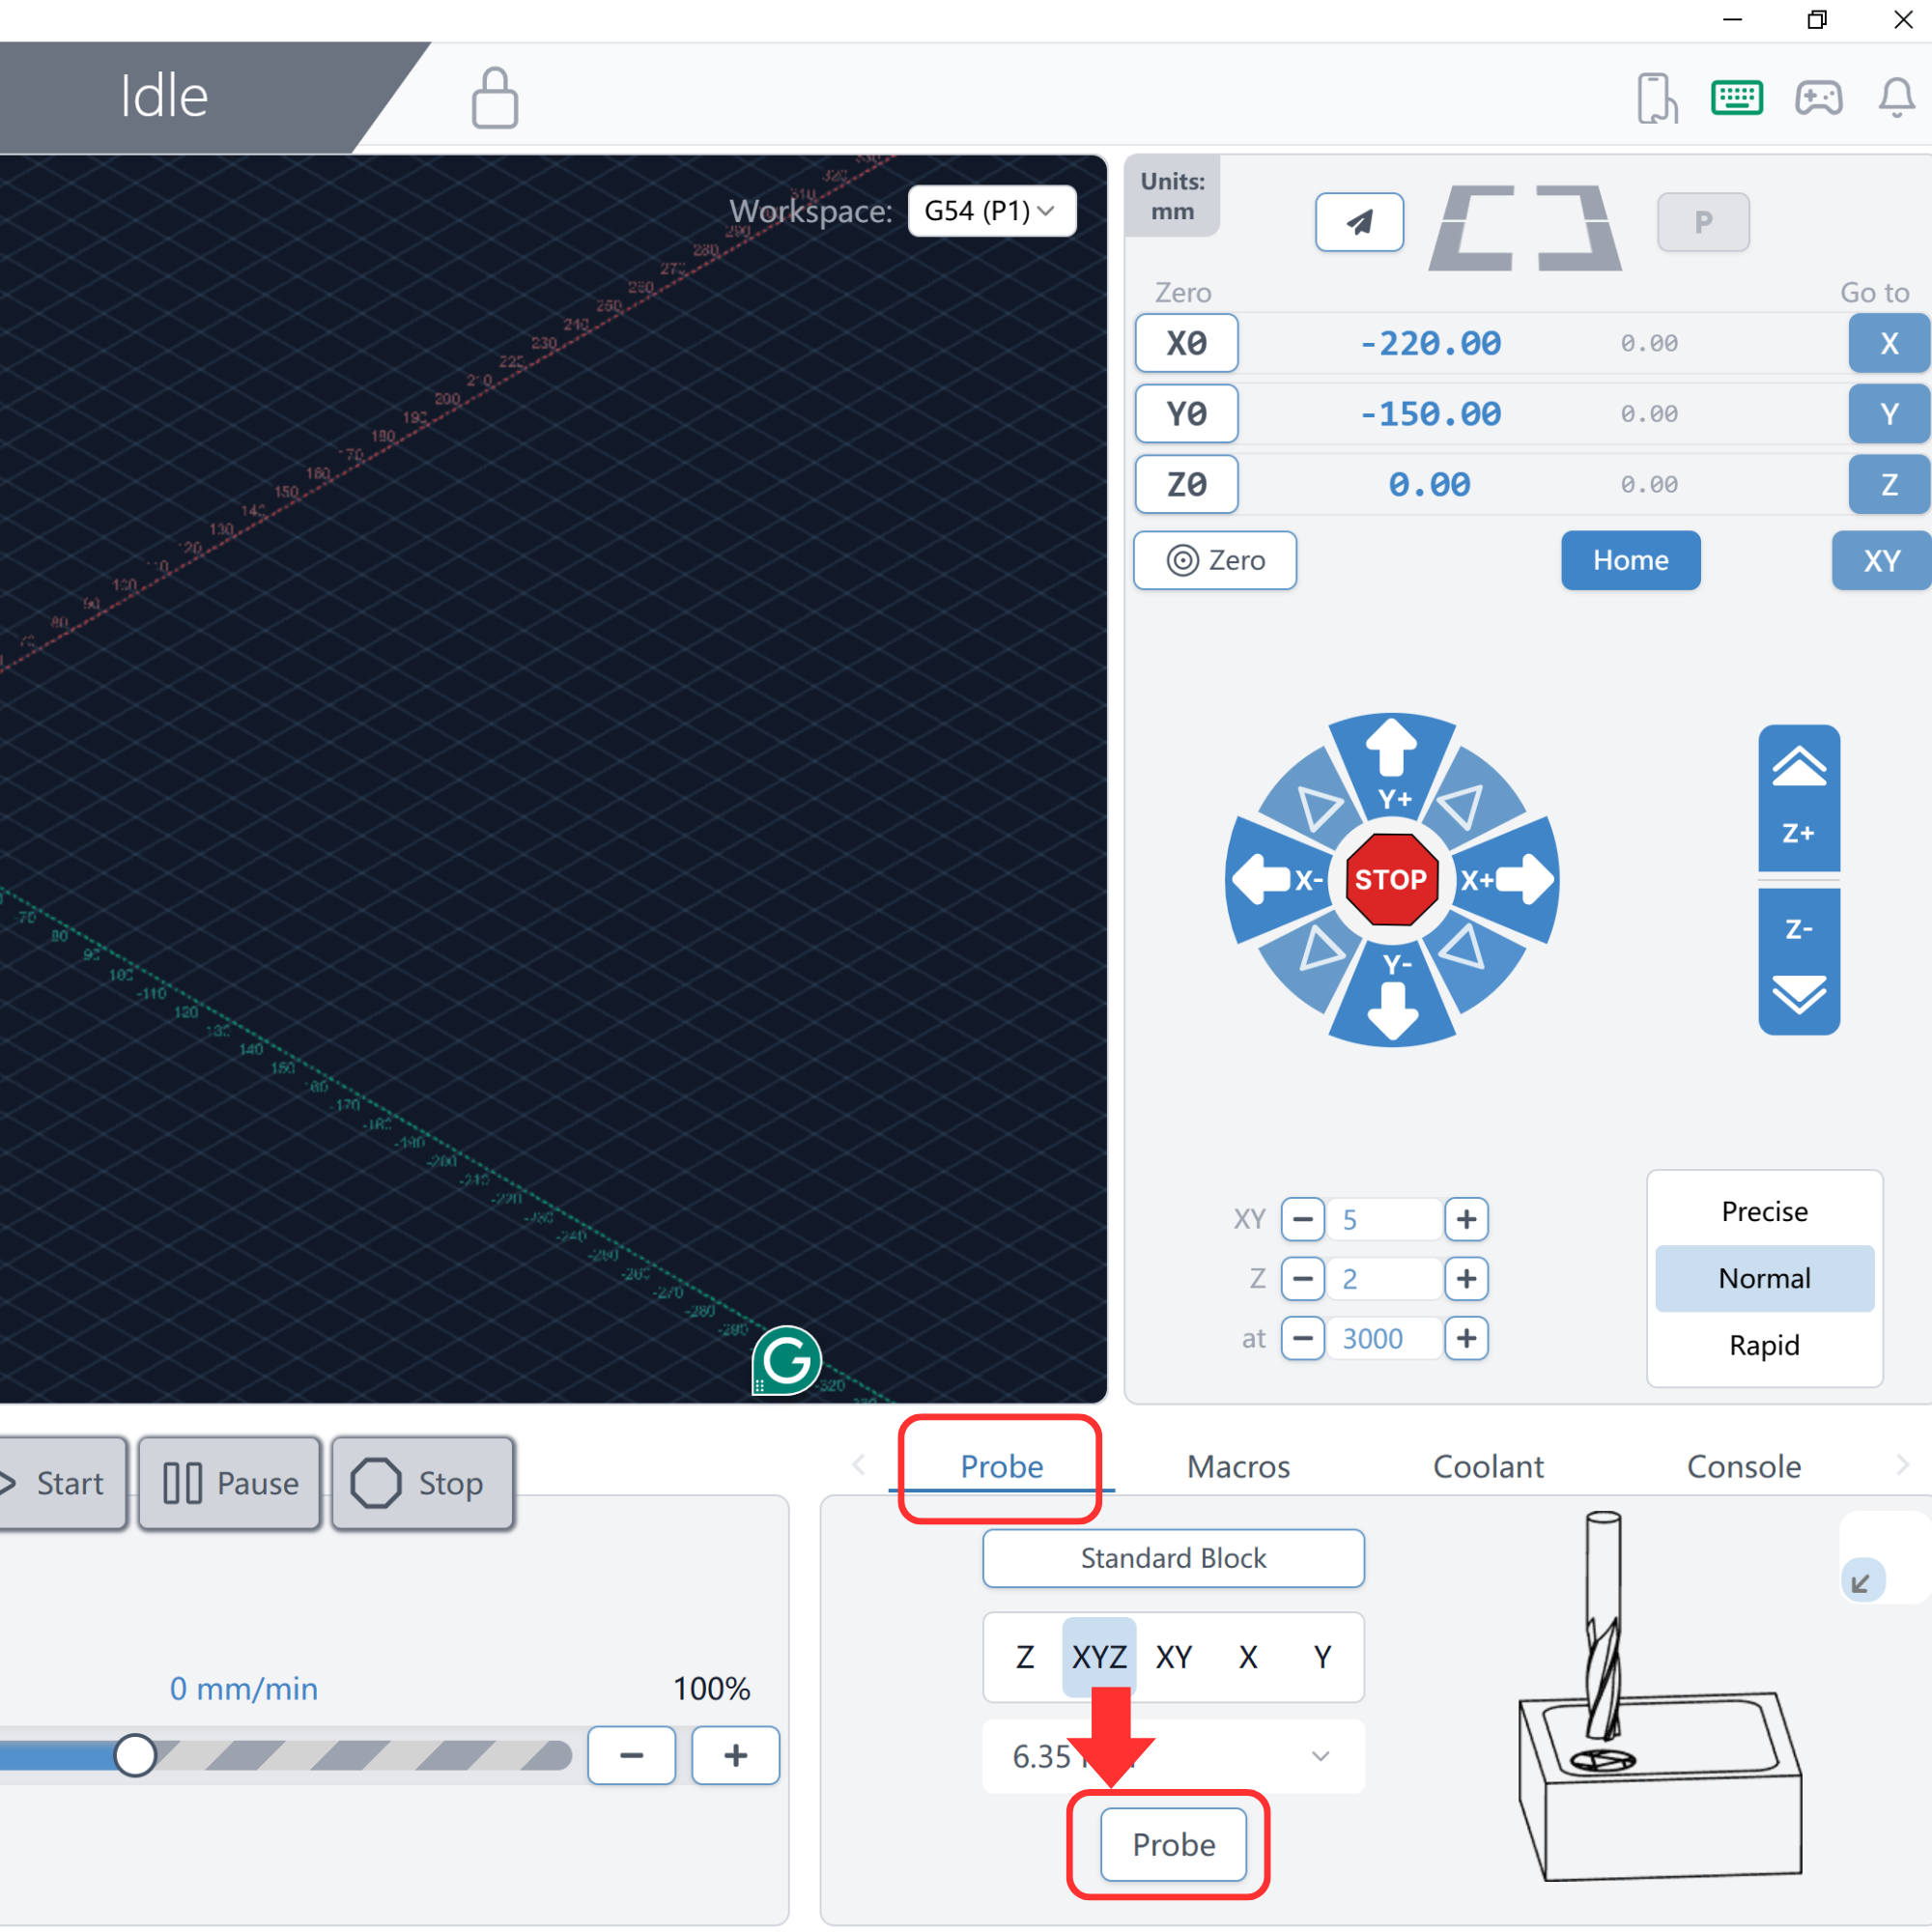
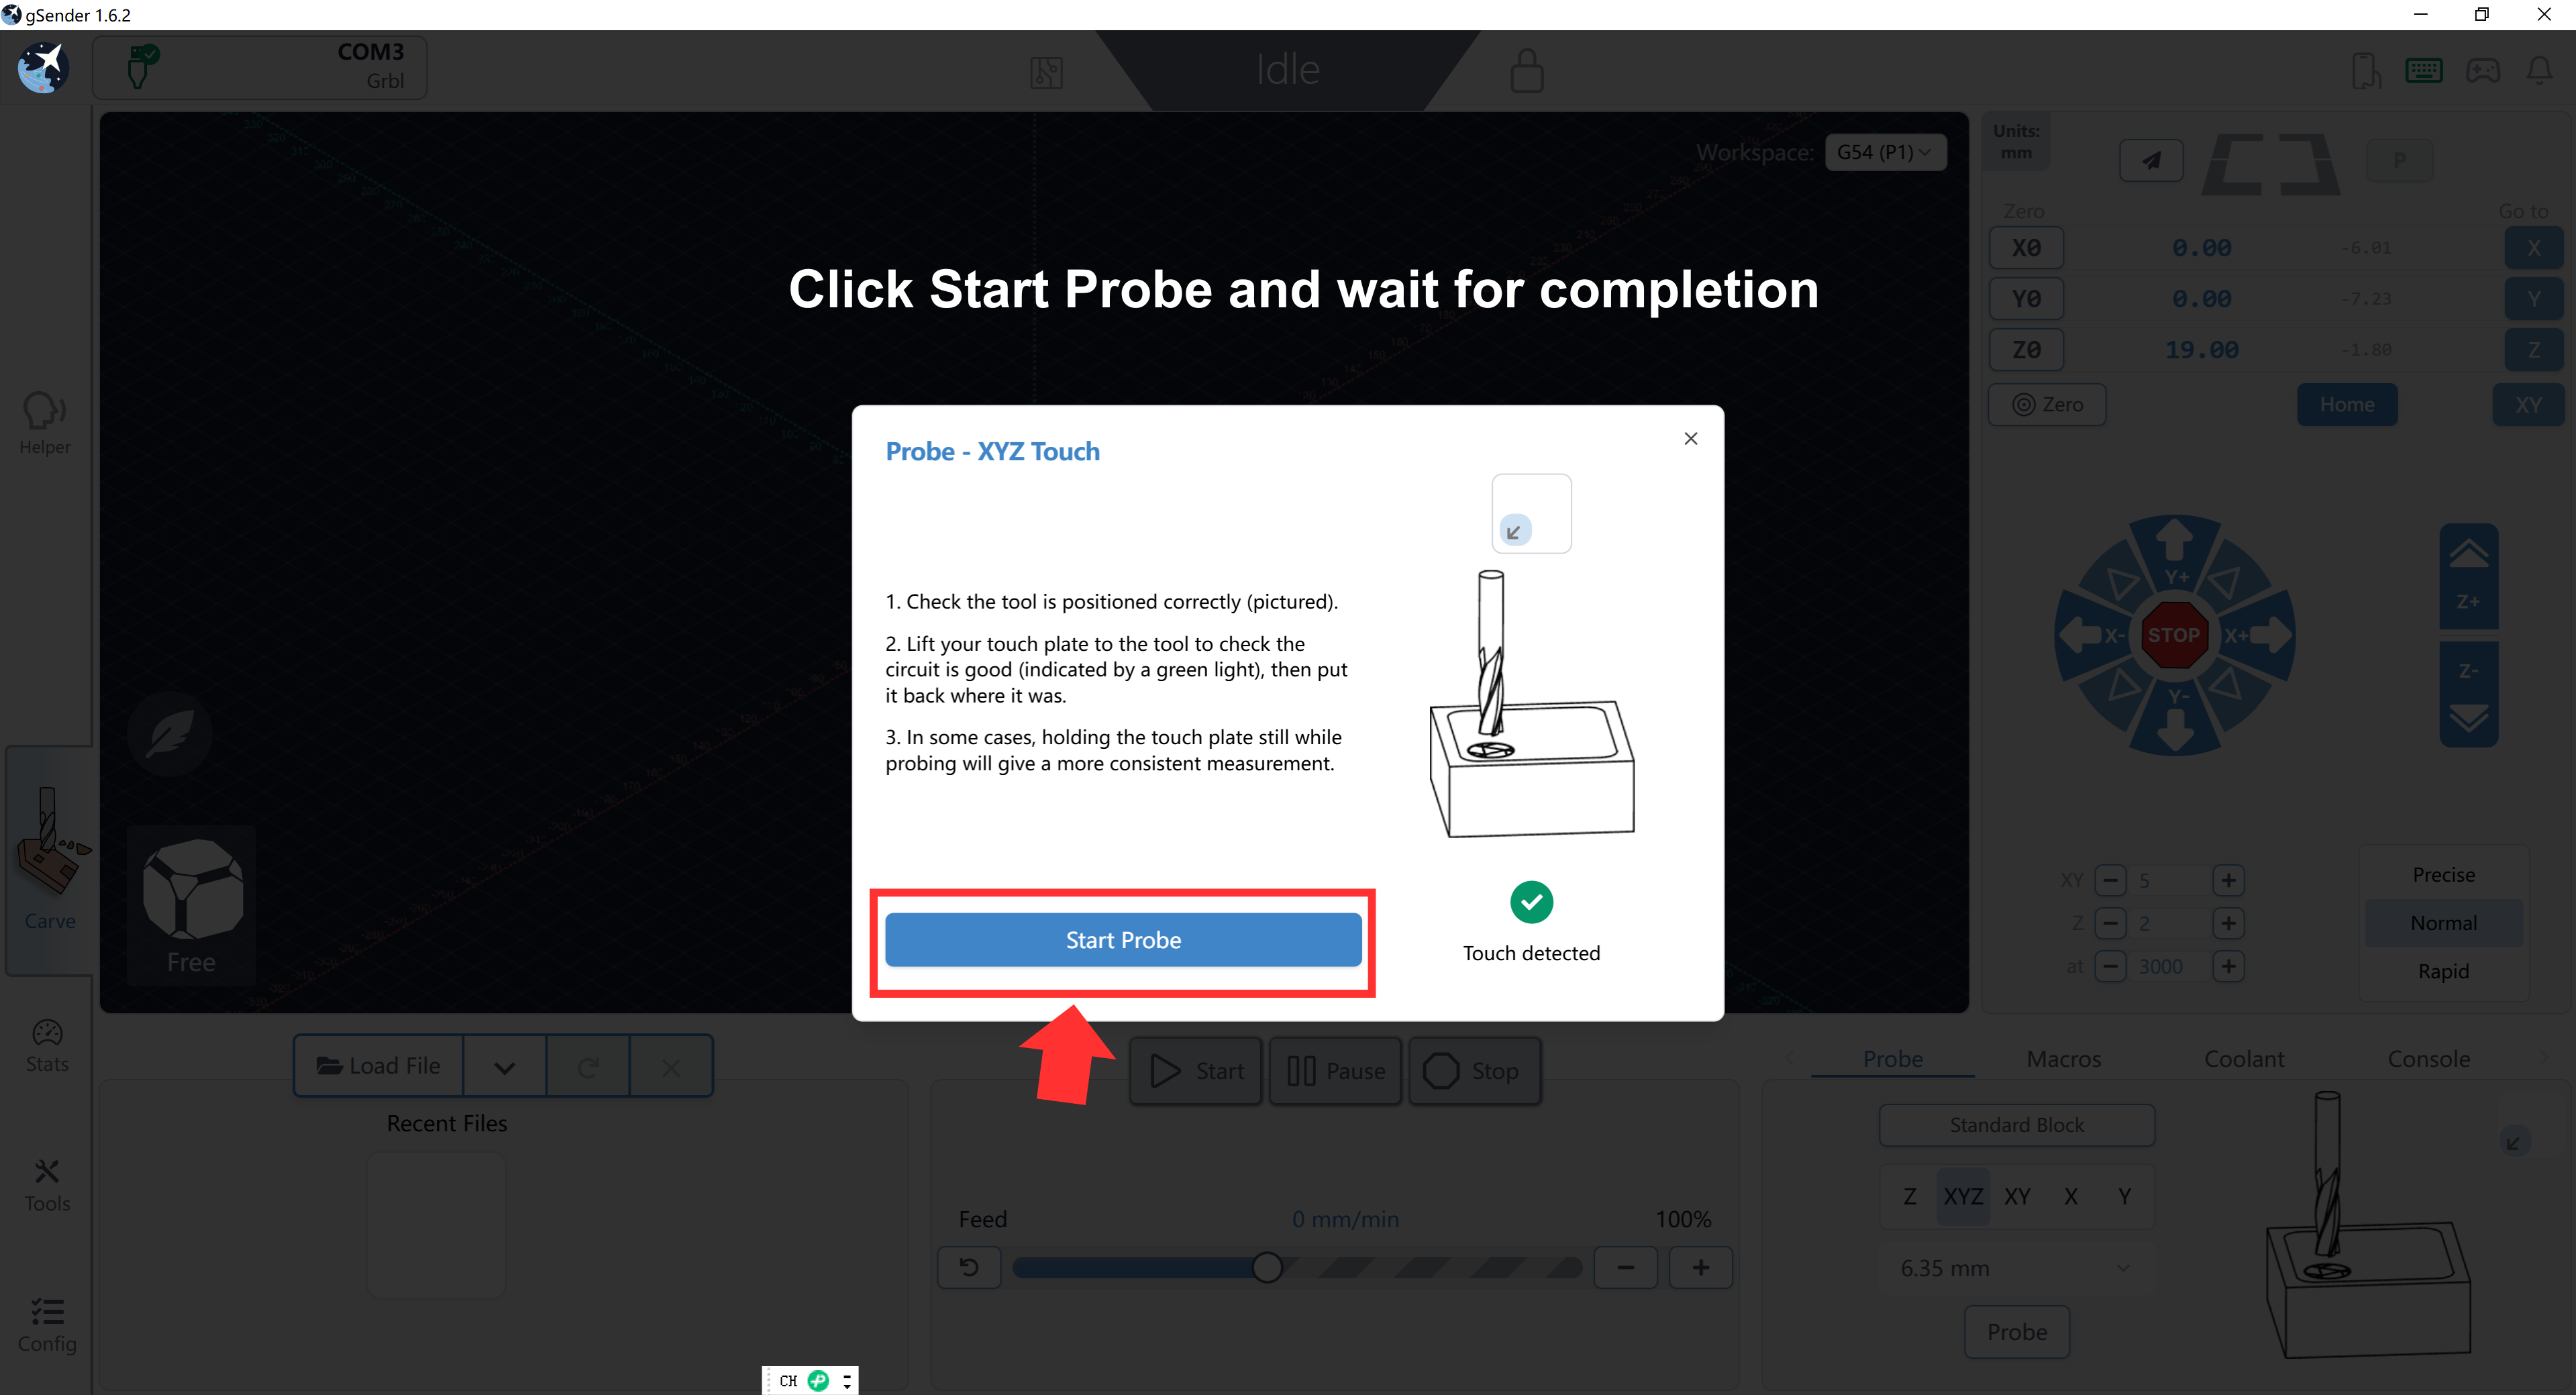
Return to the main interface, select the tool diameter, and click Probe (bottom‑right).
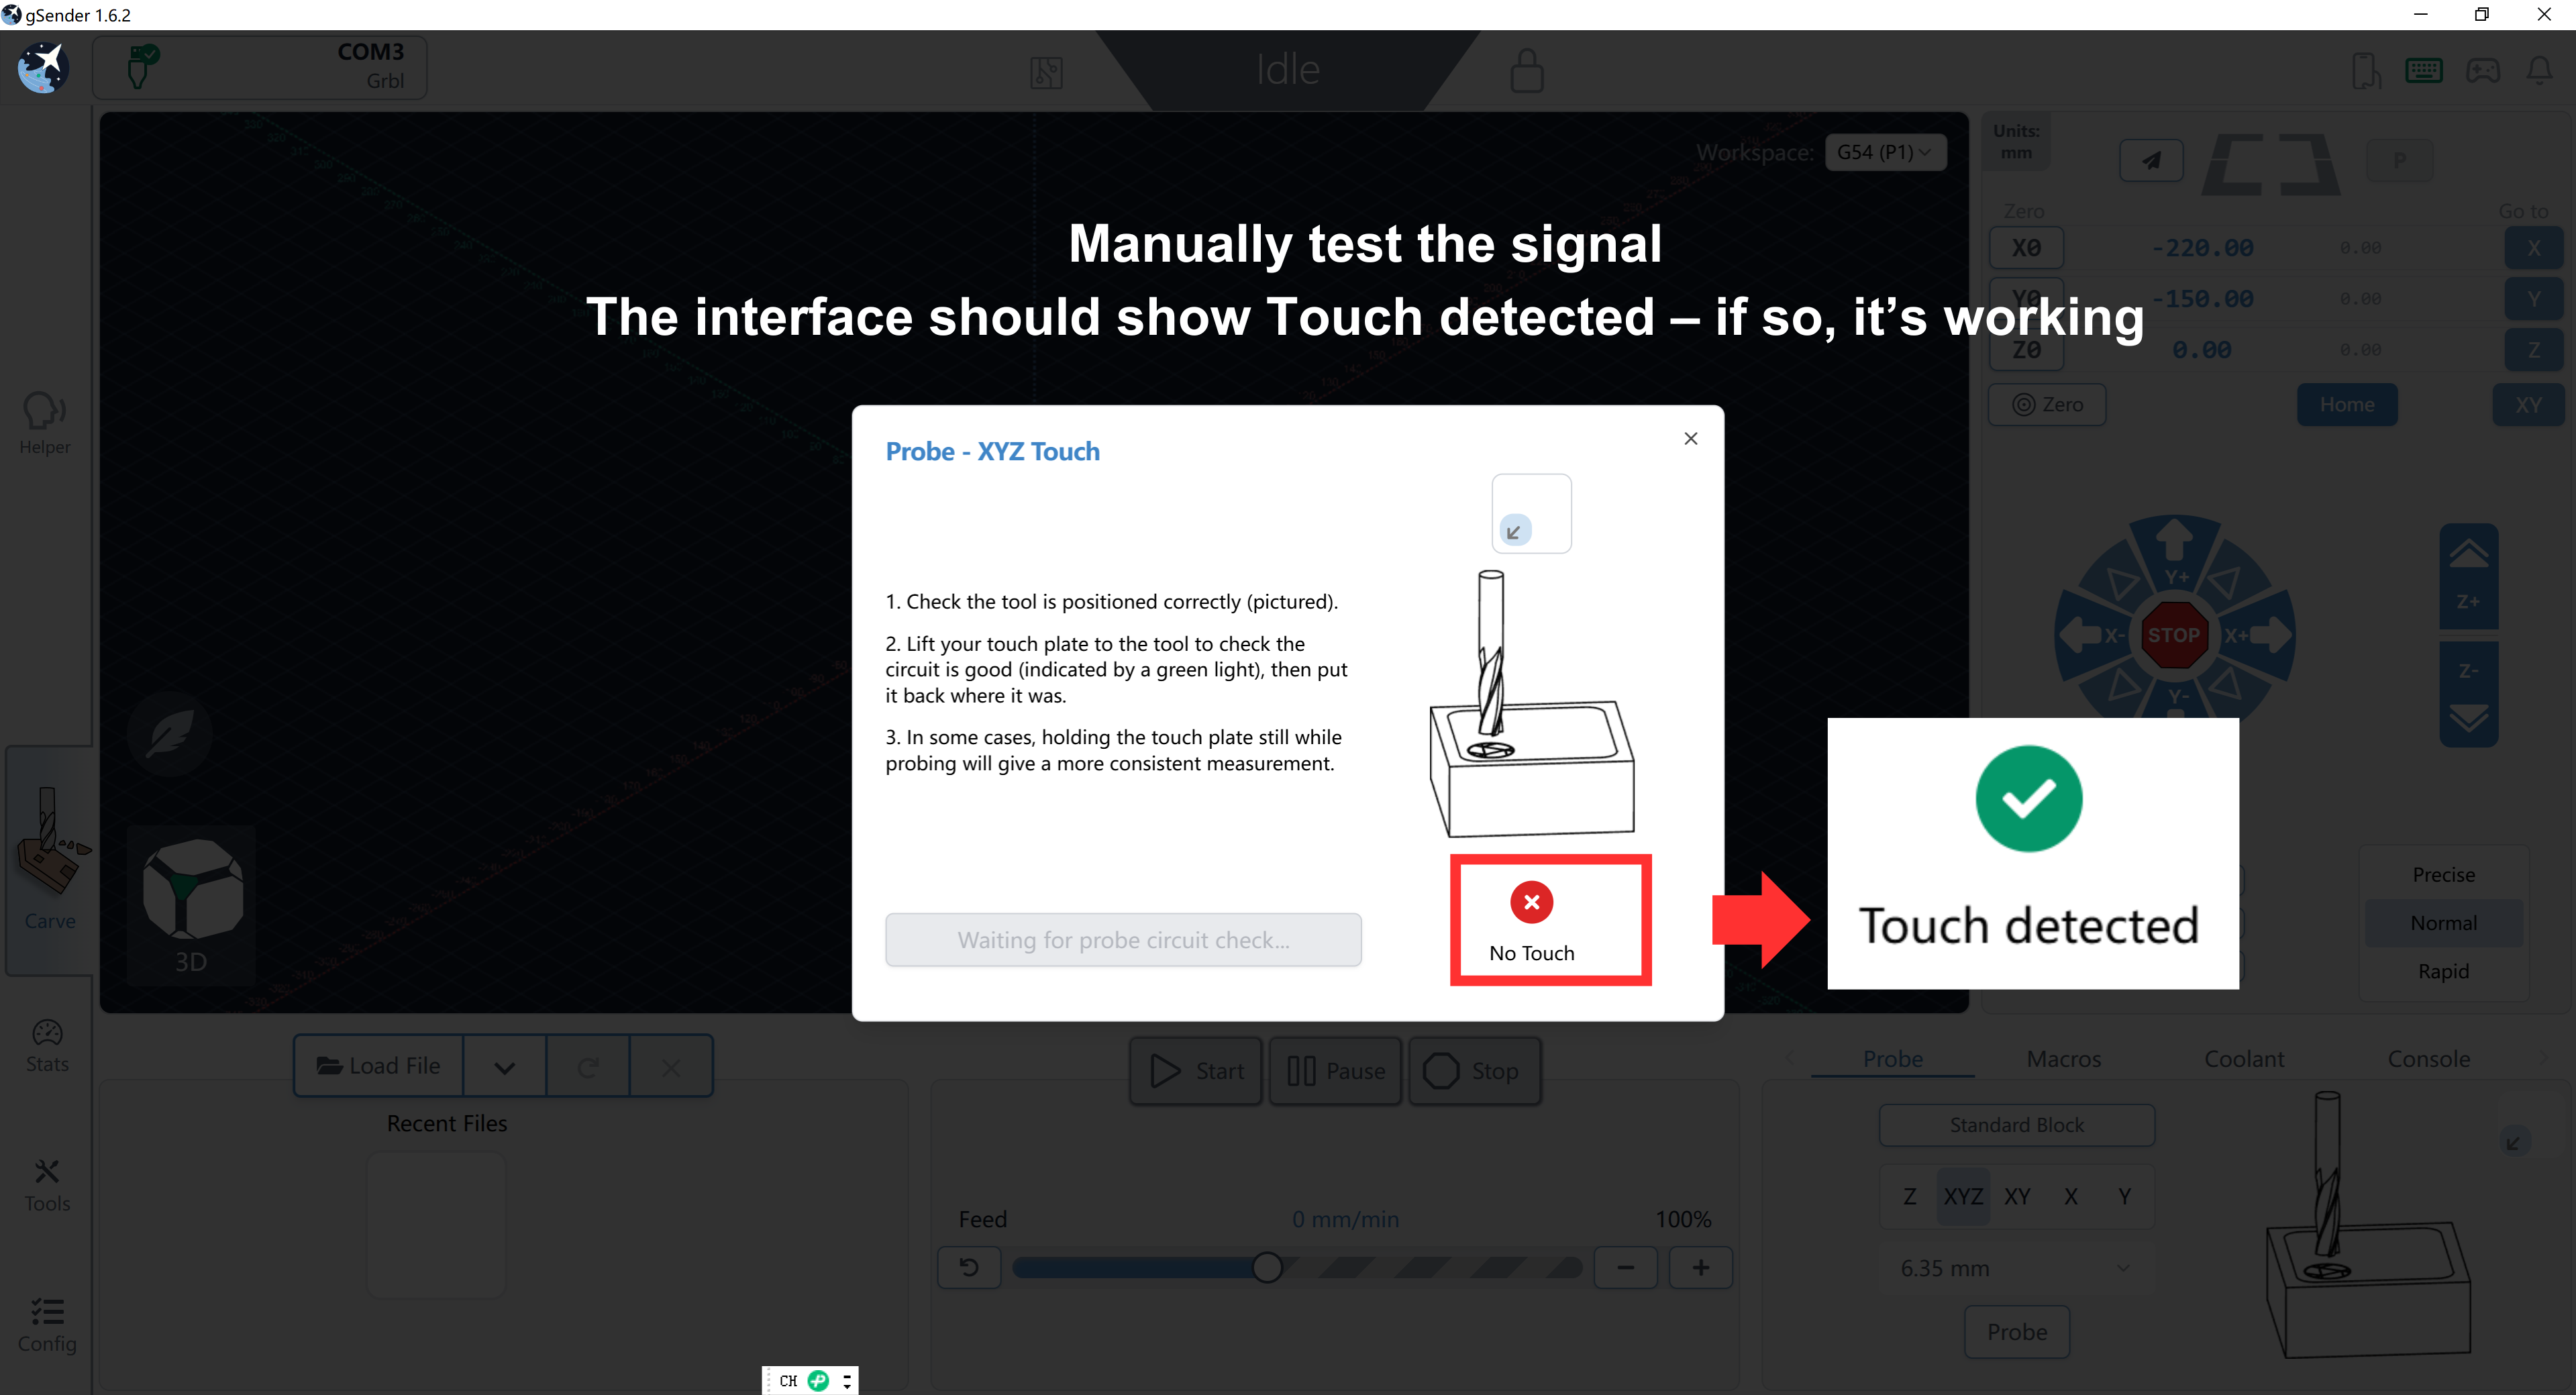
Manually test the signal: lightly touch the tool to the metal surface of the block (be careful). The interface should show Touch detected – if so, it’s working.
Click Start Probe and wait for completion.
▍UGS (Universal G‑code Sender)
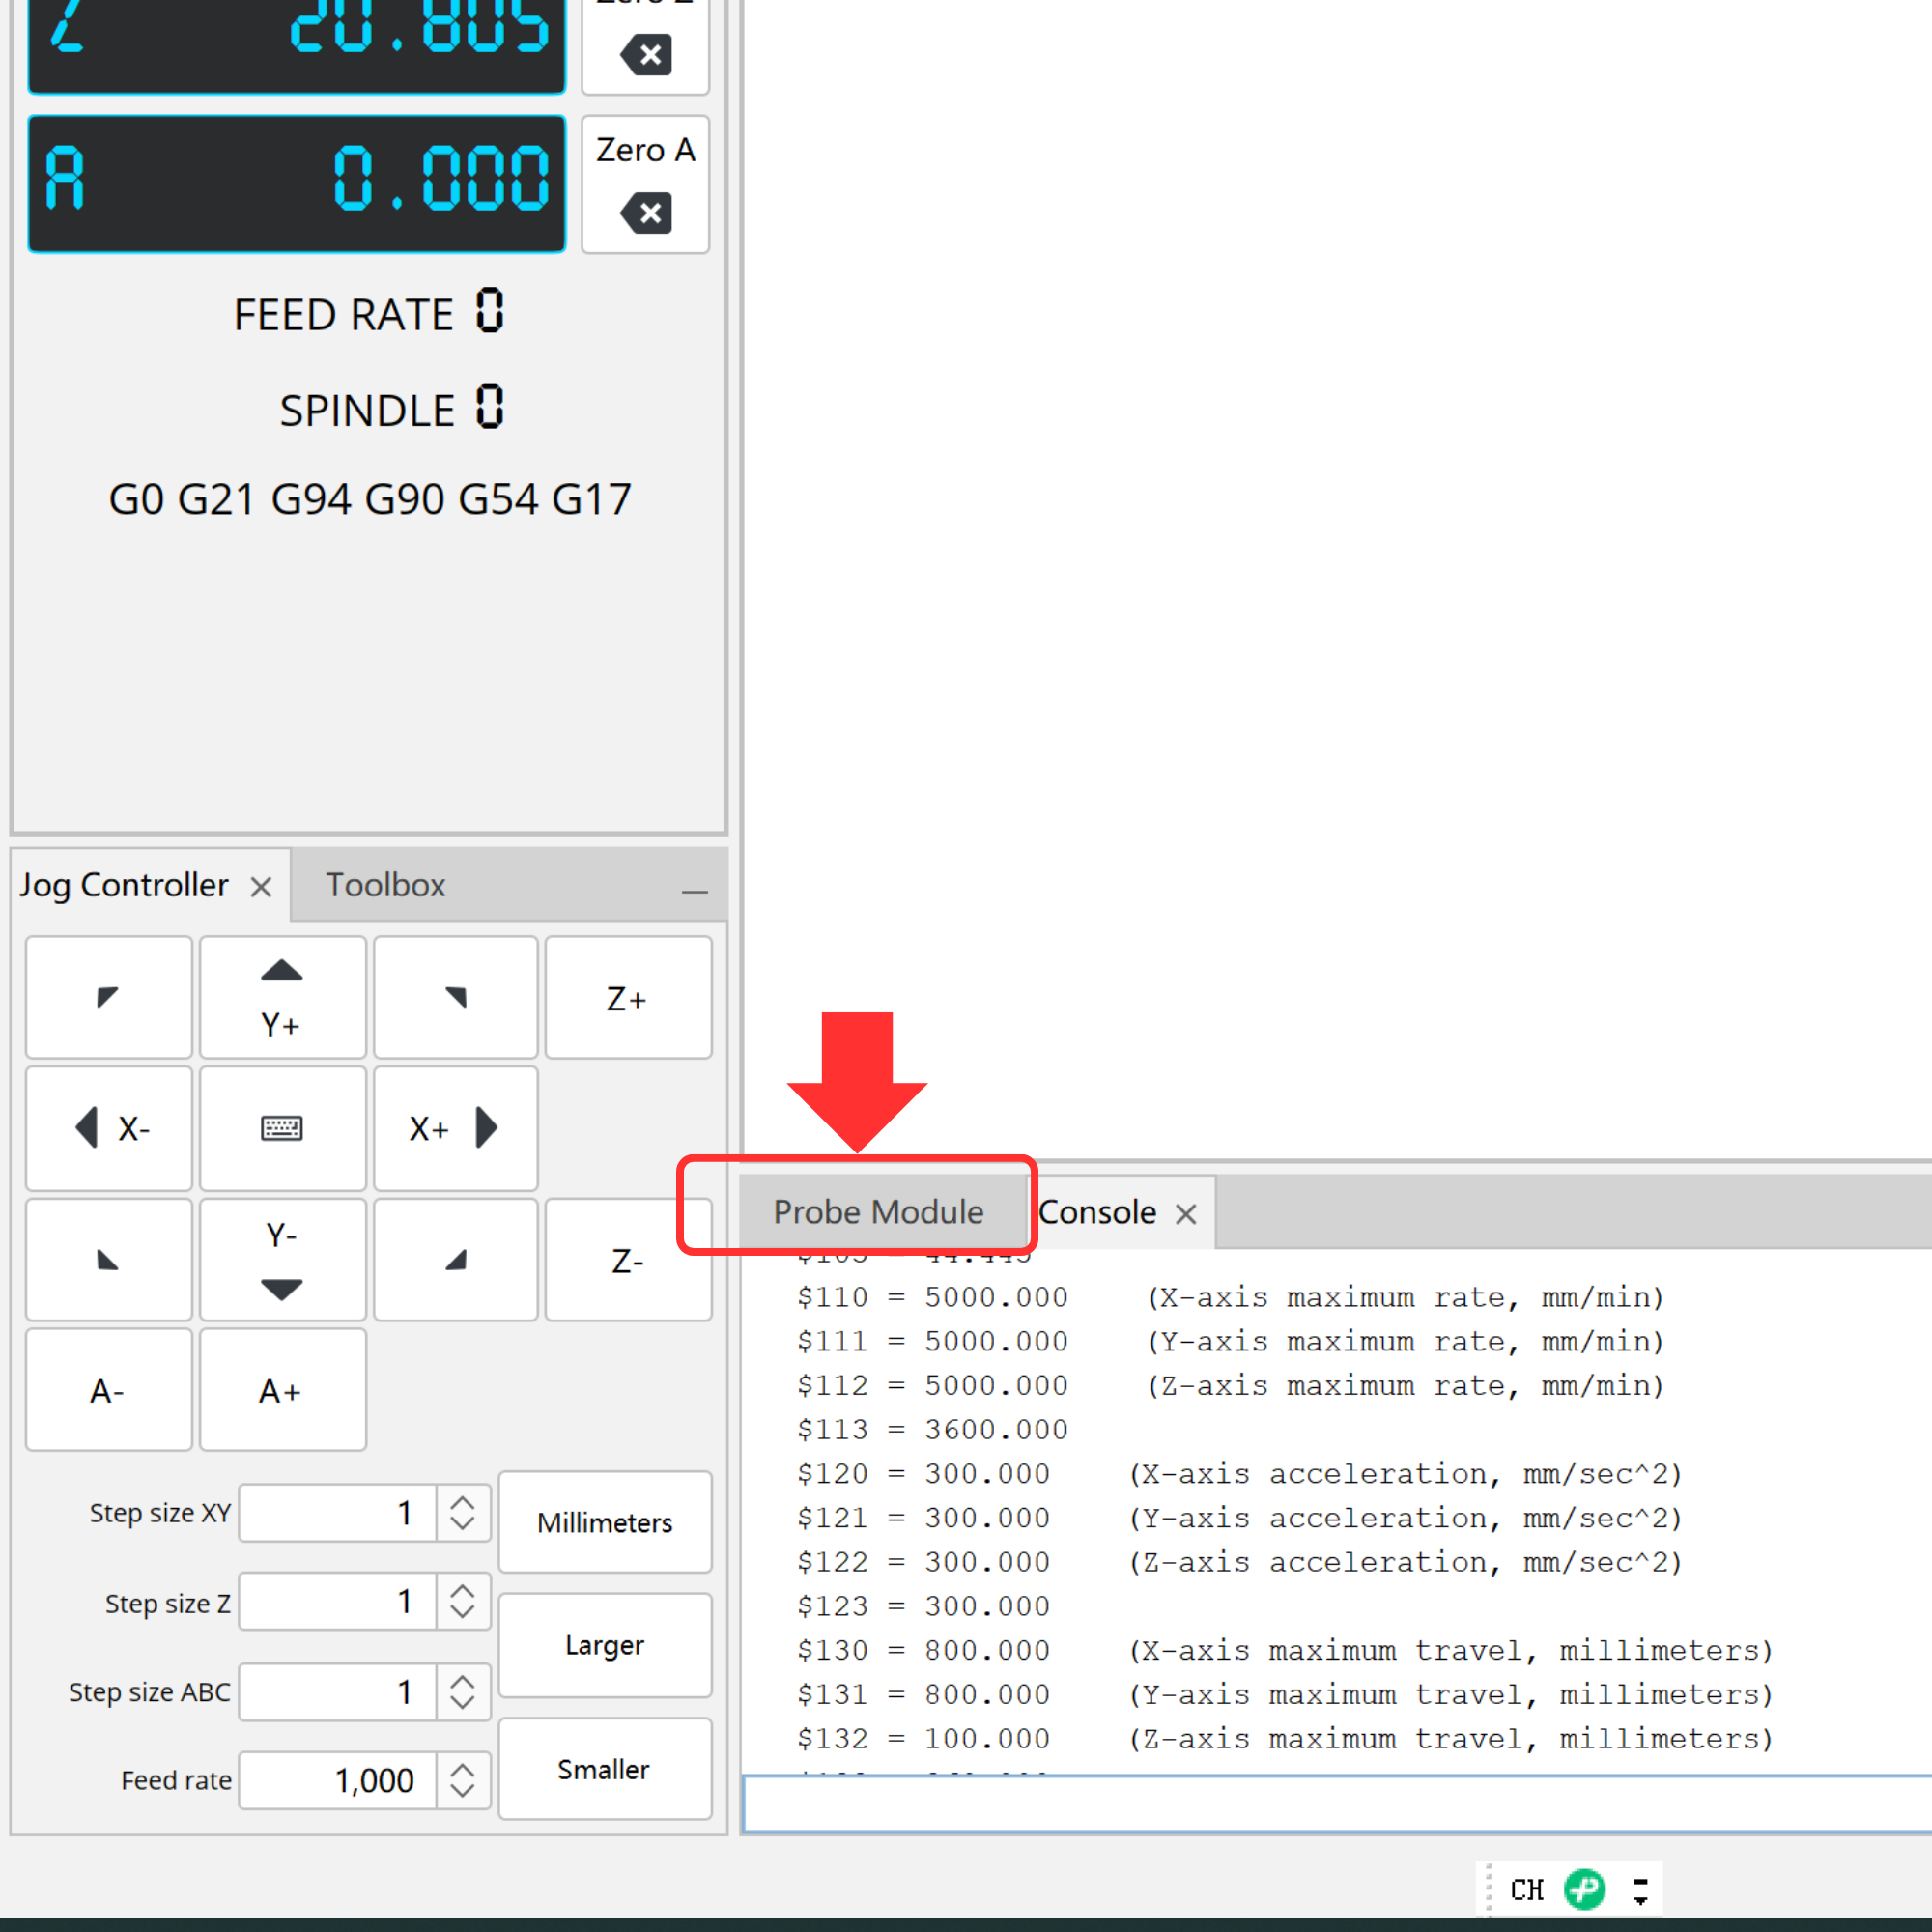
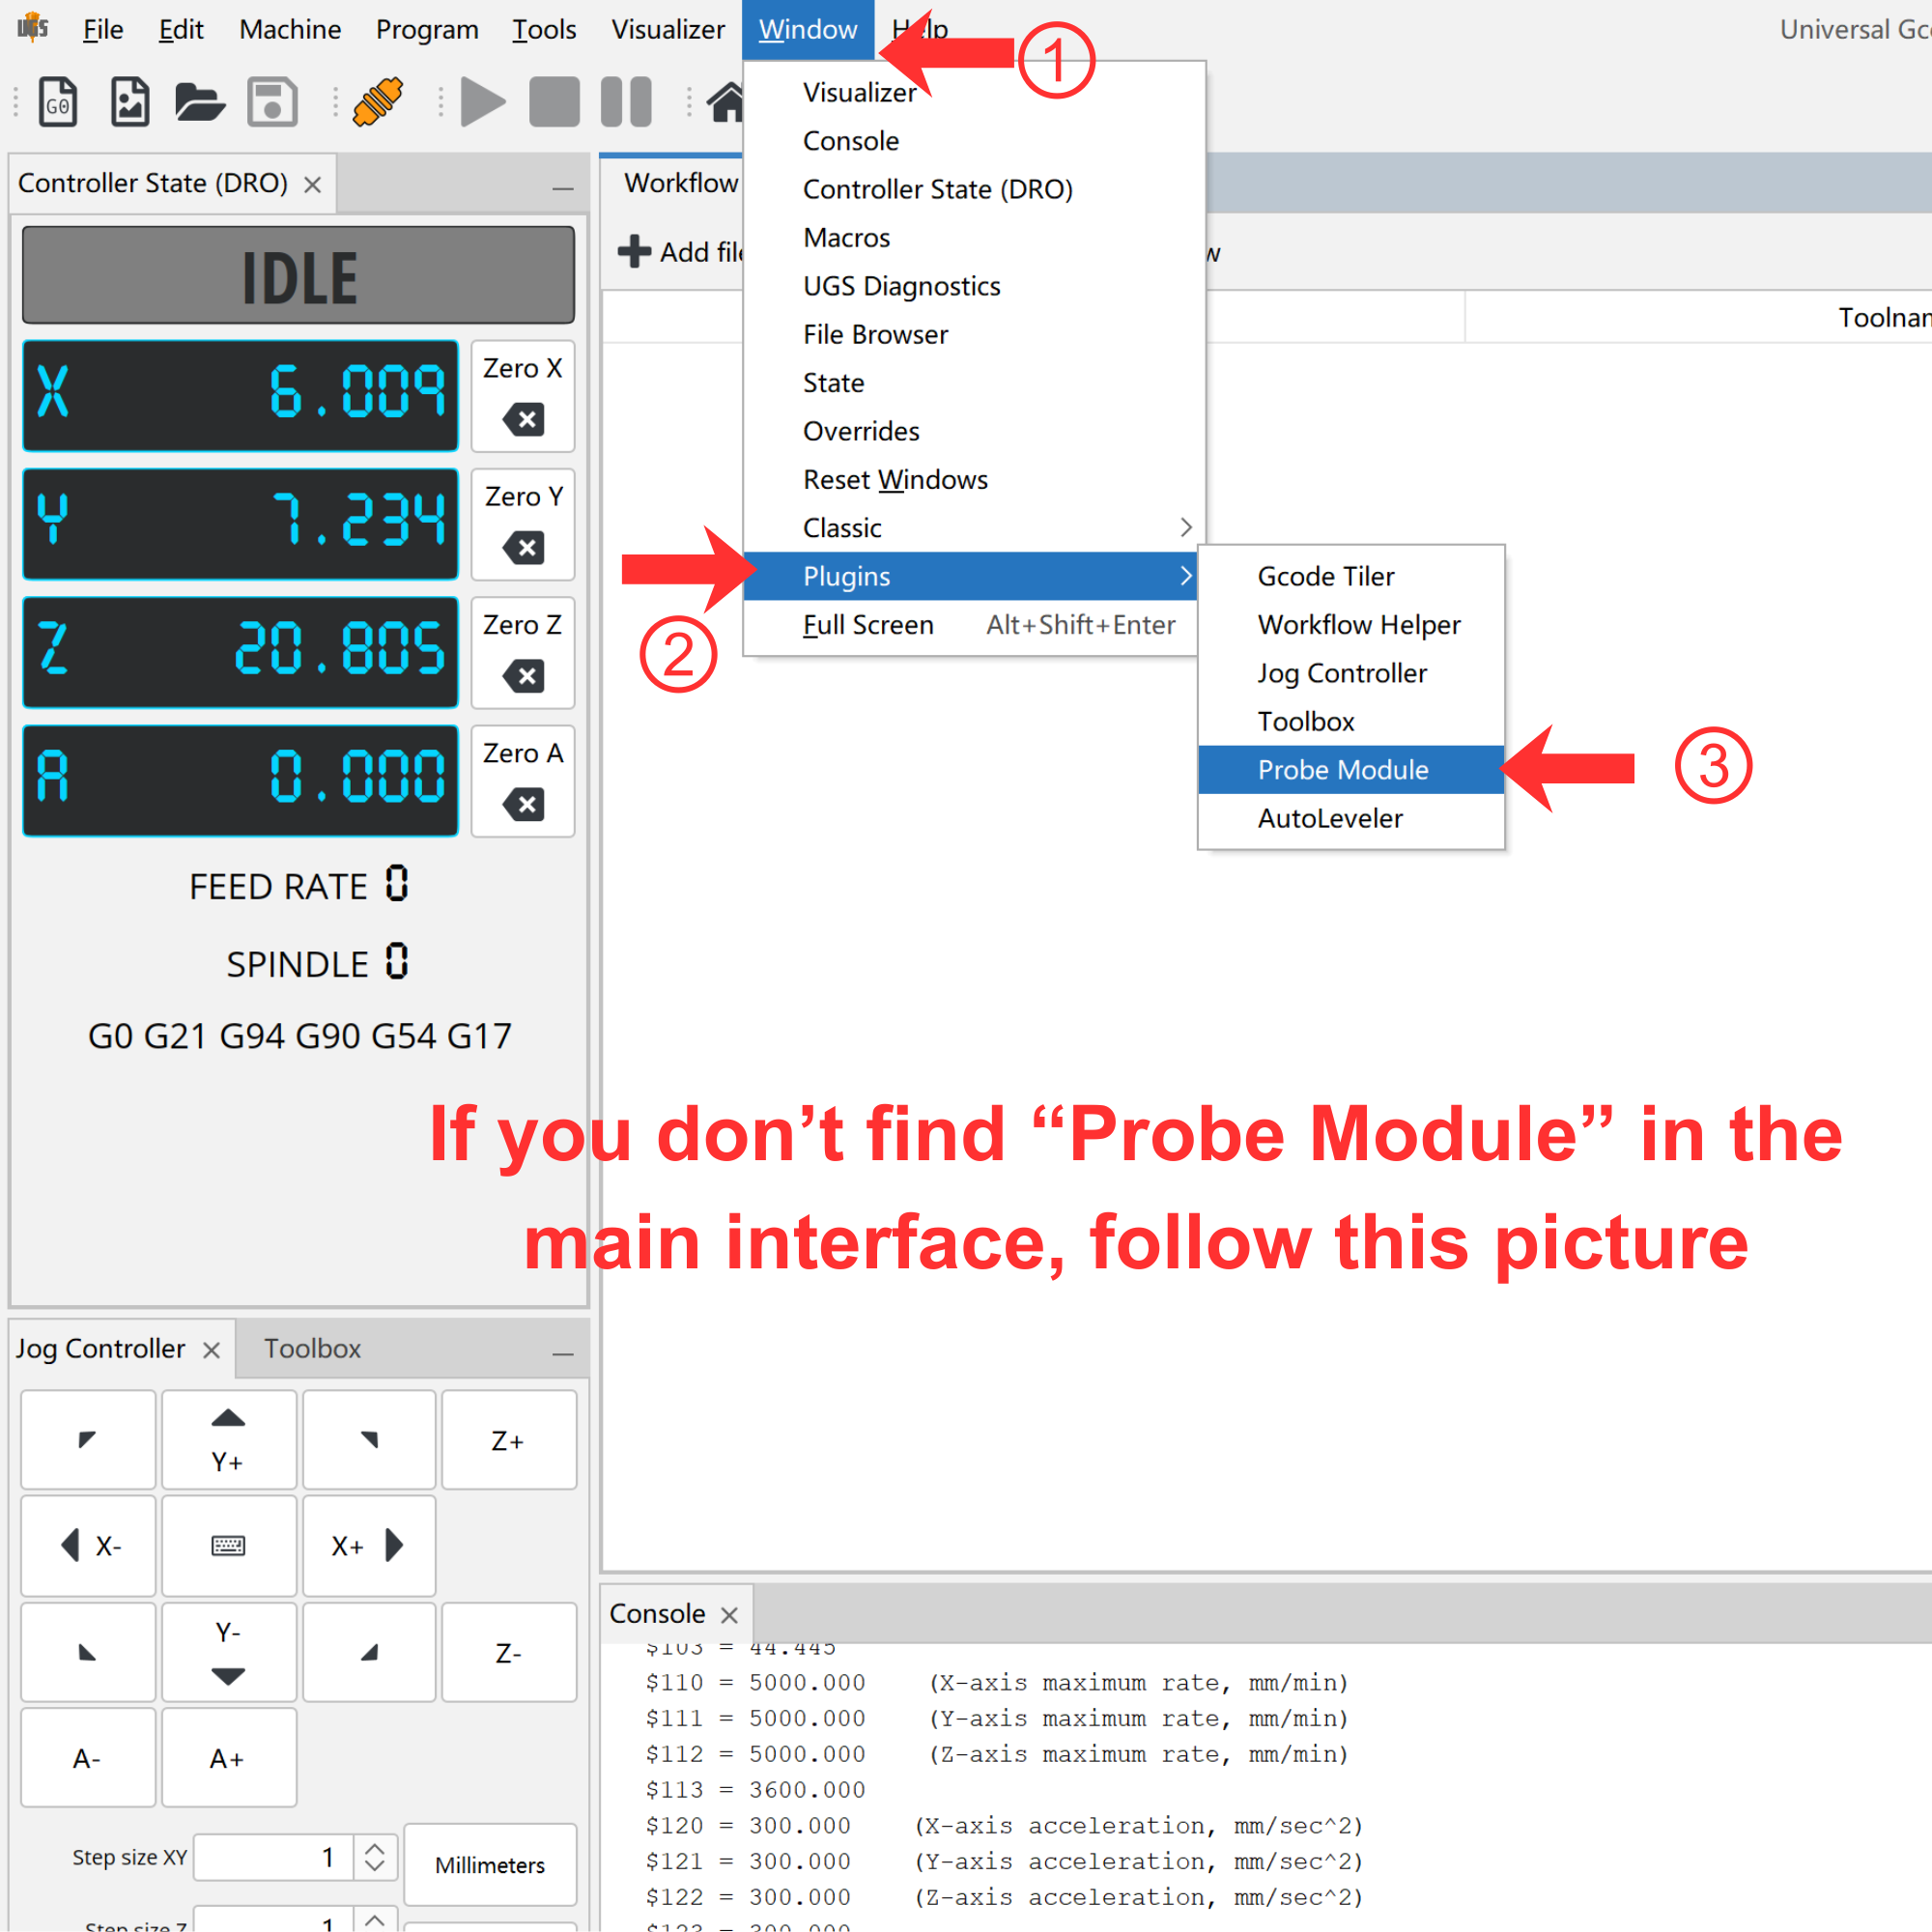
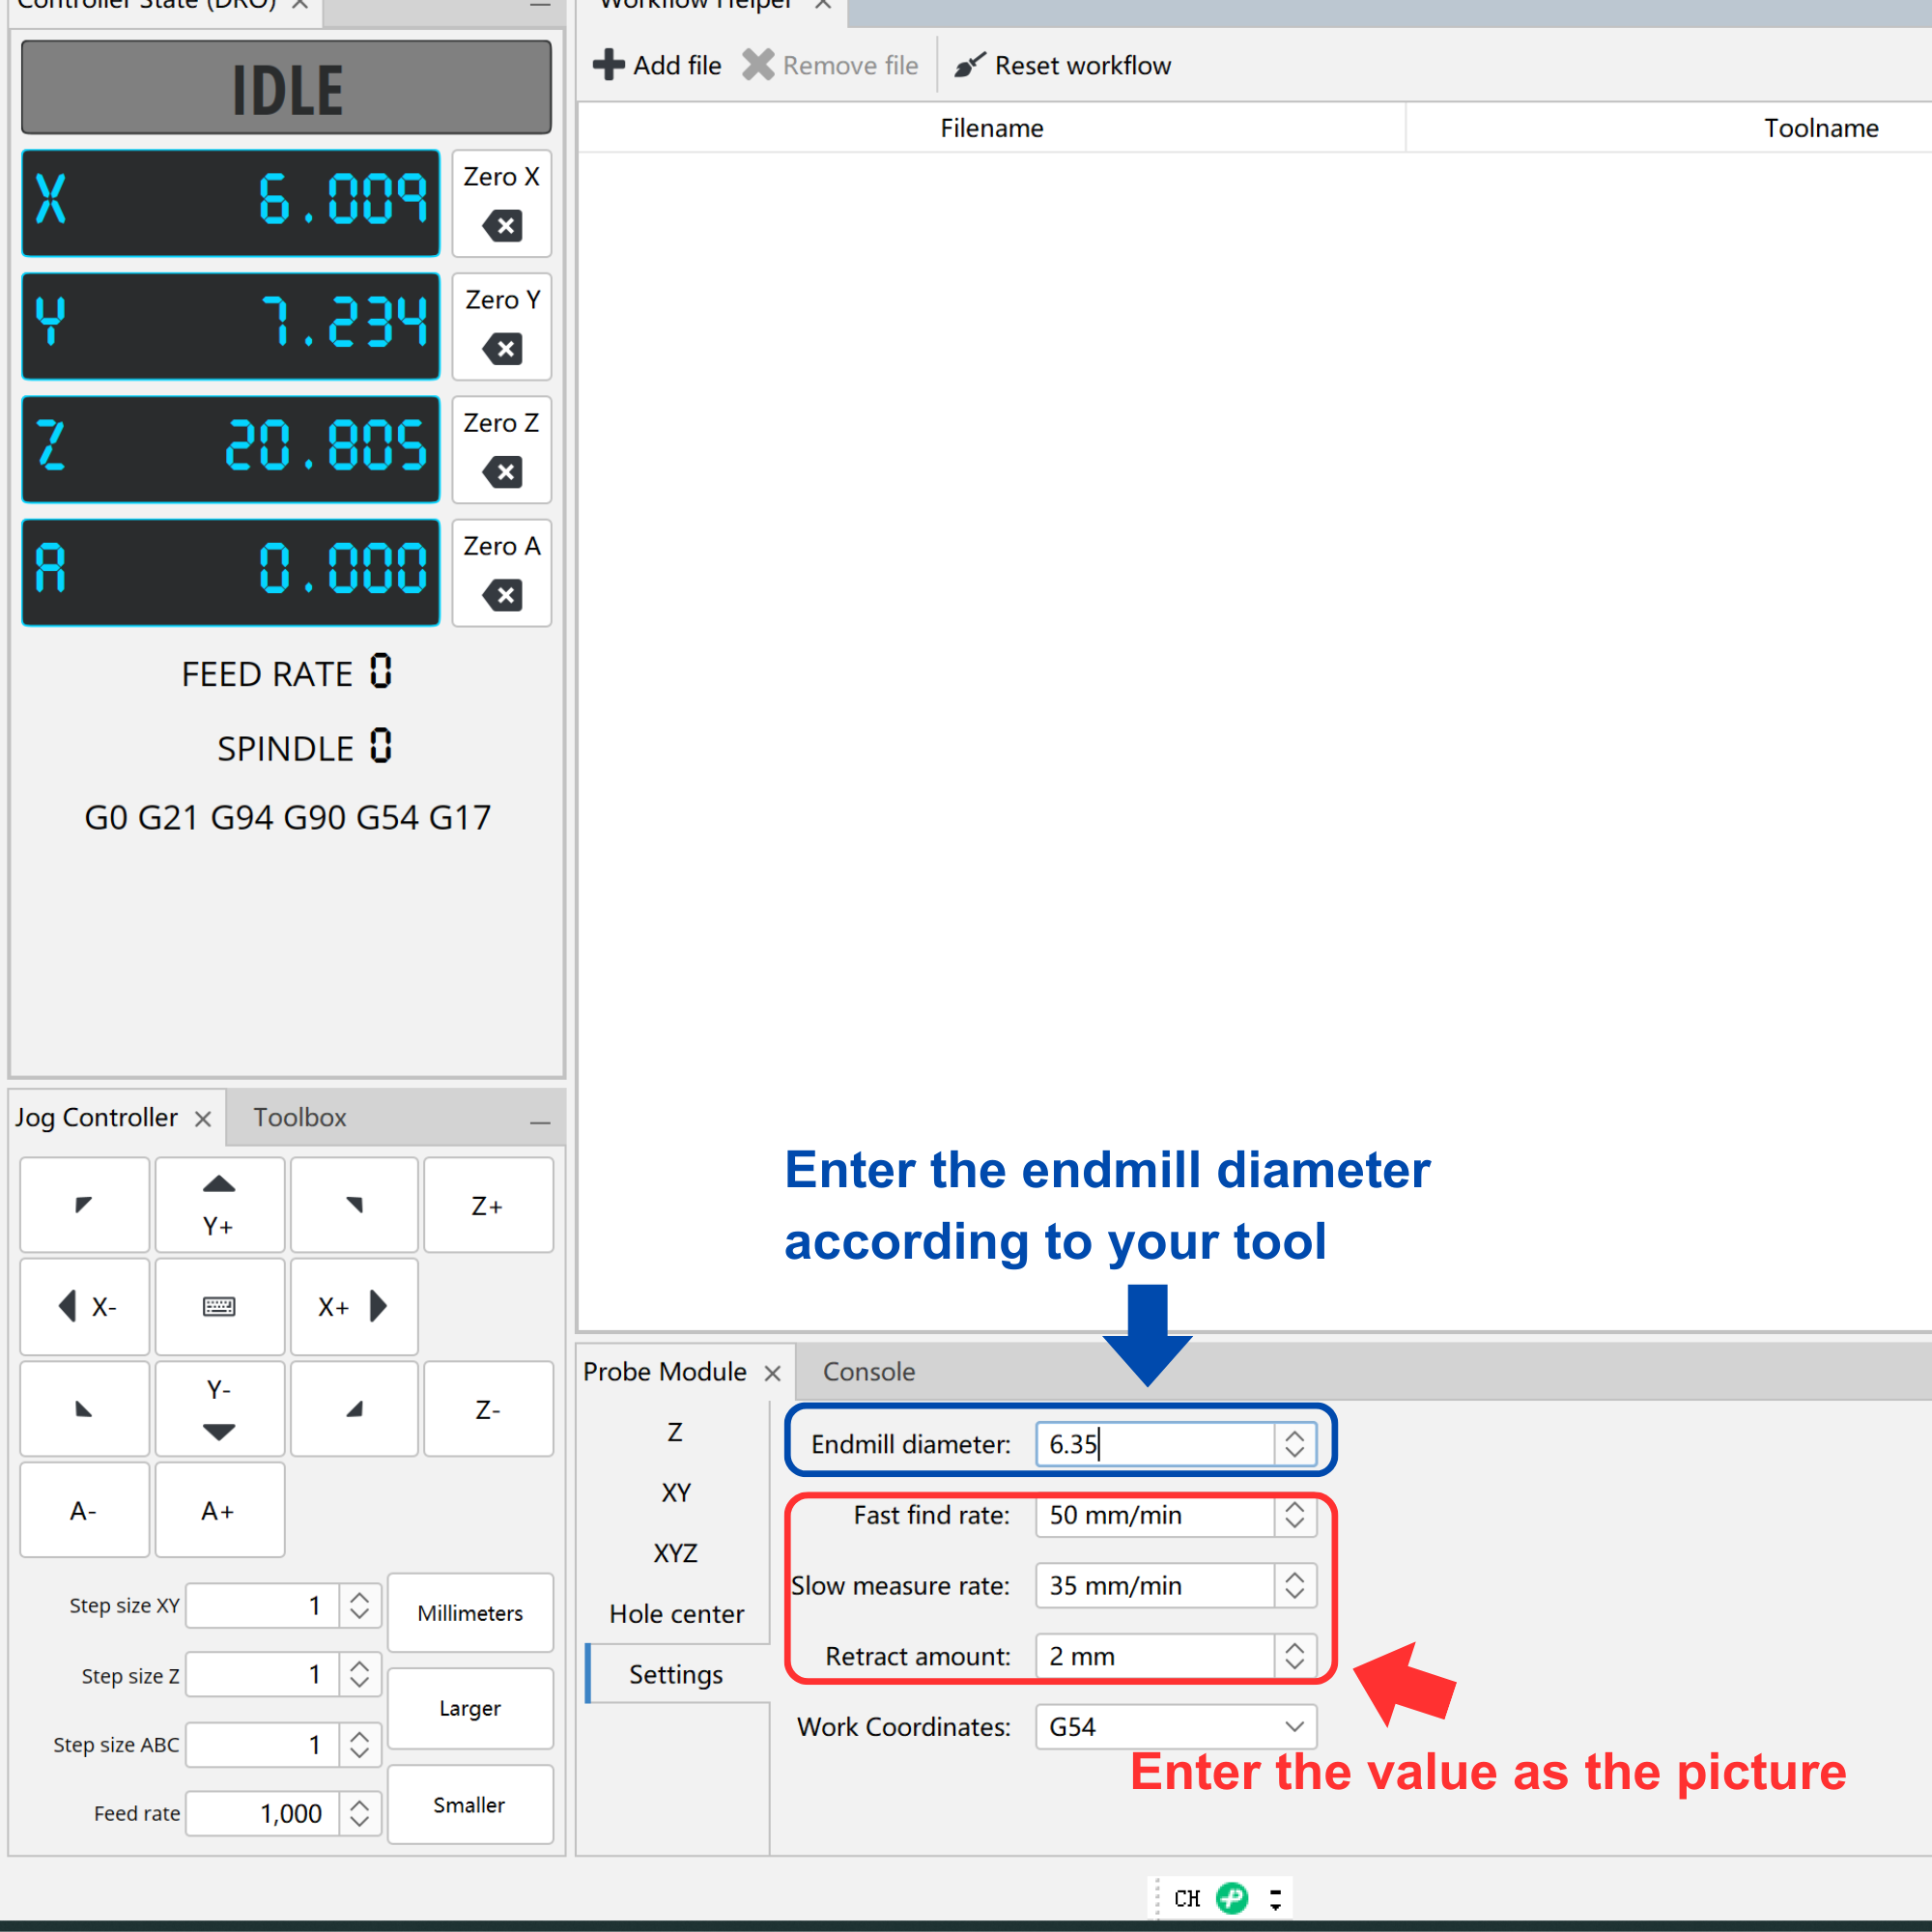
After connecting to your machine, click Probe Module (if not visible, enable it under the Window menu).
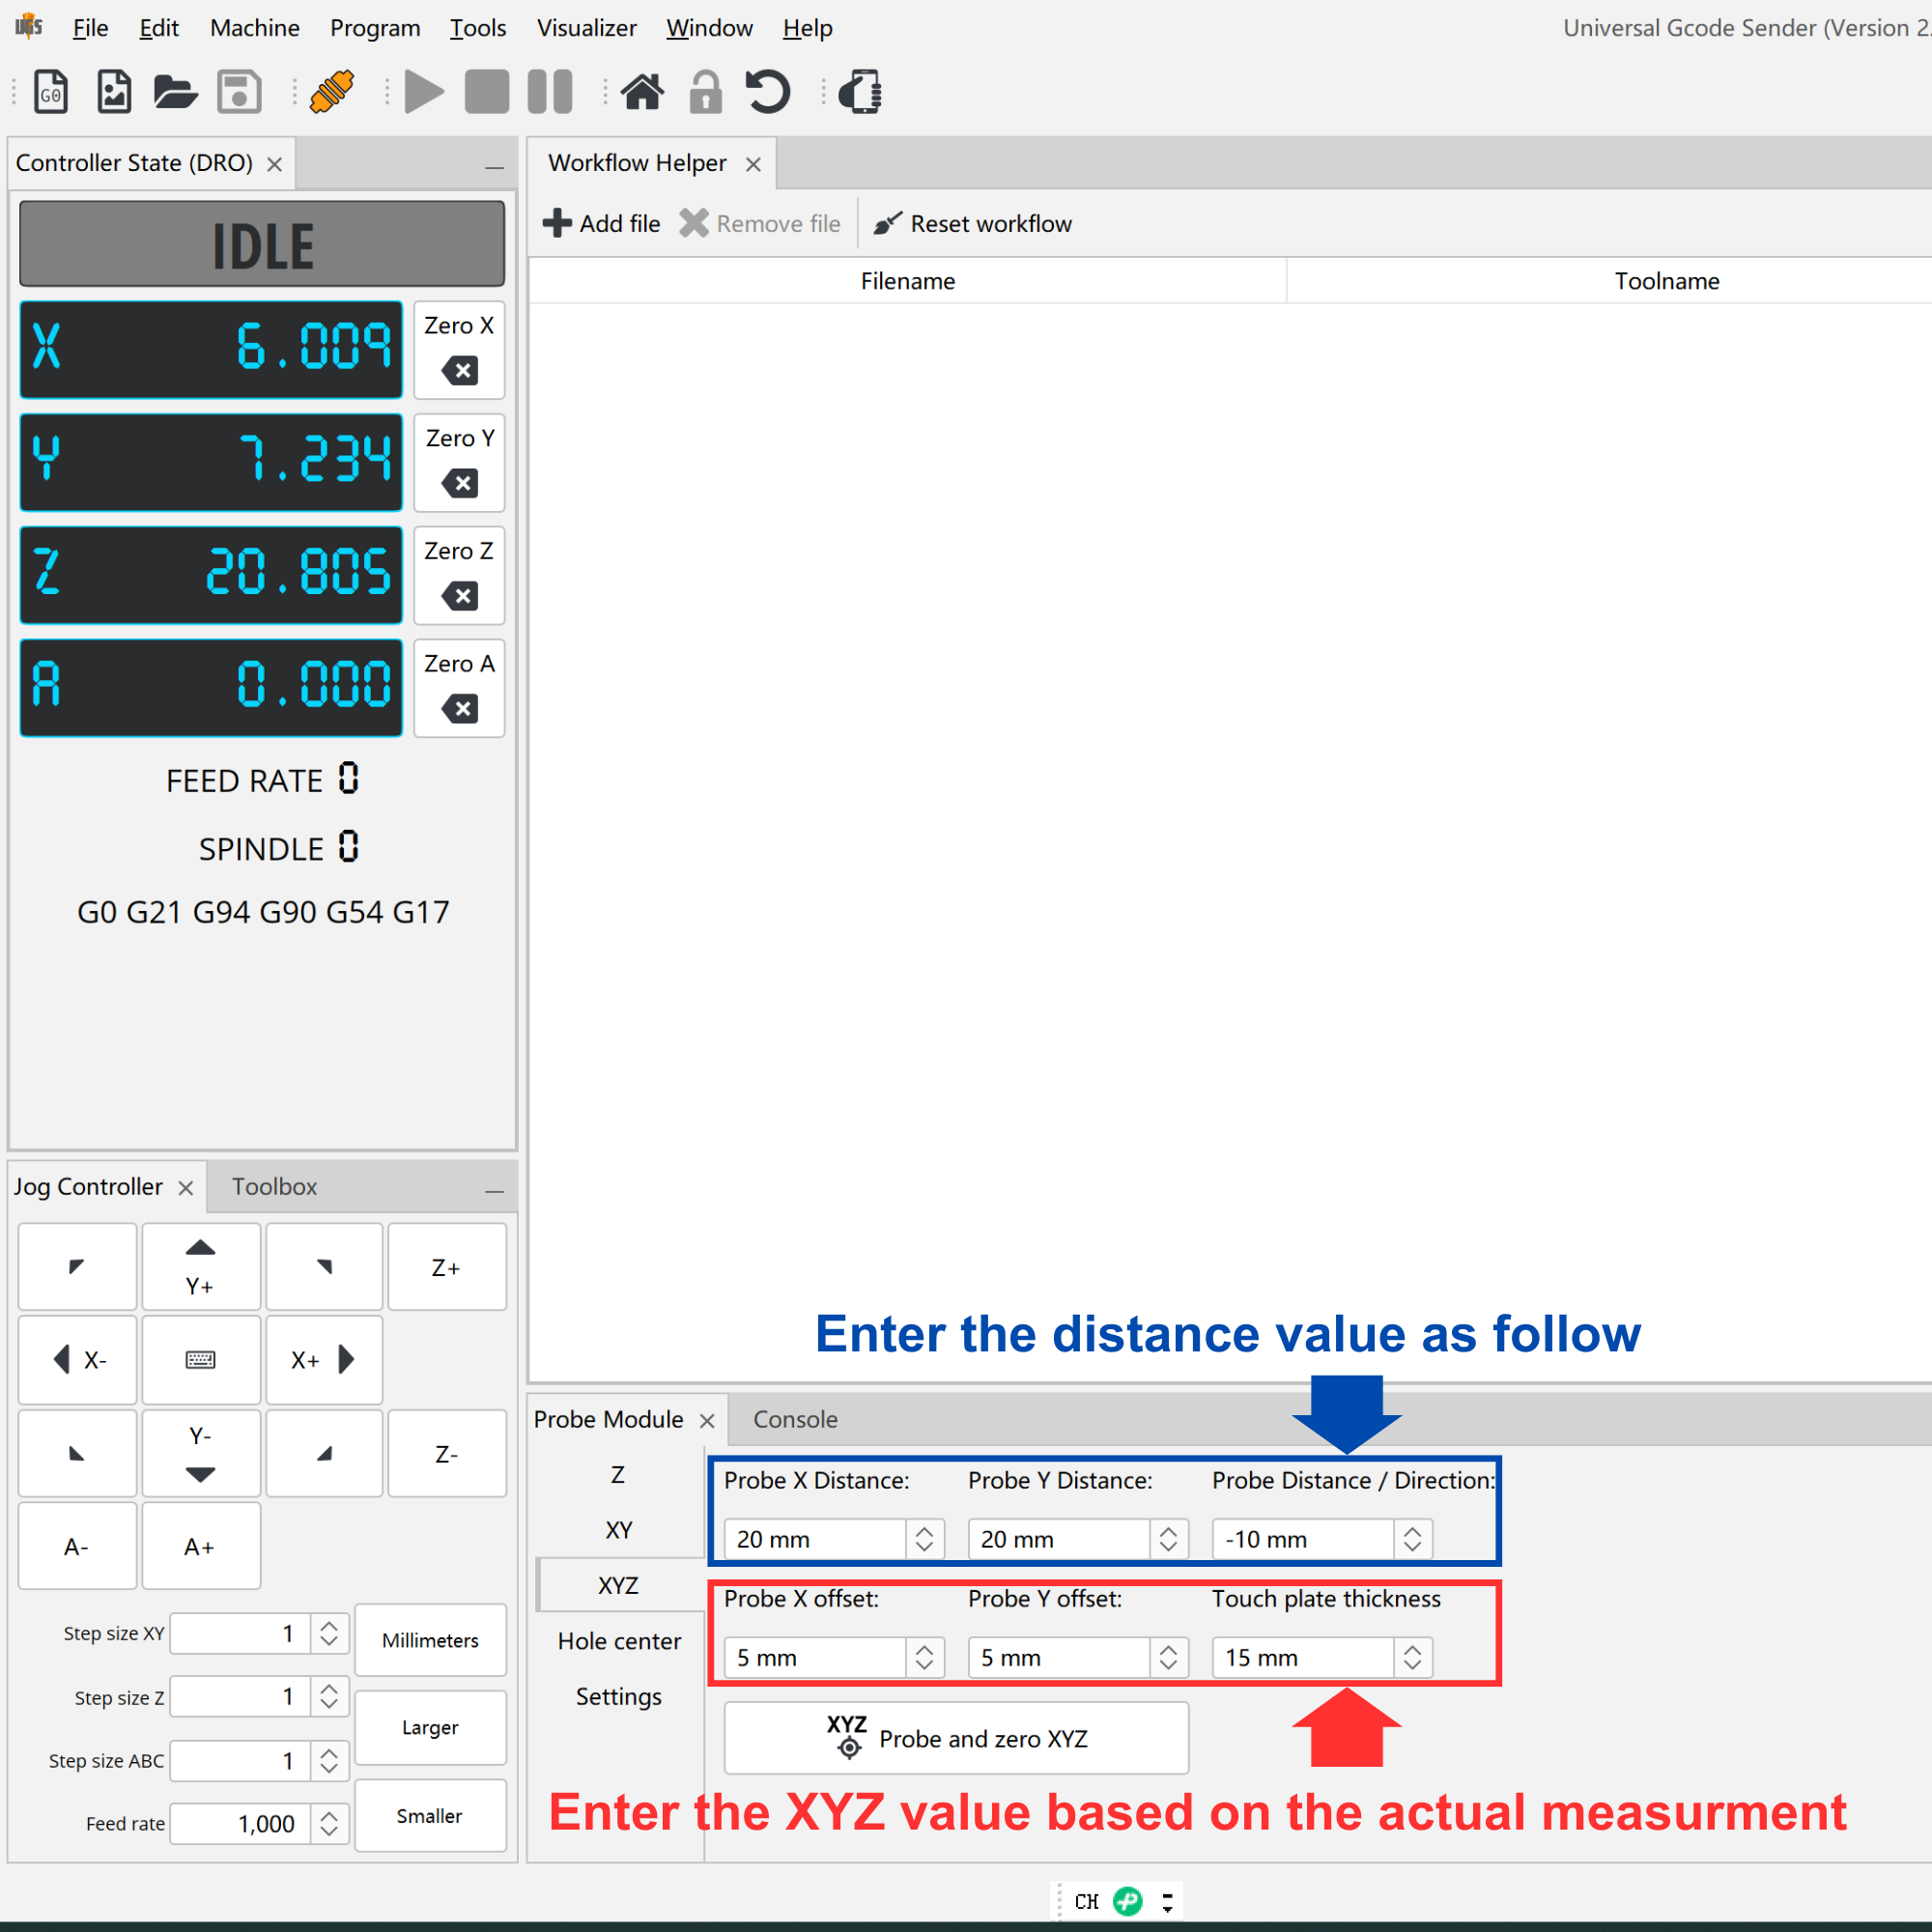
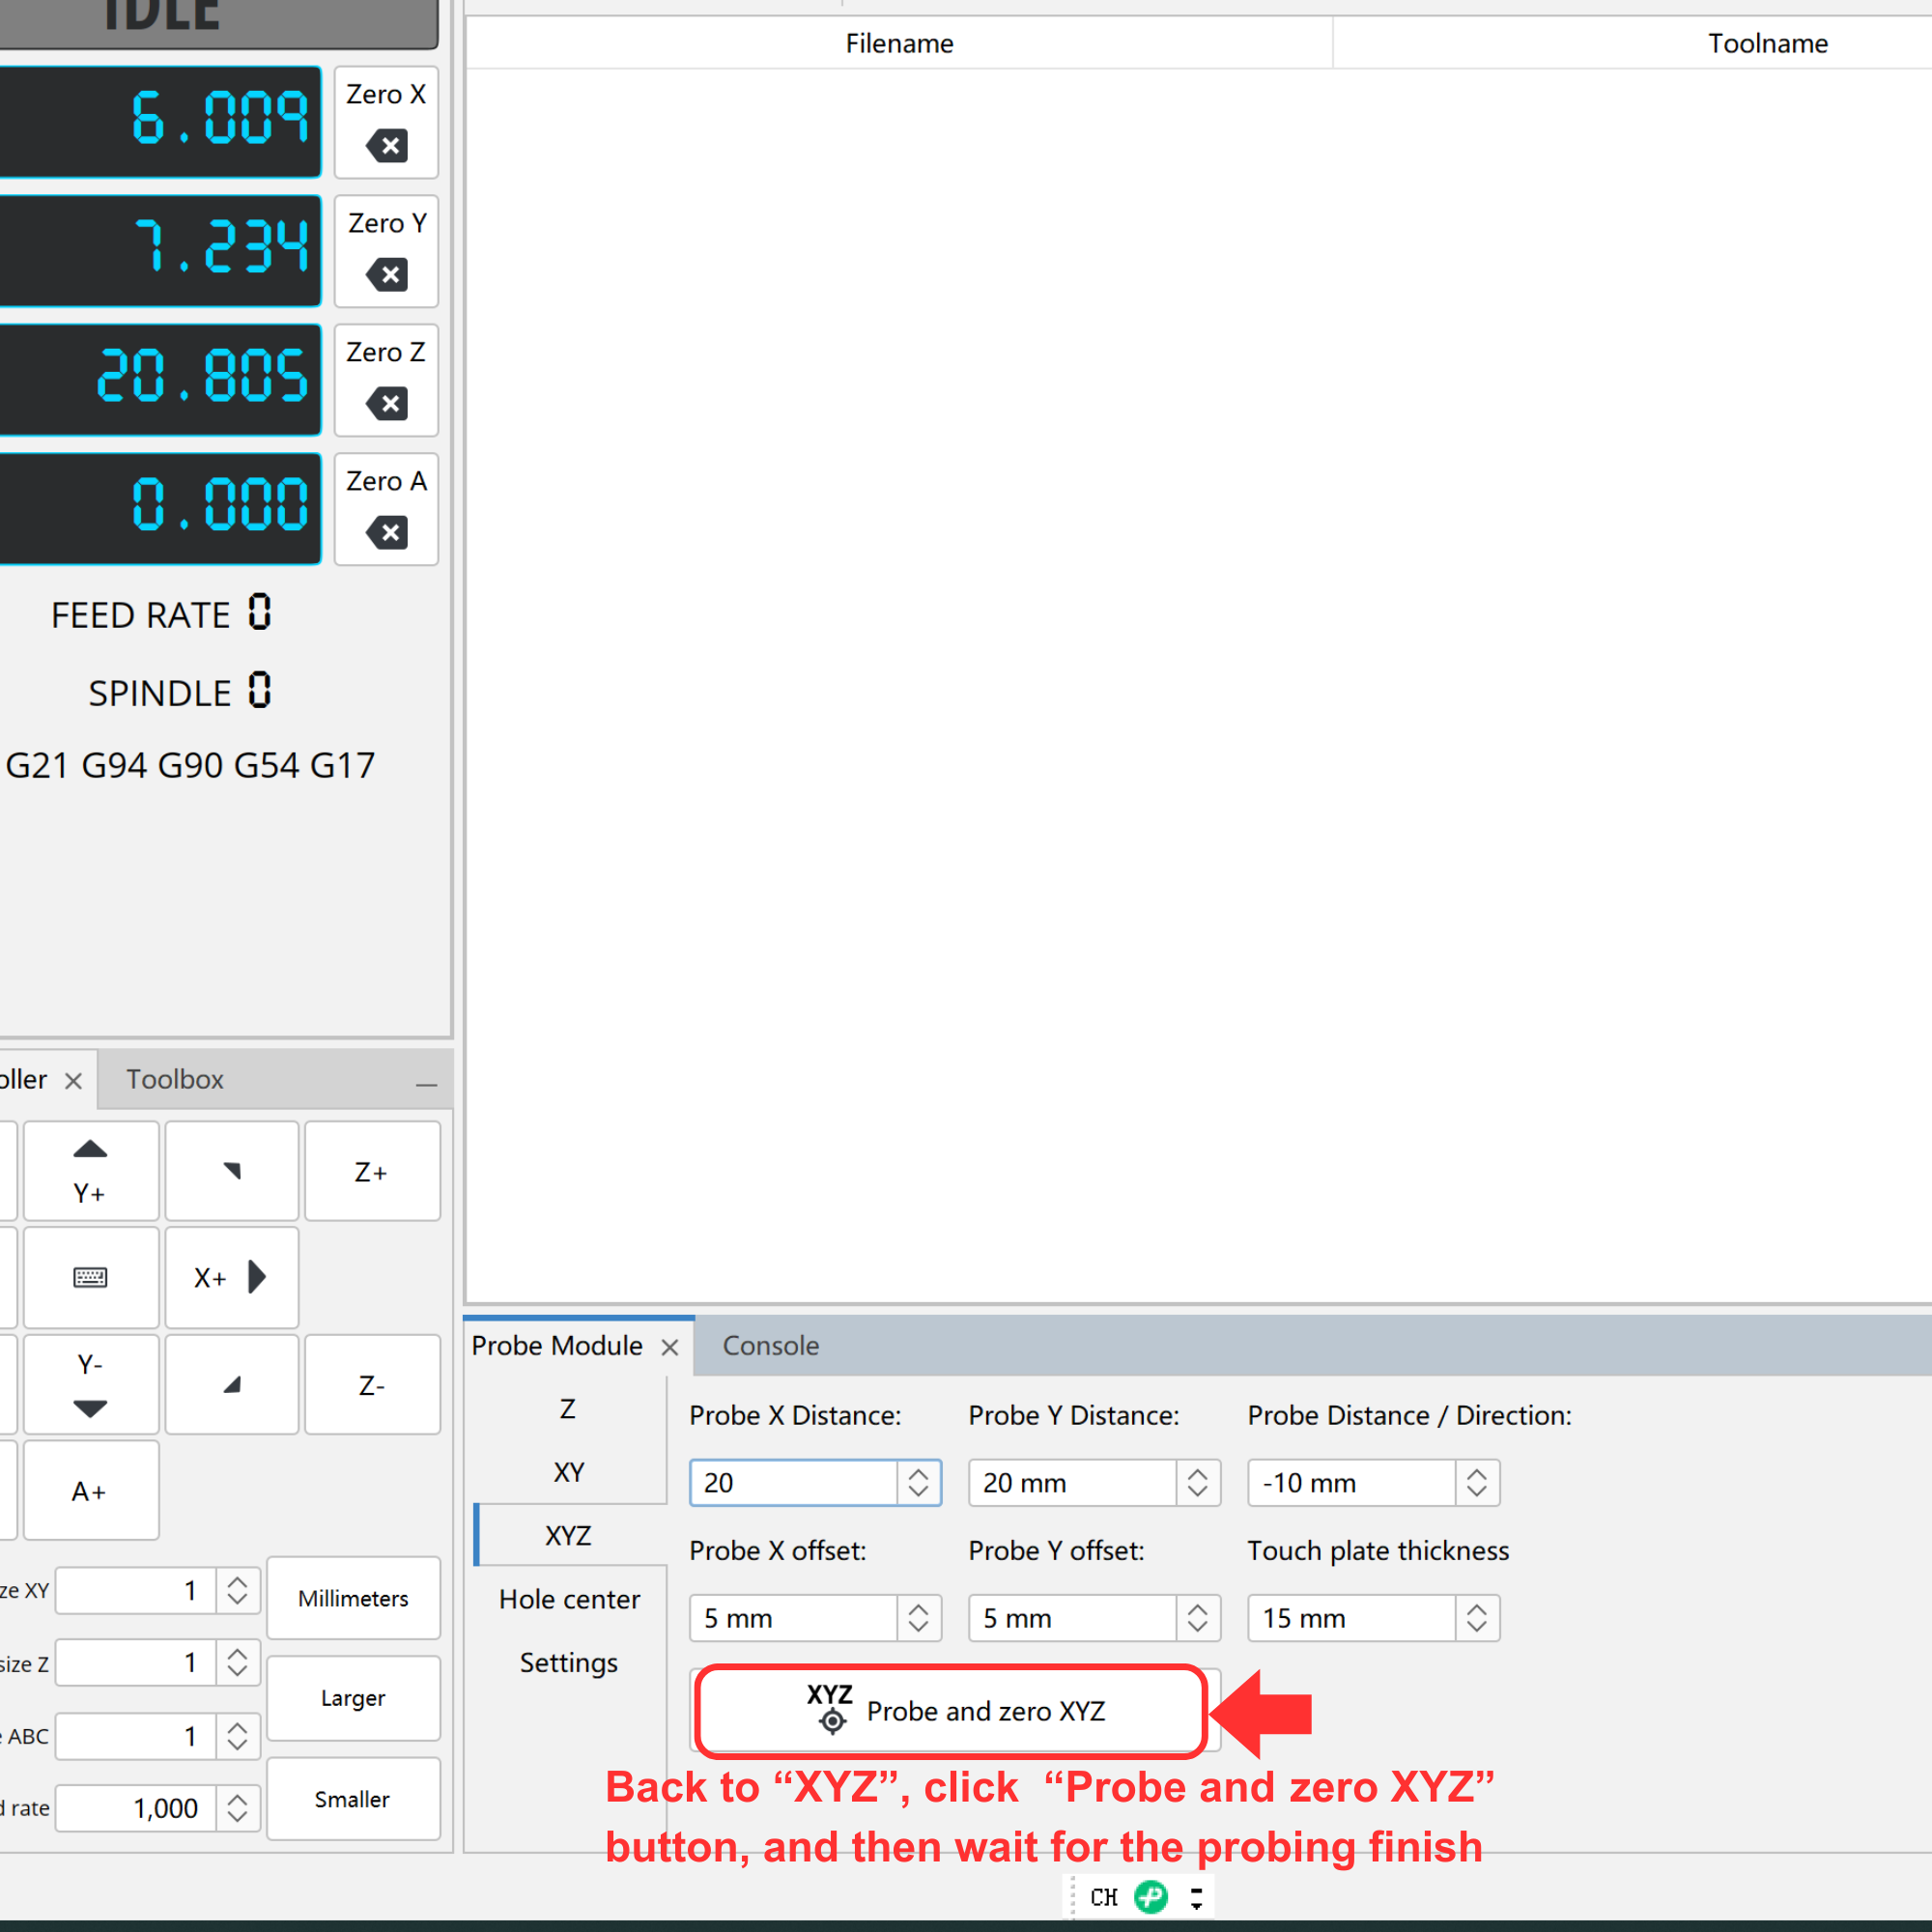
In the XYZ settings, enter the measured thickness and XY offset, and adjust the probing distance.
Click Settings to reduce the probe feed rate (≤ 50 mm/min).
Go back and click Probe and zero XYZ; wait for it to finish.
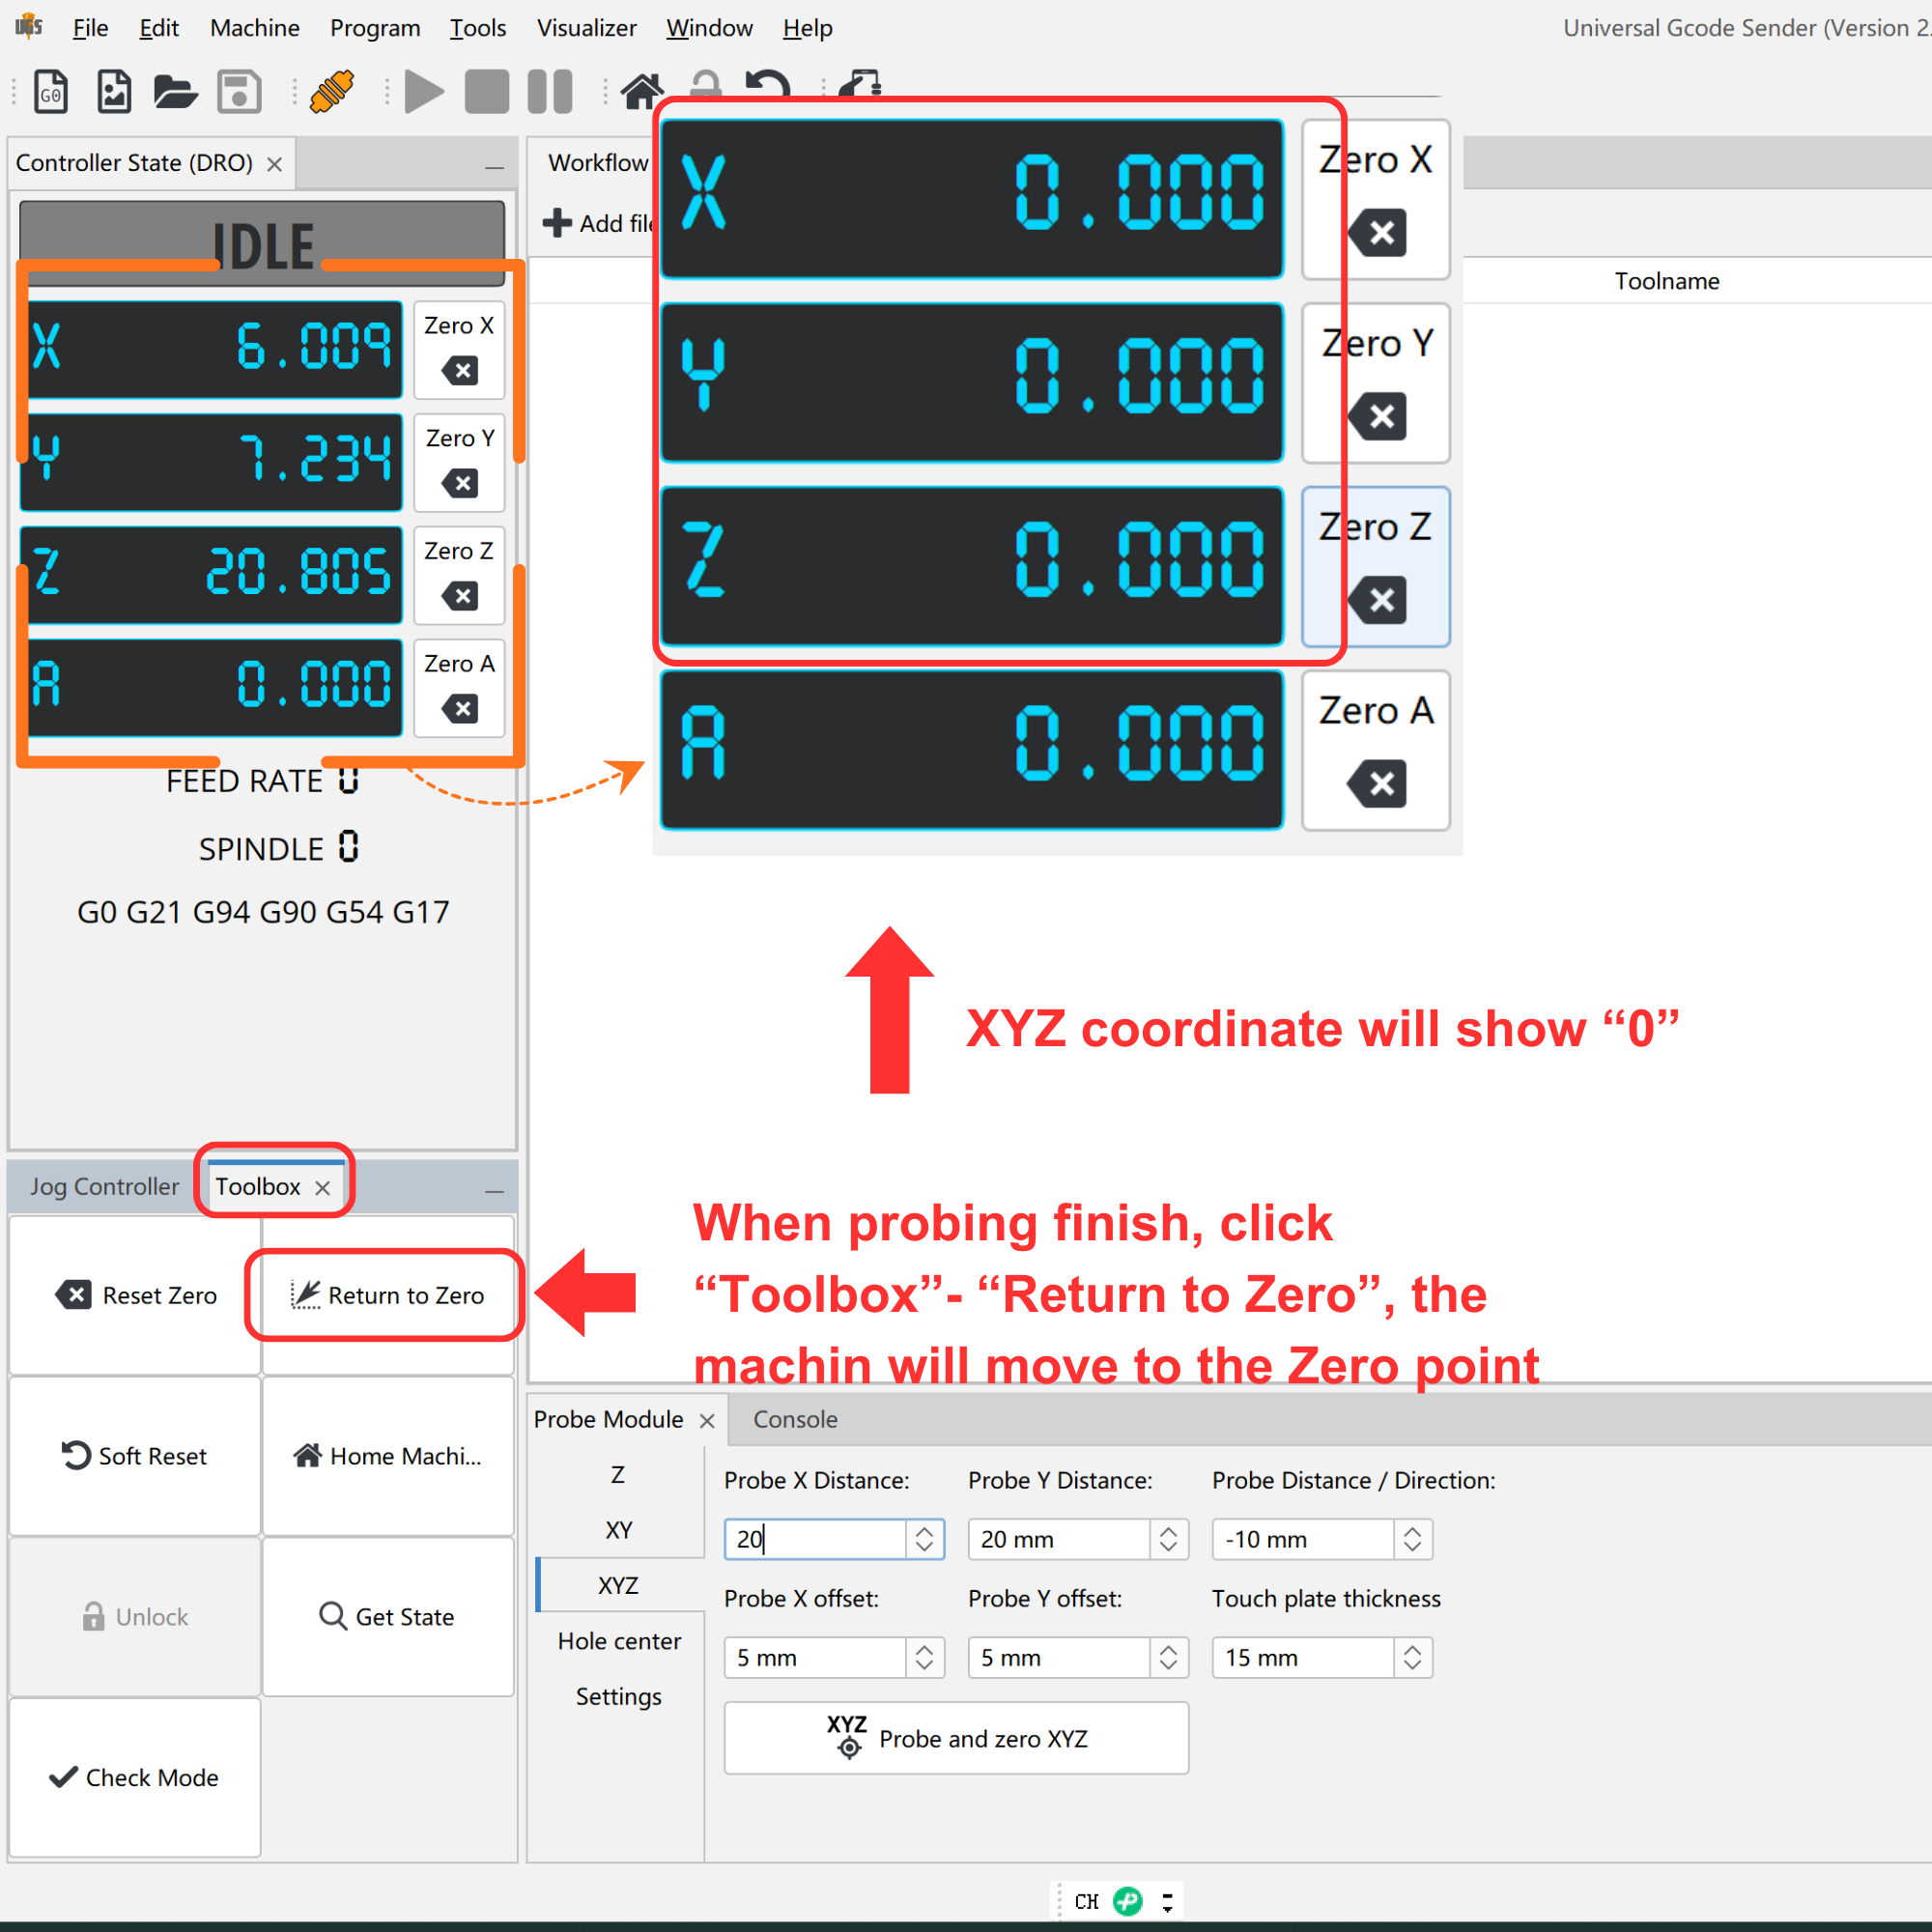
Once done, click Return to Zero in the Toolbox – the machine will move to the workpiece origin. Verify the coordinates are correct.
Please contact us at [email protected] if there is any question about the FoxAlien XYZ auto probe.